As a Windows user, you might have come across a situation where you needed to change your system’s security settings. Maybe you wanted to change User Account Control settings or adjust your firewall settings. In this article, we’ll explore 8 ways to open Local Security Policy in Windows 10 and 11 to easily access the settings you need.
In Windows 10 and 11, Local Security Policy allows you to manage different security settings, such as account policies, local policies, public key policies, event logs, etc. It is important to note that Local Security Policy is only available in Windows 11 Pro, Enterprise, and Education editions. That said, let’s start with the article.
1. Open Local Security Policy using Windows Search
Whether on Windows 10 or 11, a quick search puts the desired installed application in front of you. This is one of the easiest and most common ways to access the Local Security Policy. If you’re new to Windows, this should be your go-to method. Here’s how.
Step 1: Press the Windows key on your keyboard or click the Windows icon on the screen.
Note: You can also click the search icon on the screen.

2nd step: Type ‘Local Security Policy.’

Step 3: Click “Run as administrator”.
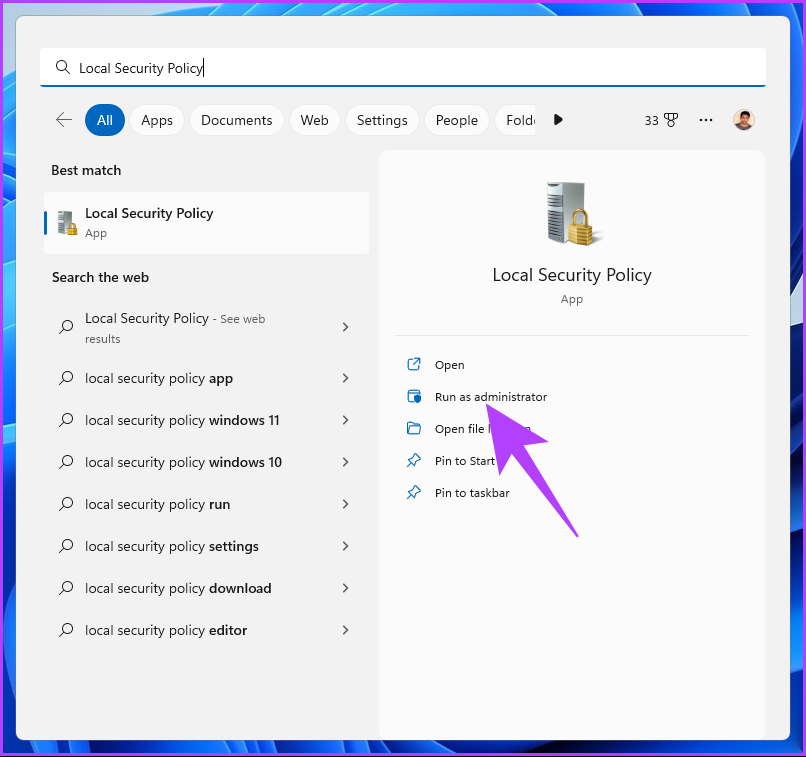
In the prompt, select Yes.
That’s it. You have successfully opened the Local Security Policy without having to go through much hassle. If you don’t see the search bar on your Windows PC, fix missing search bar.
2. Run Local Security Policy from Windows Tool/Administrative Tools
Windows Tools (Windows 11) / Administrative Tools (Windows 10) are sets of system tools and utilities built into the Windows operating system. These tools and utilities help you manage, troubleshoot, and diagnose various computer problems.
It includes several built-in features, including Disk Cleanup, Disk Defragmenter, and System Configuration. One of the tools included in Windows Tools is Task Scheduler.
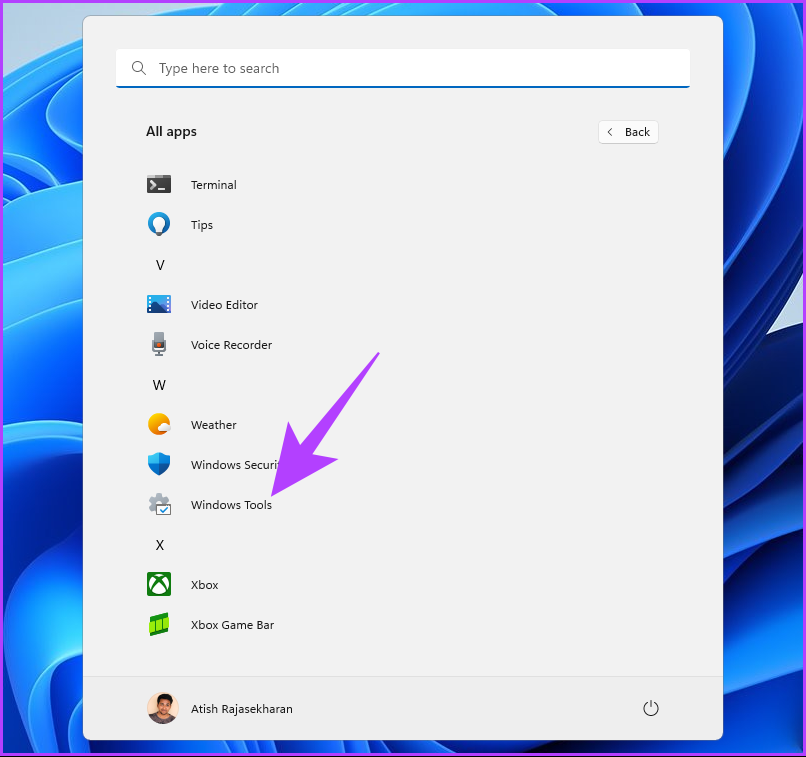
Step 1: Press the Windows key on the keyboard or click the Windows icon in the taskbar and select All apps.

2nd step: In the list of programs, scroll down and click Windows Tools.
Note: If you are using Windows 10, search for the Windows administration tool.
Step 3: Finally, click on the local security policy.
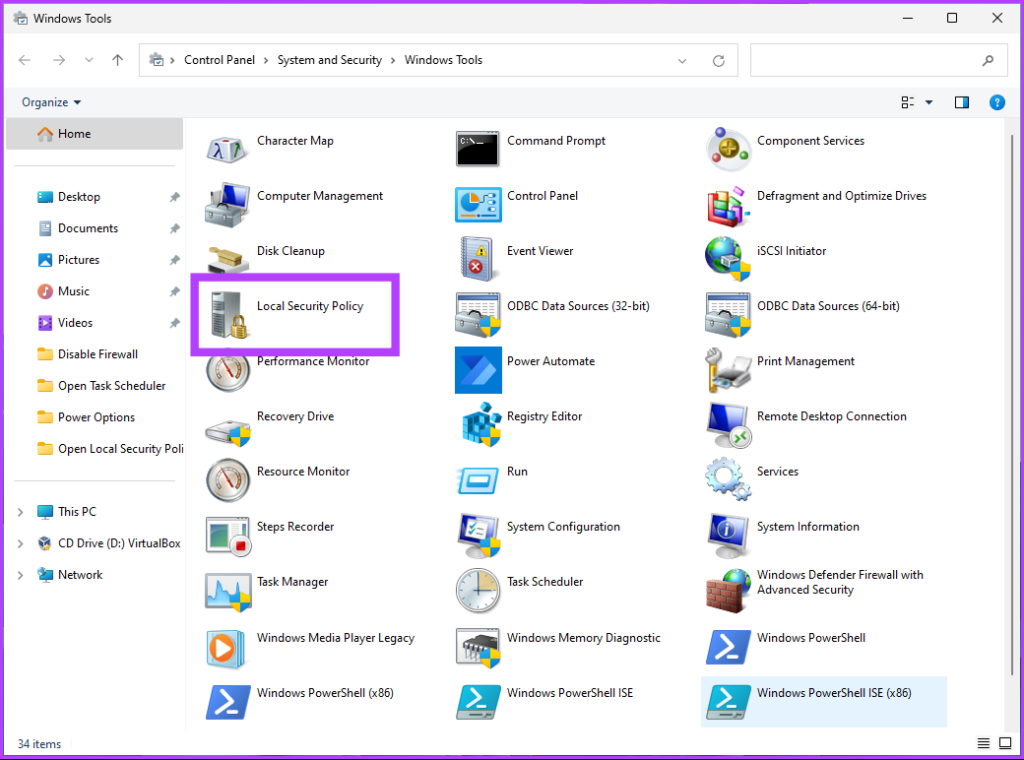
So. You have successfully opened the Local Security Policy on your Windows PC. There is multiple ways to access windows tools if you don’t want to access it from the Start menu.
3. Open Local Security Policy Using File Explorer
This method allows you to open the Local Security Policy from File Explorer. Whether you are using Windows 10 or Windows 11, it is not too difficult to follow the steps below.
Step 1: Press the Windows key on your keyboard, type File Explorerthen click Open.
Note: You can also press “Windows key + E” on your keyboard to open Windows Explorer.

2nd step: Go to the address bar, type the command below and hit enter.
secpol.msc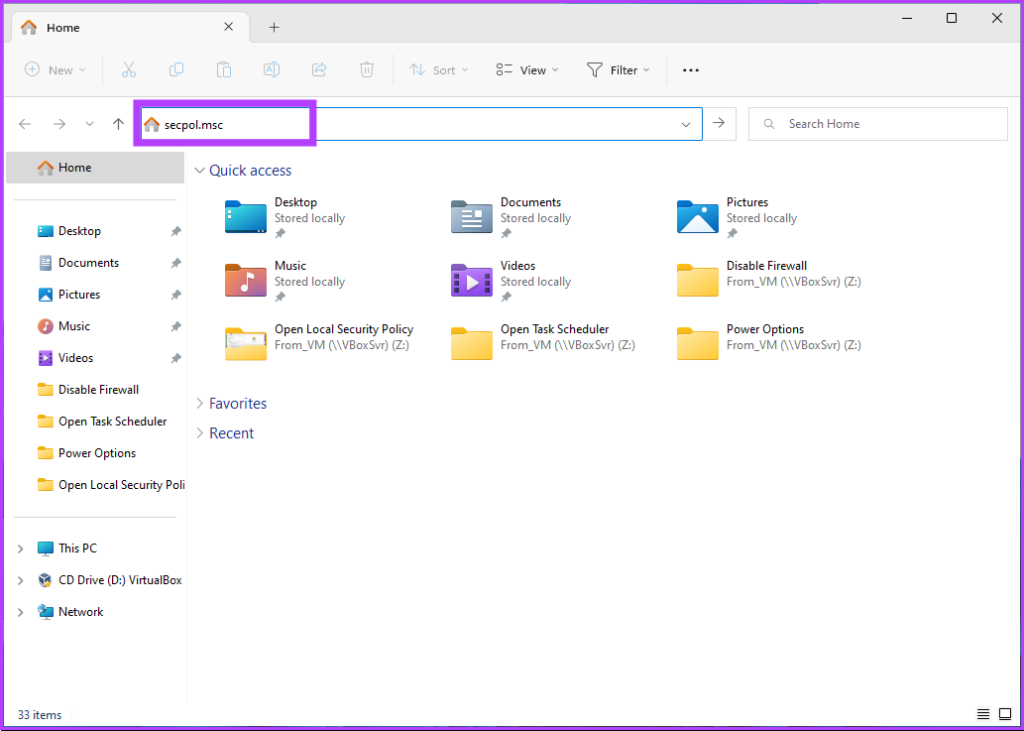
So. You can get started with Local Security Policy in a few simple steps. Moreover, you can also create a shortcut and place it wherever you prefer on your Windows PC. Let’s understand how.
4. Create Desktop Shortcut to Run Local Security Policy
Creating a local security policy shortcut on the desktop is a one-time process. It allows you to access the tool with one click whenever you want. Follow the steps below.
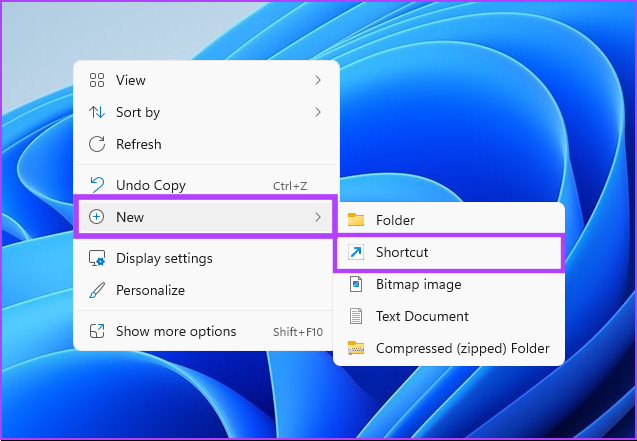
Step 1: Right-click on the empty space on your desktop, navigate to New and select Shortcut.
2nd step: In the Create Shortcut wizard, type secpol.msc under “Type the location of the item” then click Next.

Step 3: Enter a name for your shortcut and click Finish.
For example: local security policy
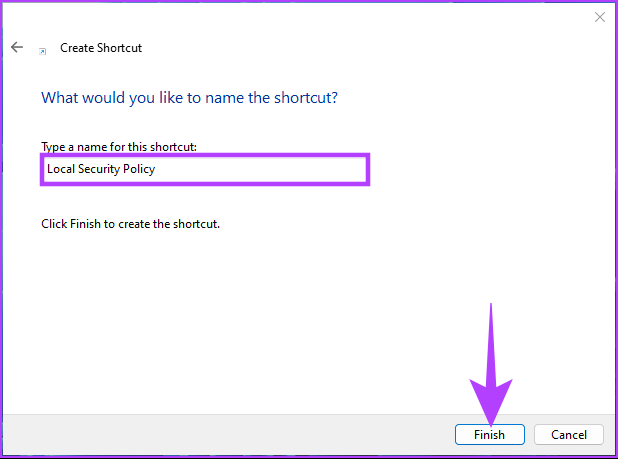
You can access local security policy at the press of a button at any time.
5. Open Local Security Policy Using Task Manager
Whether to monitor your PC’s performance or to complete any task, Task Manager is commonly used. Opening the Local Security Policy from Task Manager is quite simple. All you have to do is follow the instructions below.
Step 1: Press the Windows key on your keyboard, type Task Manager, and click Open.
Note: You can also press ‘Windows Key + Shift + Esc’ to open Task Manager.
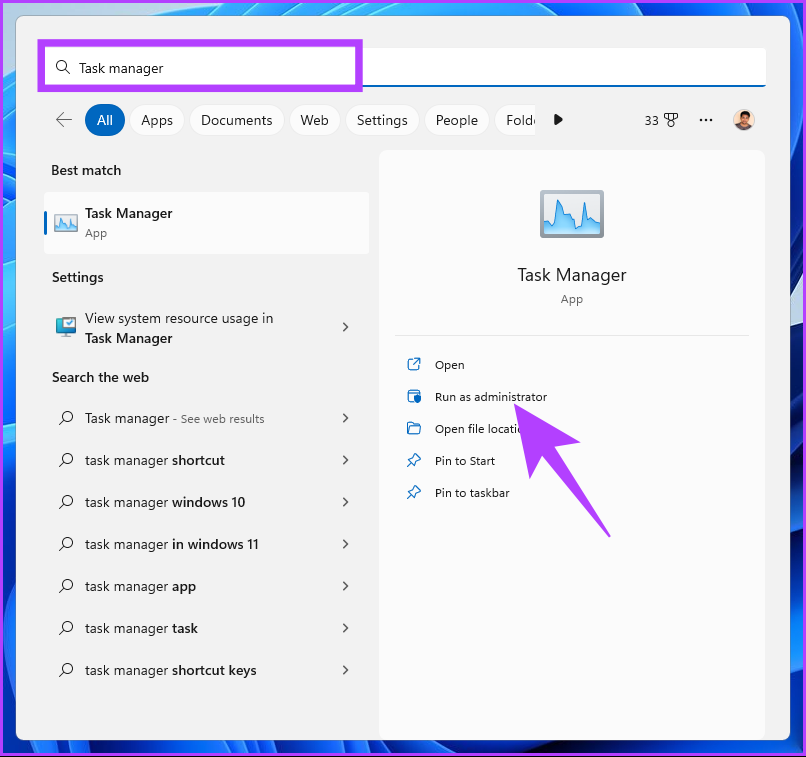
2nd step: Click on ‘Run a new task.’
Note: If you are on Windows 10, you will need to click on File and select “Run a new task”.

Step 3: In the ‘Create a new task’ window, in the text field, type secpol.mscthen click OK.
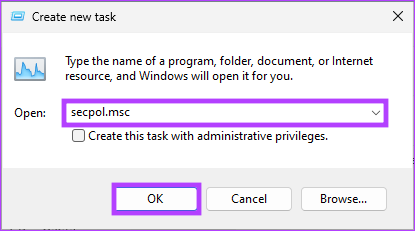
You have now opened the Local Security Policy on your Windows PC using Task Manager. You can do the same with the Run command box. Keep reading.
6. Open Windows 11 Local Security Policy using Secpol.msc command
Since you already know how to open the local security policy with the task manager (see above), this method is simple. Follow the steps below.
Step 1: Press ‘Windows key + R’ to open the Run command box.
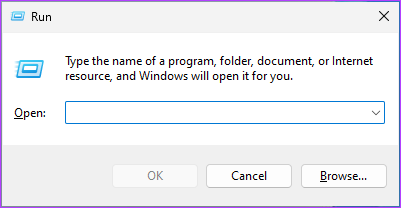
2nd step: Now type the below command and click OK.
secpol.msc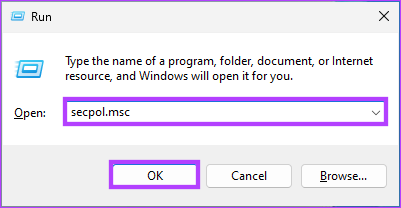
So. This method is the fastest way to open the Local Security Policy.
7. Run Local Security Policy using Command Prompt or Windows PowerShell
You can launch the local security policy using command line interpreters. All you have to do is enter a command to open it. Follow the steps below.
Step 1: Press the Windows key on your keyboard, type Command Prompt Or PowerShell Or windows terminal, and click “Run as administrator”.
Note: For the demonstration, we go with the command prompt.
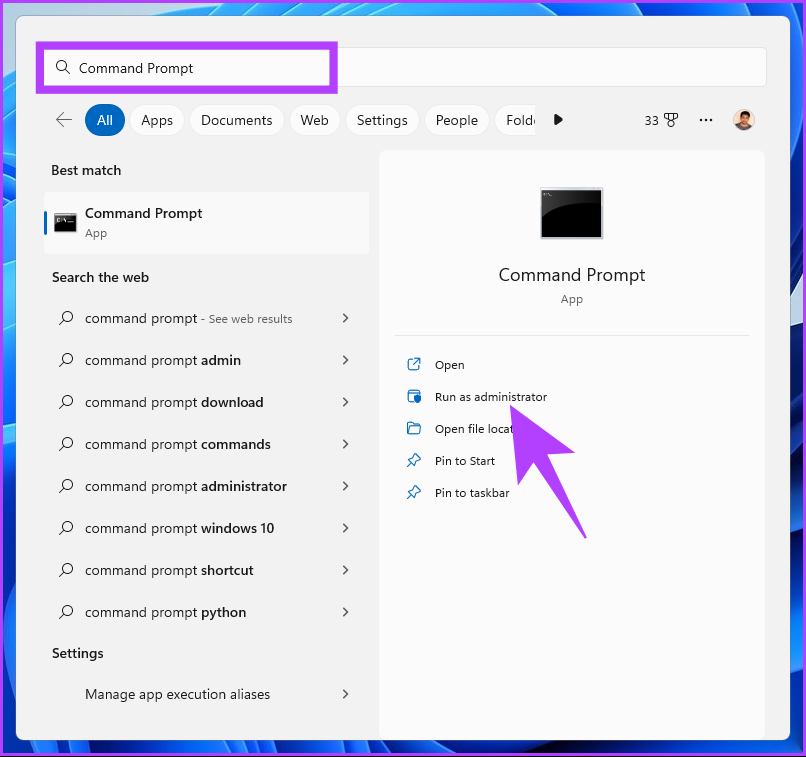
In the prompt, select Yes.
2nd step: Type the command below and press Enter.
secpol.msc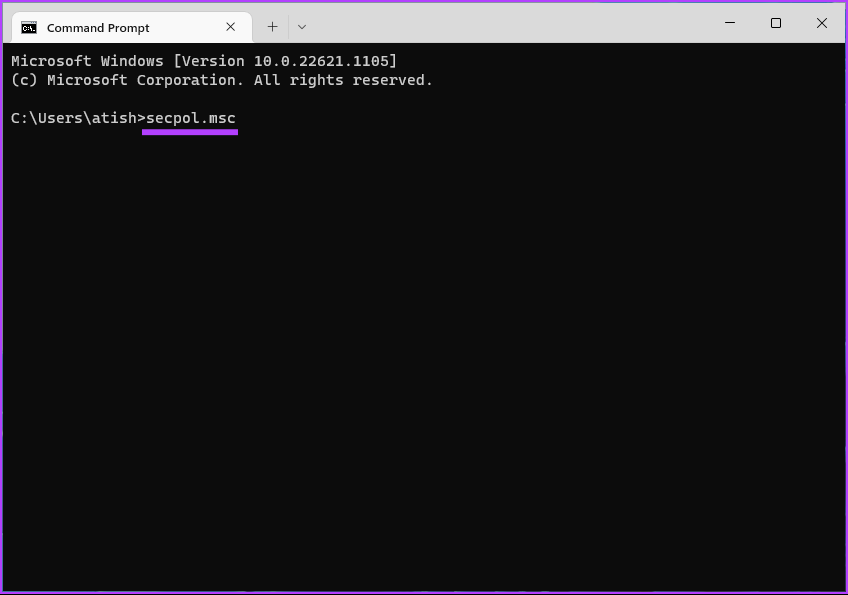
That’s it. It will easily open the local security policy. If you don’t want to use Command Prompt or PowerShell, you can try the following method.
8. Open Local Security Policy using Group Policy
Group Policy Editor is a great tool for managing Windows settings, including Windows Firewall. Here is how you can open Local Security Policy in Windows 11 using Group Policy.
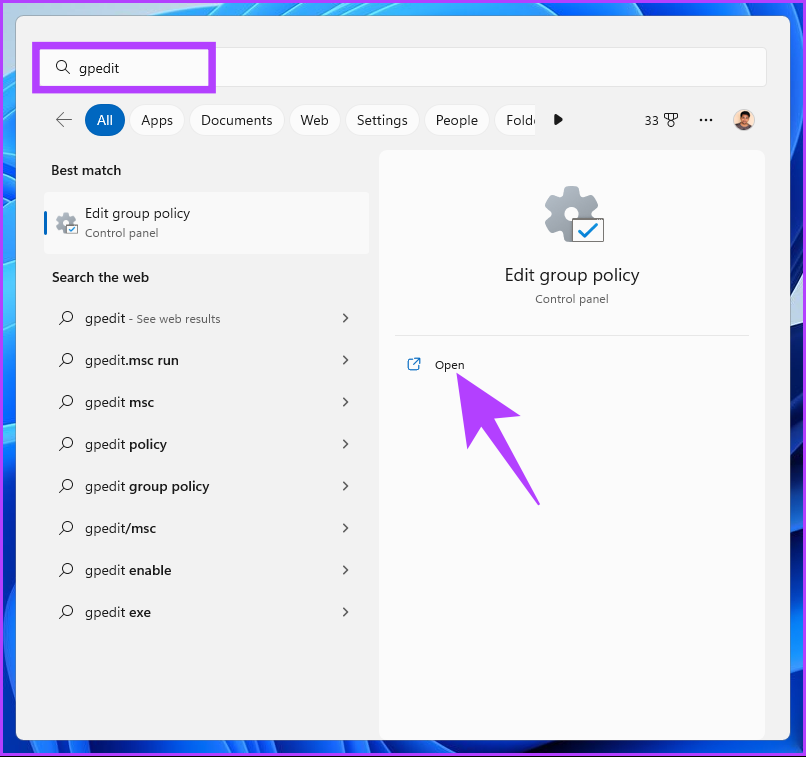
Step 1: Press the Windows keys on your keyboard, type gpeditthen click Open.
Note: You can also press ‘Windows Key + R’ to open the Run command box, type gpedit.mscthen click Open.
2nd step: In the left pane, under “Local Computer Policy”, select Computer Configuration.

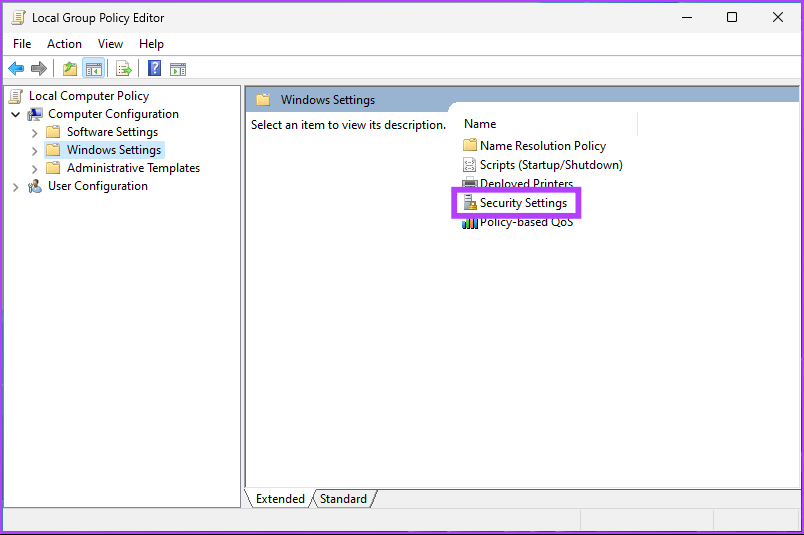
Step 3: In the right pane, double-click Windows Settings.

Step 4: Select the Security Settings option.
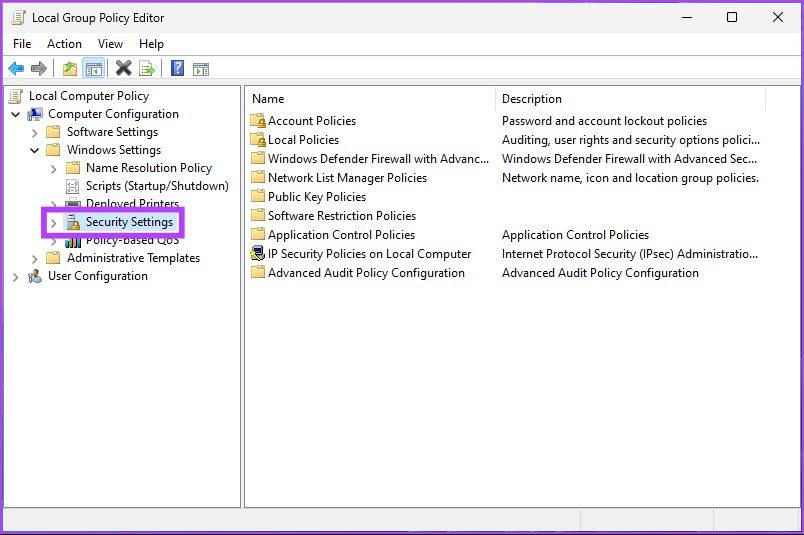
So. You have reached the desired destination, i.e. the Local Security Policy page. If you have any questions, see the FAQ section below.
Local Security Policy FAQ
This depends on local security policy changes and the operating system being used. Some local security policy changes may take effect immediately, while policies such as user rights, password policies, or firewall rules may require a reboot for the changes to take effect.
It depends on the security policy and operating system you are using. System administrators are usually in charge of security policies because they have the necessary rights and permissions to do so.
Take control of your Windows security
Whether you’re a system administrator or just a user looking to secure your device, knowing how to open Local Security Policy in Windows can save you time and ensure it’s available when you need it. You can also read how to fix Windows Security Center is disabled error.
