When it comes to voice assistants, the Google Assistant is easily one of the best and the most popular. Several features on Google Assistant can make your life easier on your phone and Nest speakers and devices. However, Google Assistant can raise privacy concerns since it stores your voice recordings in the cloud.
If you’re one of them and you don’t want Google to get hold of your precious data, you can periodically purge voice recordings from the Google Assistant. Here’s how to delete Google Assistant voice recordings on your Nest speaker by following a few simple steps.
Why Should You Delete Your Google Assistant Voice History
Smart speakers learn from your interactions to give better answers to your queries over time. They learn your usage patterns and store relevant data. When you ask a query, the speaker takes the details of the query to online servers for further processing and stores them online in your account. Google uses this data to improve speech recognition and the accuracy of search results.
Given that a Nest speaker with Google Assistant has an always-on mic, it can be a concern if it records and stores private conversations. That can lead to targeted advertising and a breach of privacy. Thus, it’s a good idea to delete your voice history periodically from your smart speaker.
How to Delete Nest Speaker Voice History via a Smartphone
If you choose to delete your Nest speaker’s Google Assistant voice history via your smartphone, you can even listen to individual voice recordings after you see the recorded interactions. Here’s how to do it.
Step 1: Open the Google Assistant Activity page in a browser window on your smartphone. You will be asked to log in to your Google account. Use the same account that you used to set up your Nest speaker.

Step 2: Scroll down and check out all the recordings stored by Google Assistant in chronological order.

If you want to delete individual recordings, tap on the ‘X’ button next to the entry you want to delete.

You will now see a Deletion complete prompt on your screen. Tap on OK to continue.

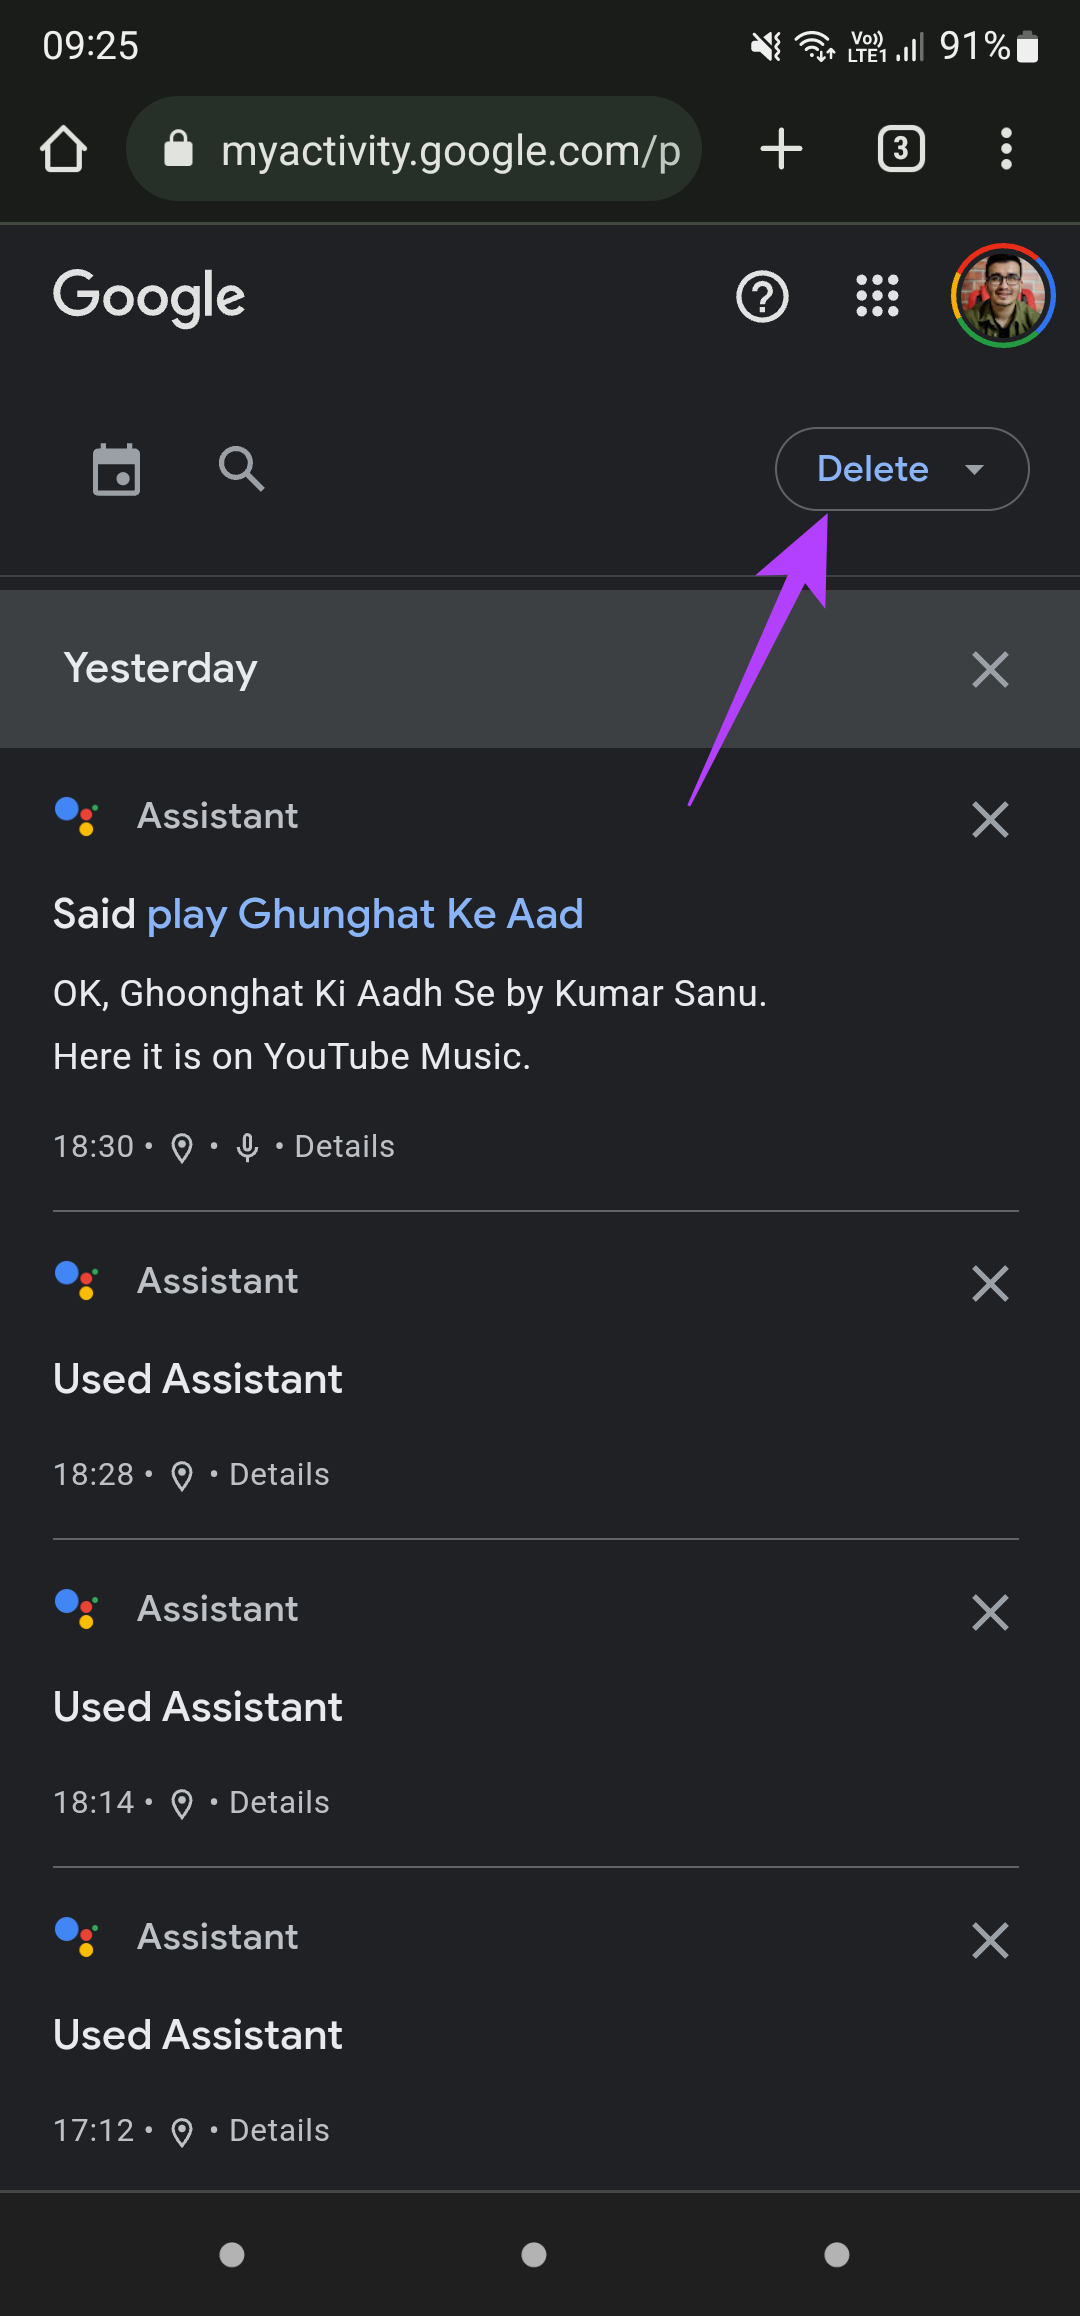
Step 3: Since manually deleting multiple recordings can be tedious, and you can delete your entire voice history at once. To do this, tap on the Delete button in the top-right corner of the screen.
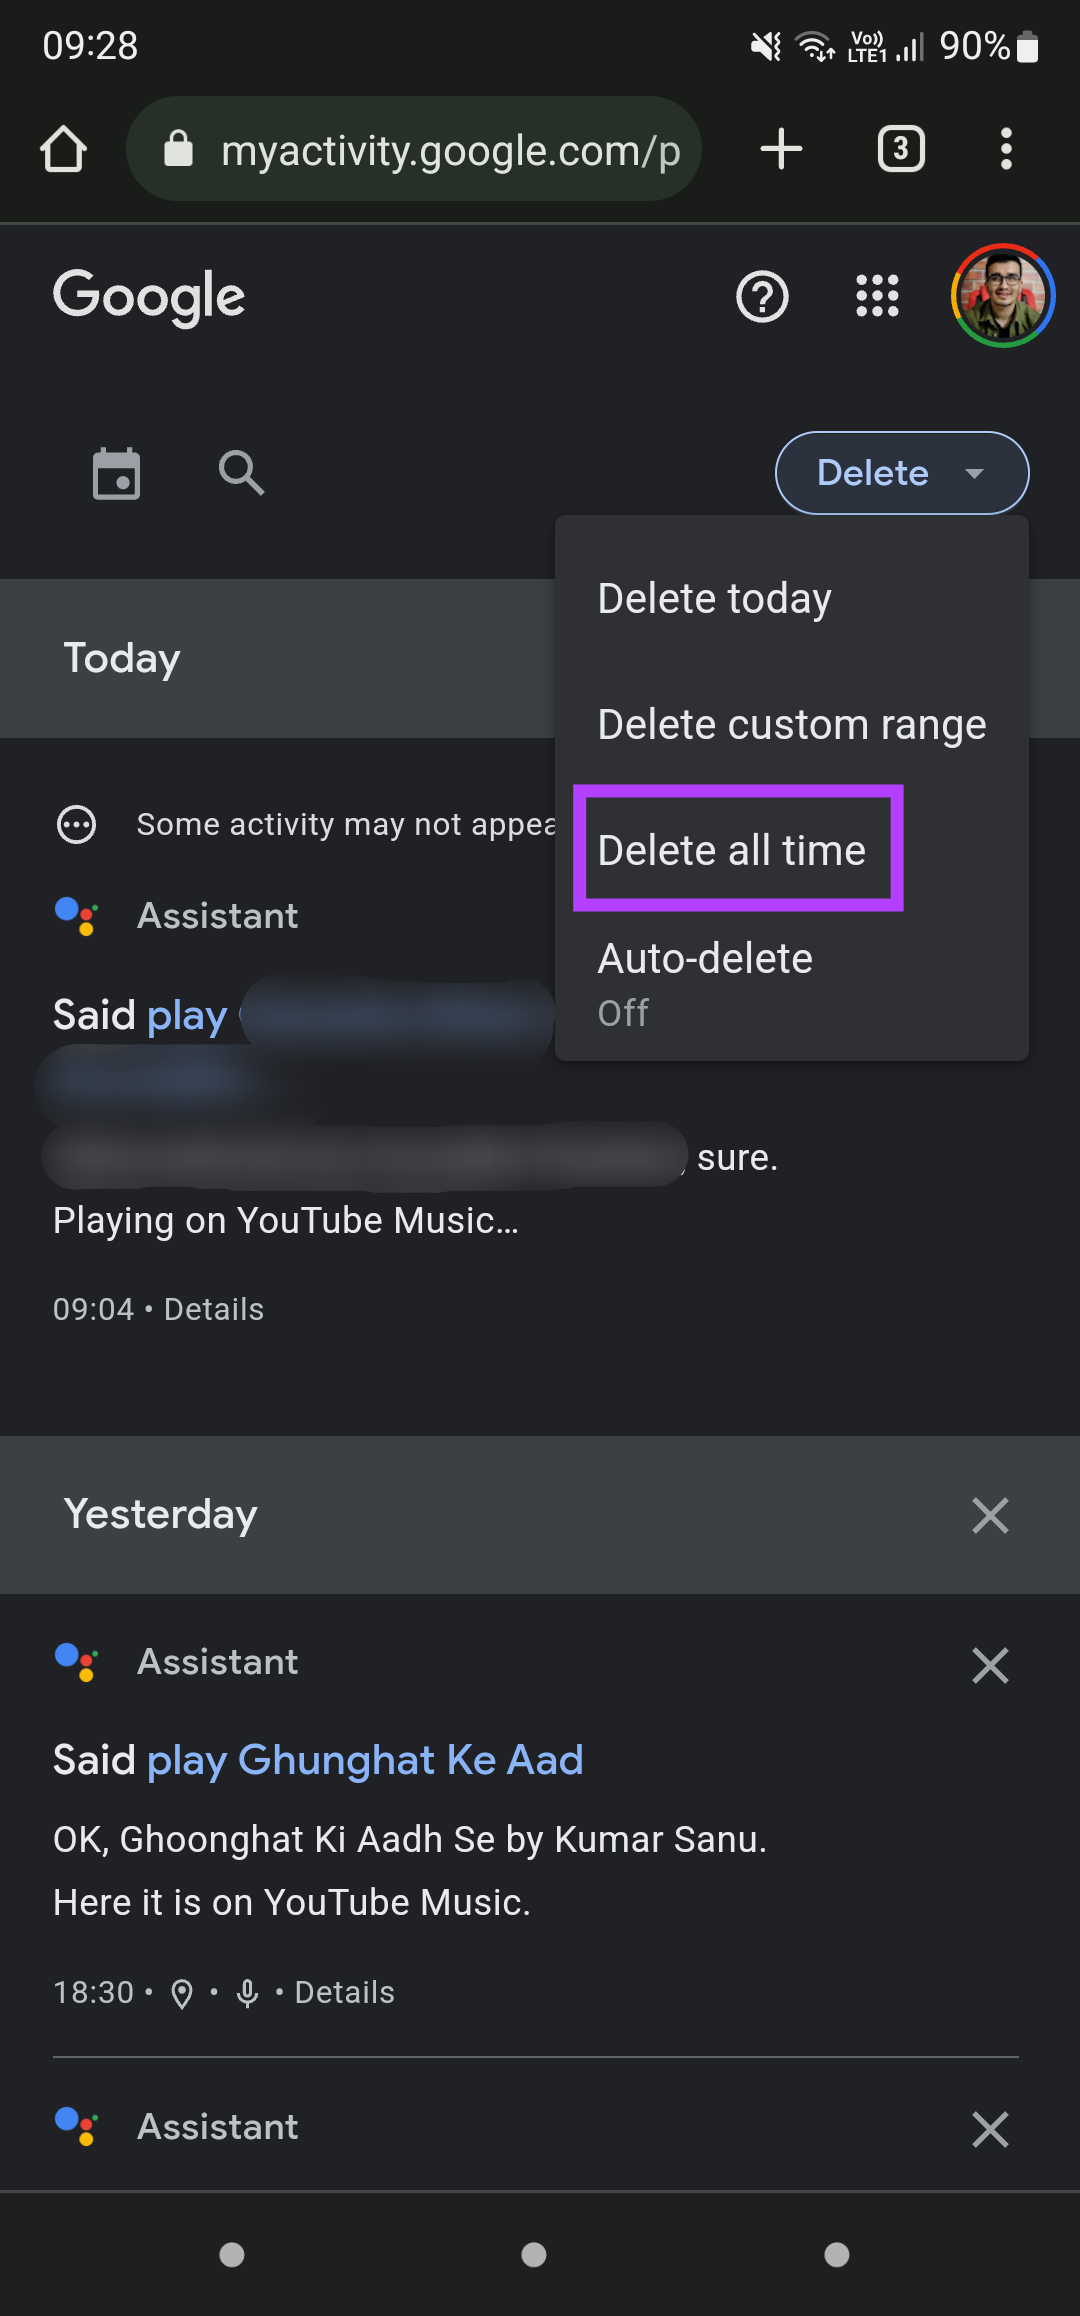
Step 4: Now, select the date range you want to delete your voice history. If you want to delete your entire voice history from the beginning, select Delete all time.
Step 5: In the confirmation prompt, select Delete, and Google will delete all your voice history permanently.
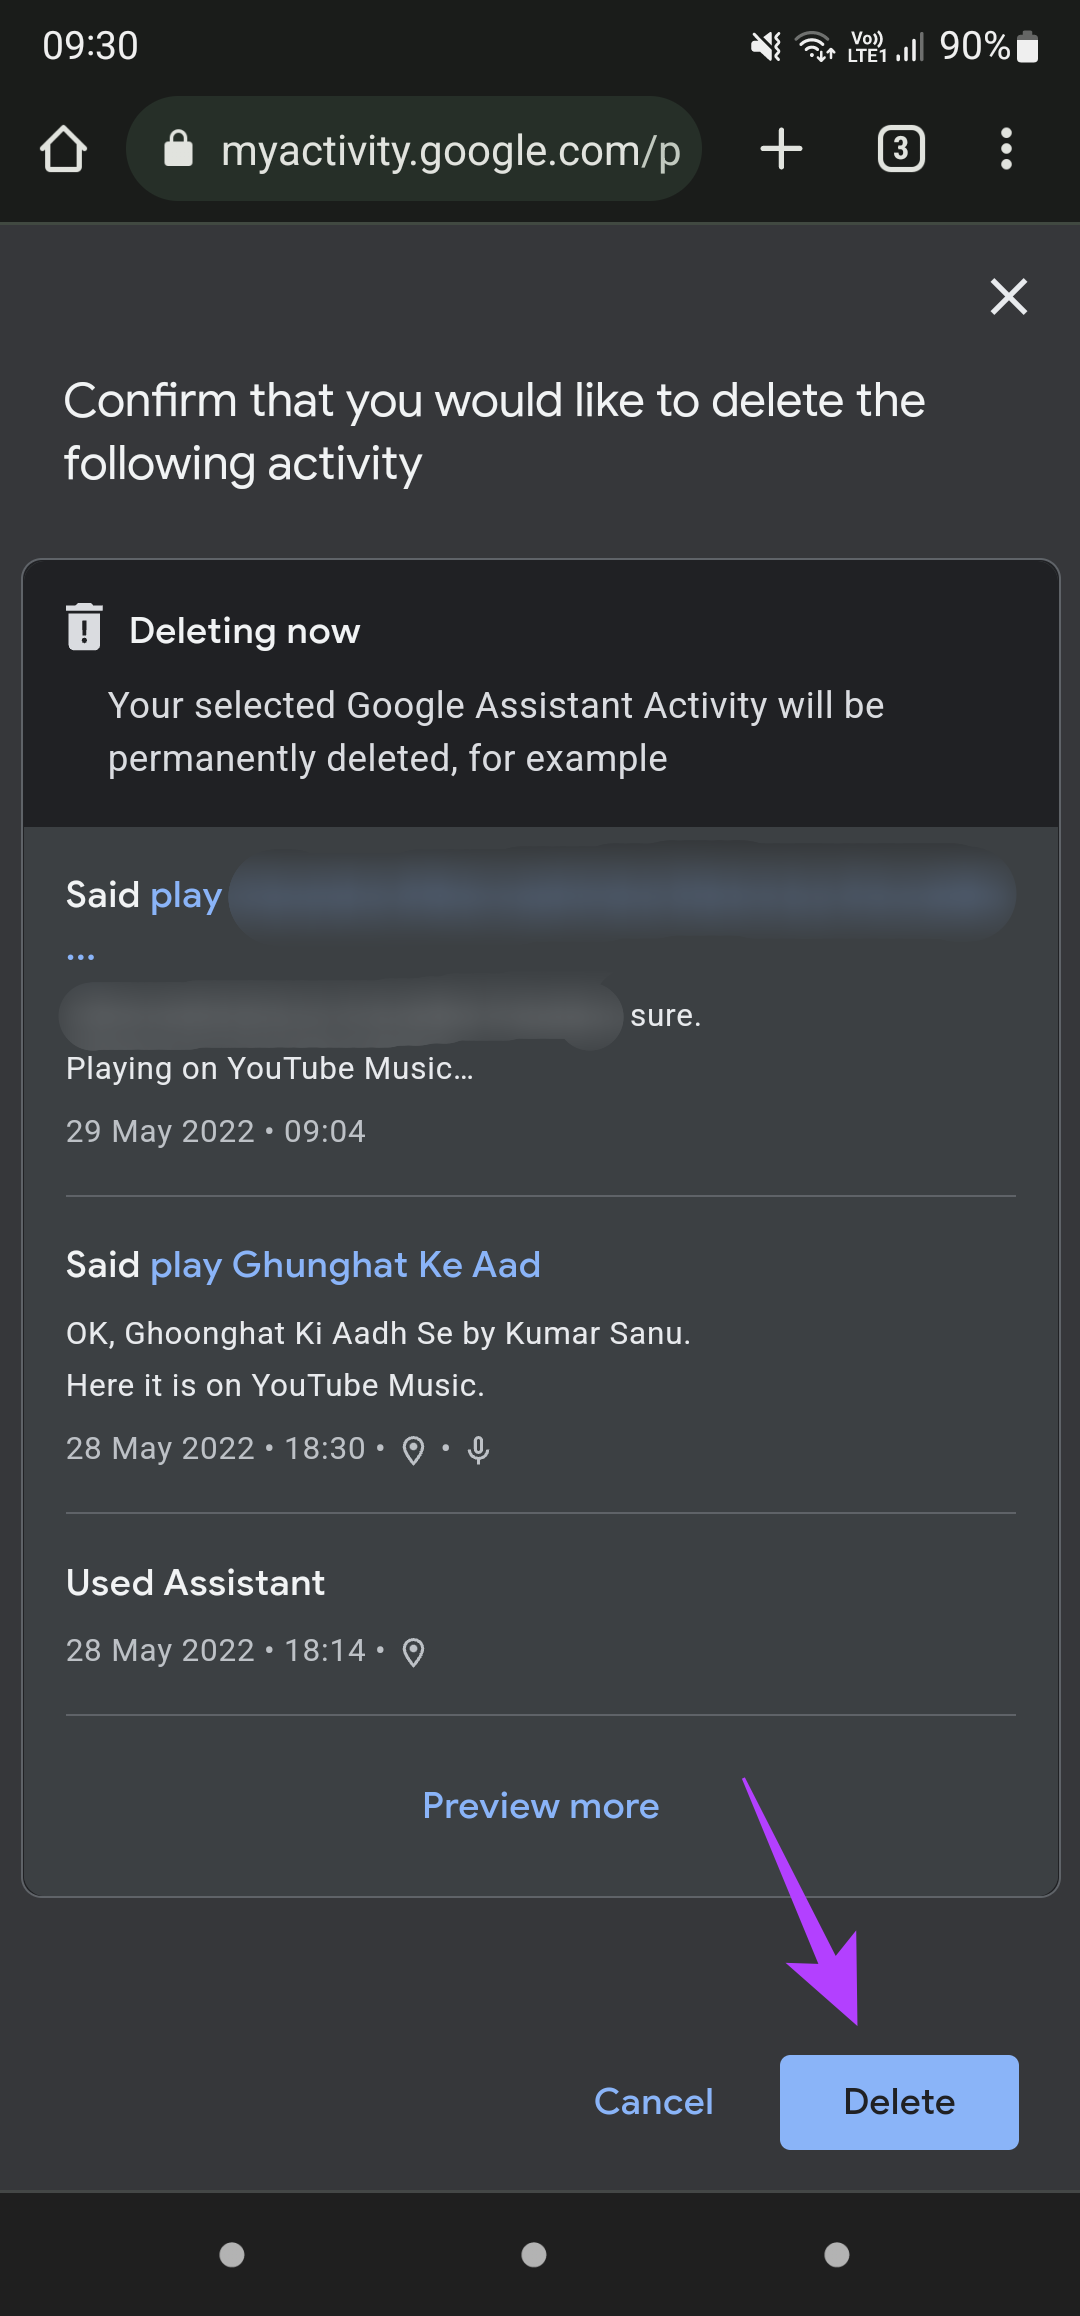
However, deleting your voice history doesn’t mean Google won’t re-record it. Right from your next query onwards, Google will start re-recording your voice history. So, it’s wise to enable auto-delete for your voice history so that it periodically gets deleted without you having to delete it every time manually. Here’s how to enable it.
How to Enable Auto-Delete for Google Assistant Voice History
Step 1: Open the Google Assistant Activity page in a browser window on your smartphone. The page will ask you to log in to your Google account. Use the same account that you use to set up your Nest speaker.

Step 2: Tap on the Delete button in the top-right corner of the screen.

Step 3: Select the Auto-delete option in the drop-down menu.
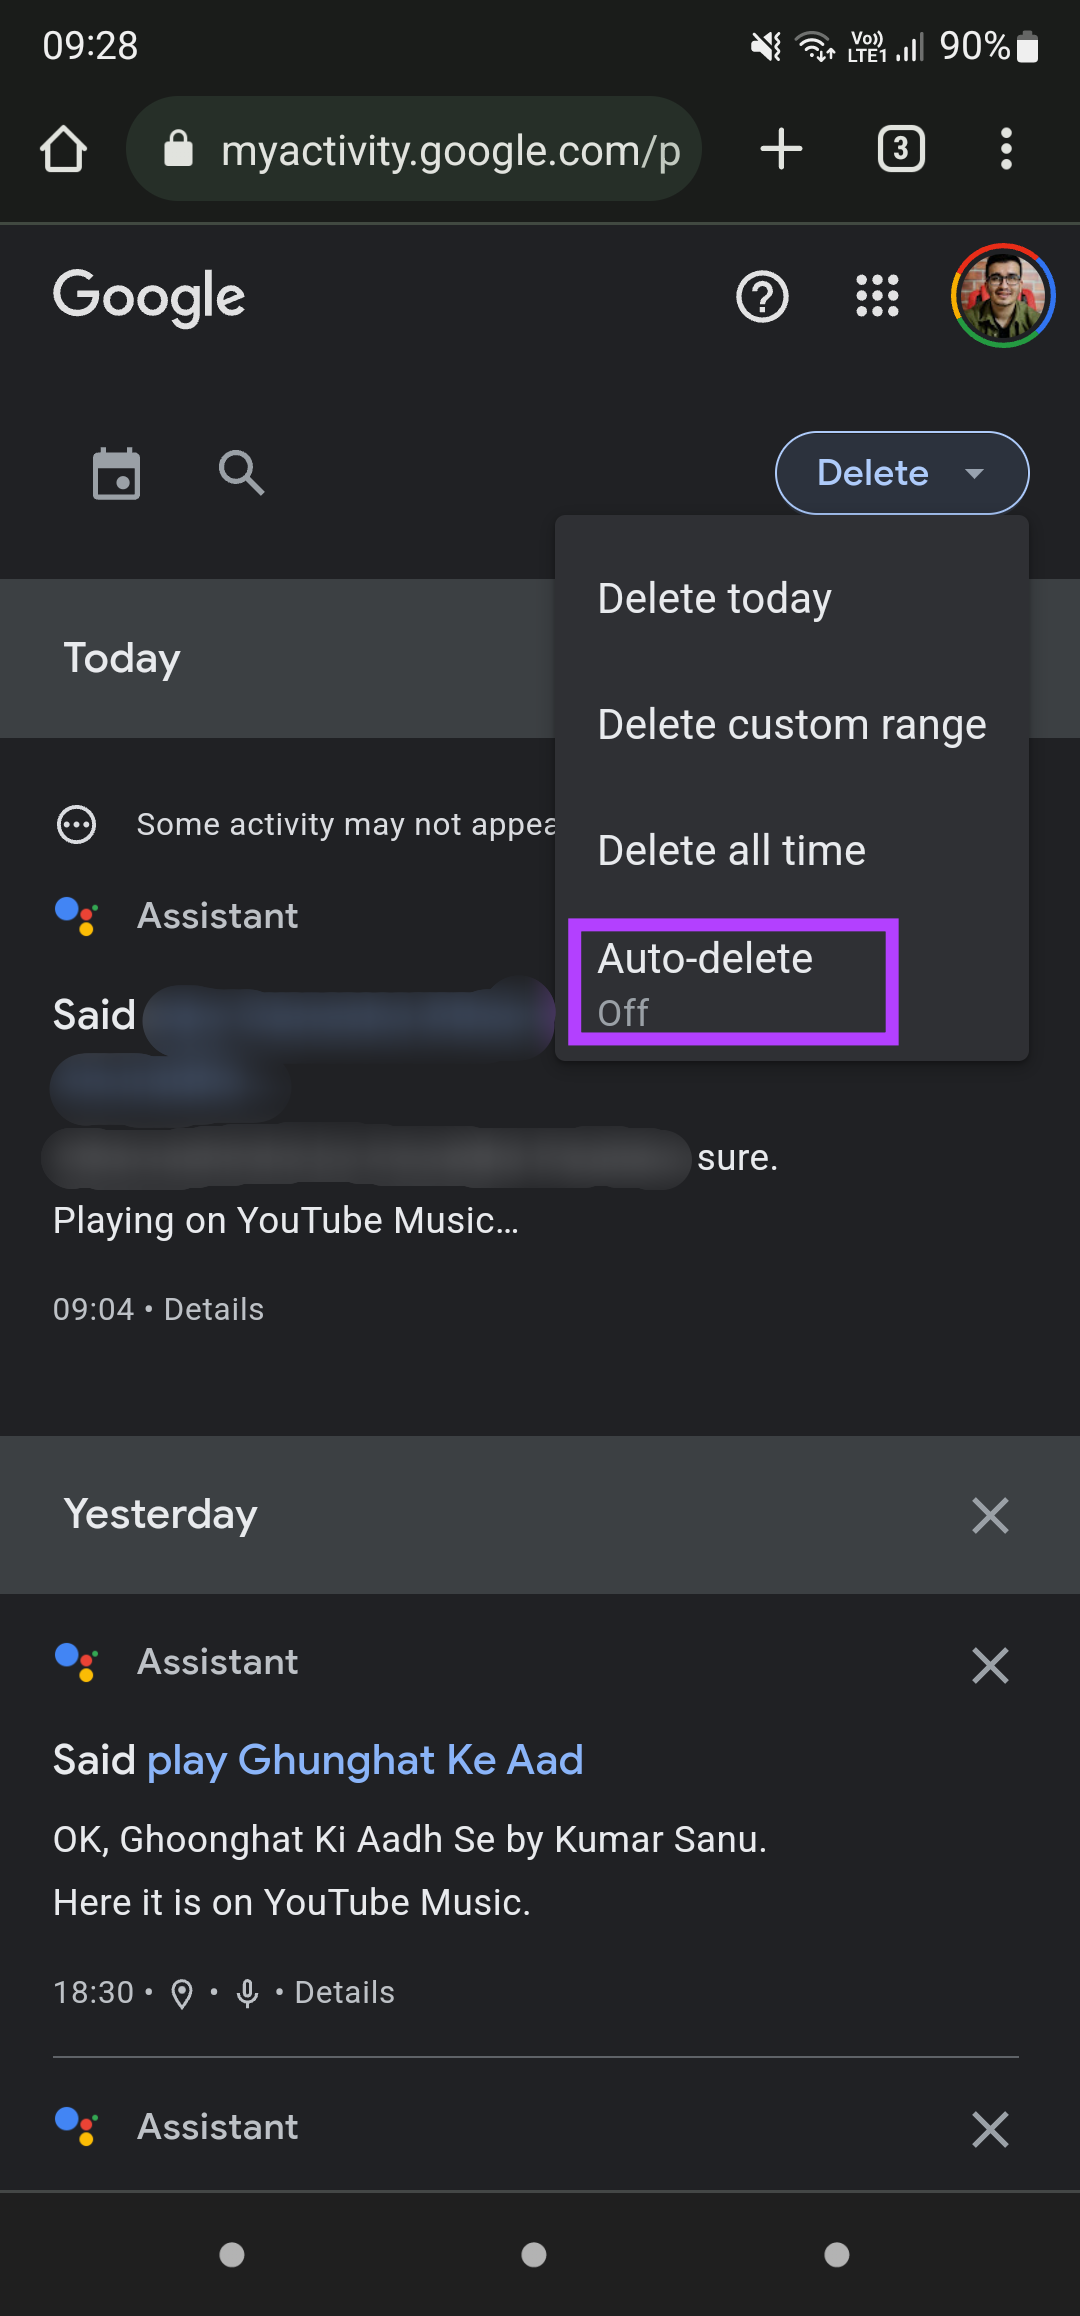
Step 4: Tap on ‘Auto-delete activity older than.’

Step 5: Use the drop-down menu to select the duration after which you want your voice history to be deleted.
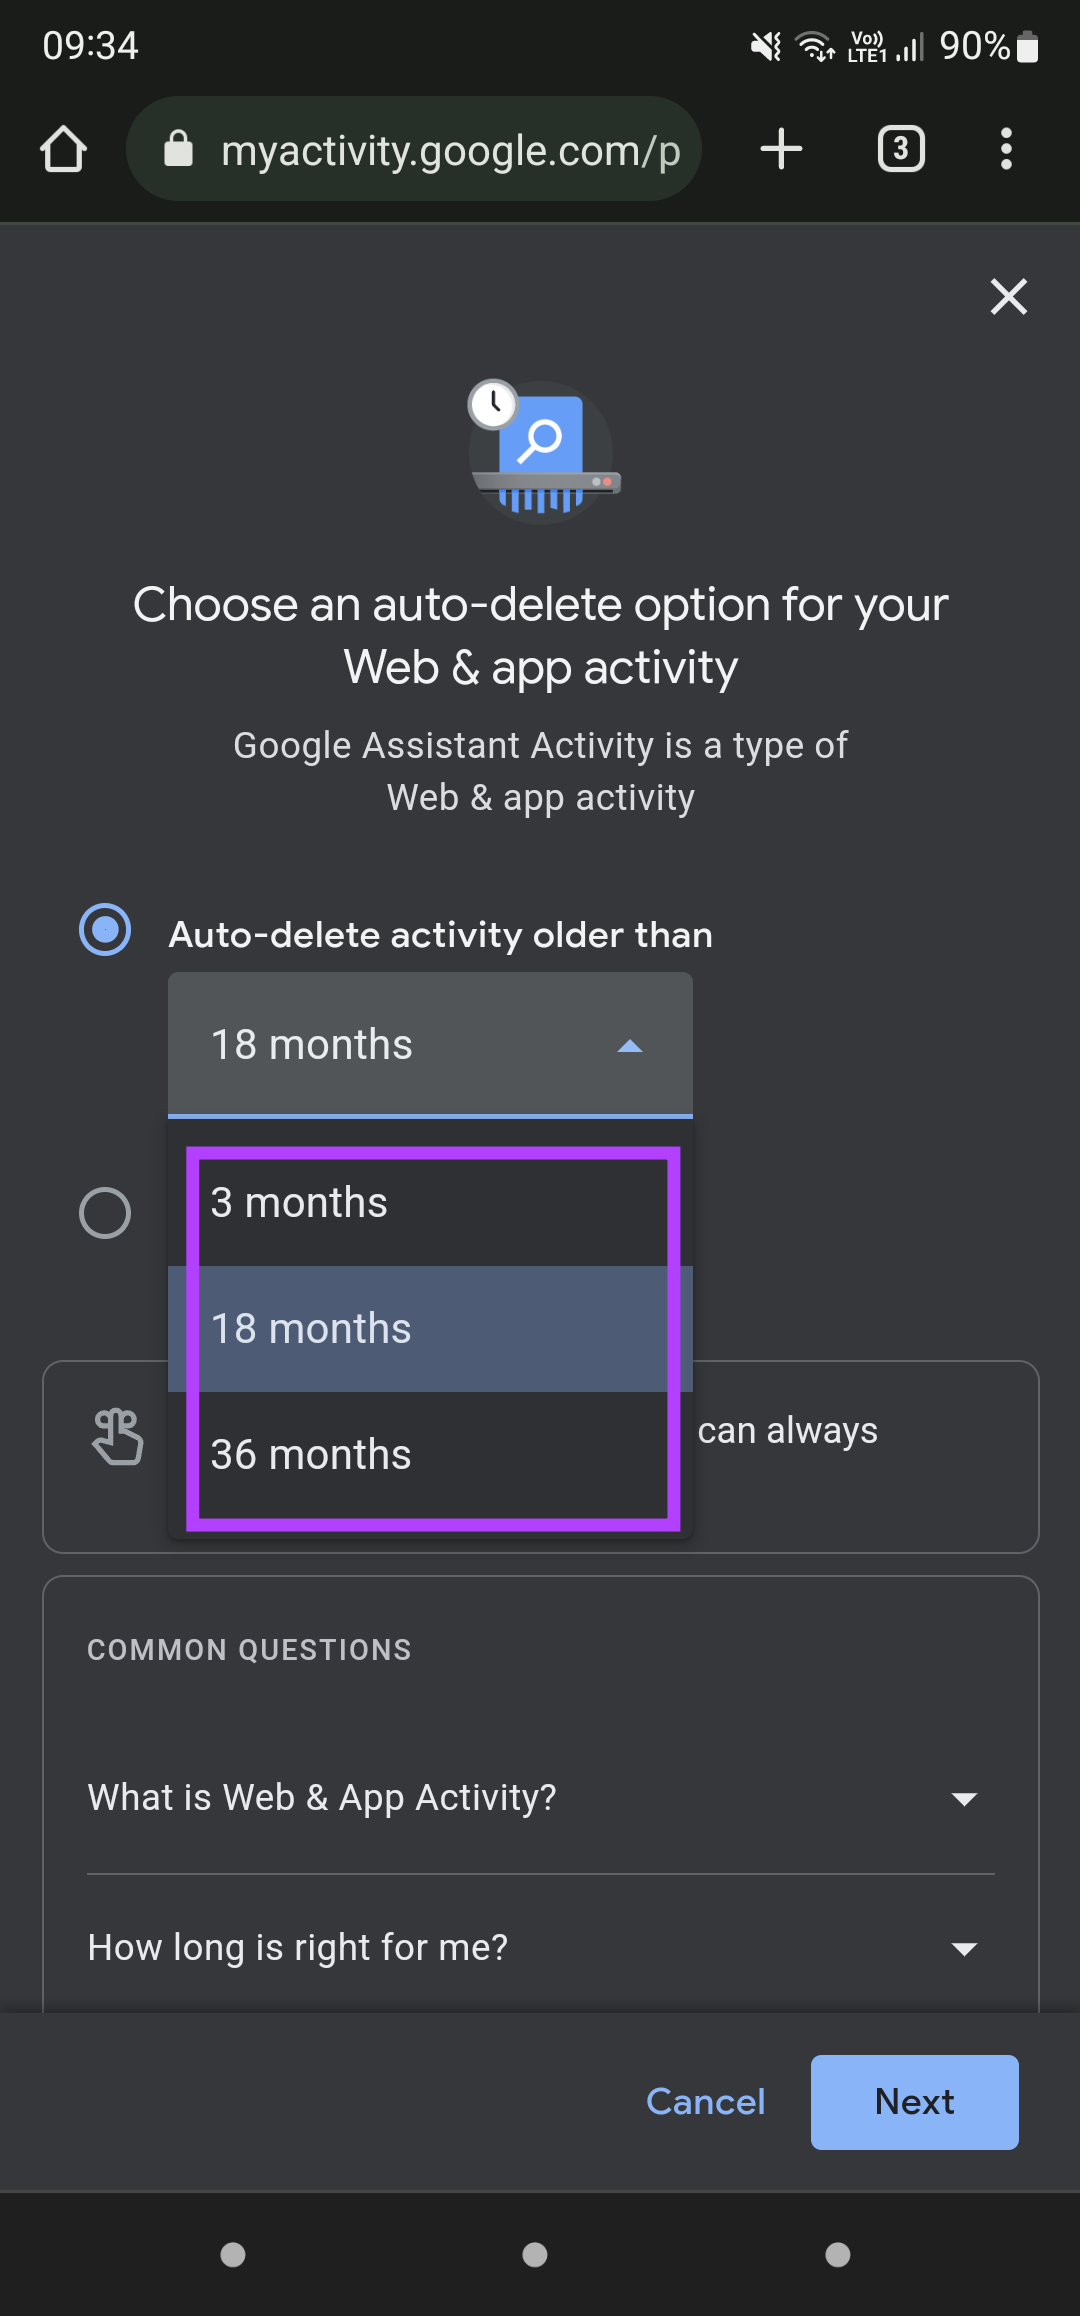
Step 6: Once you’ve selected the relevant option, tap on Next.
Step 7: Now, select the Confirm button, and auto-delete will be set for your Google Assistant voice history on your Nest speaker.
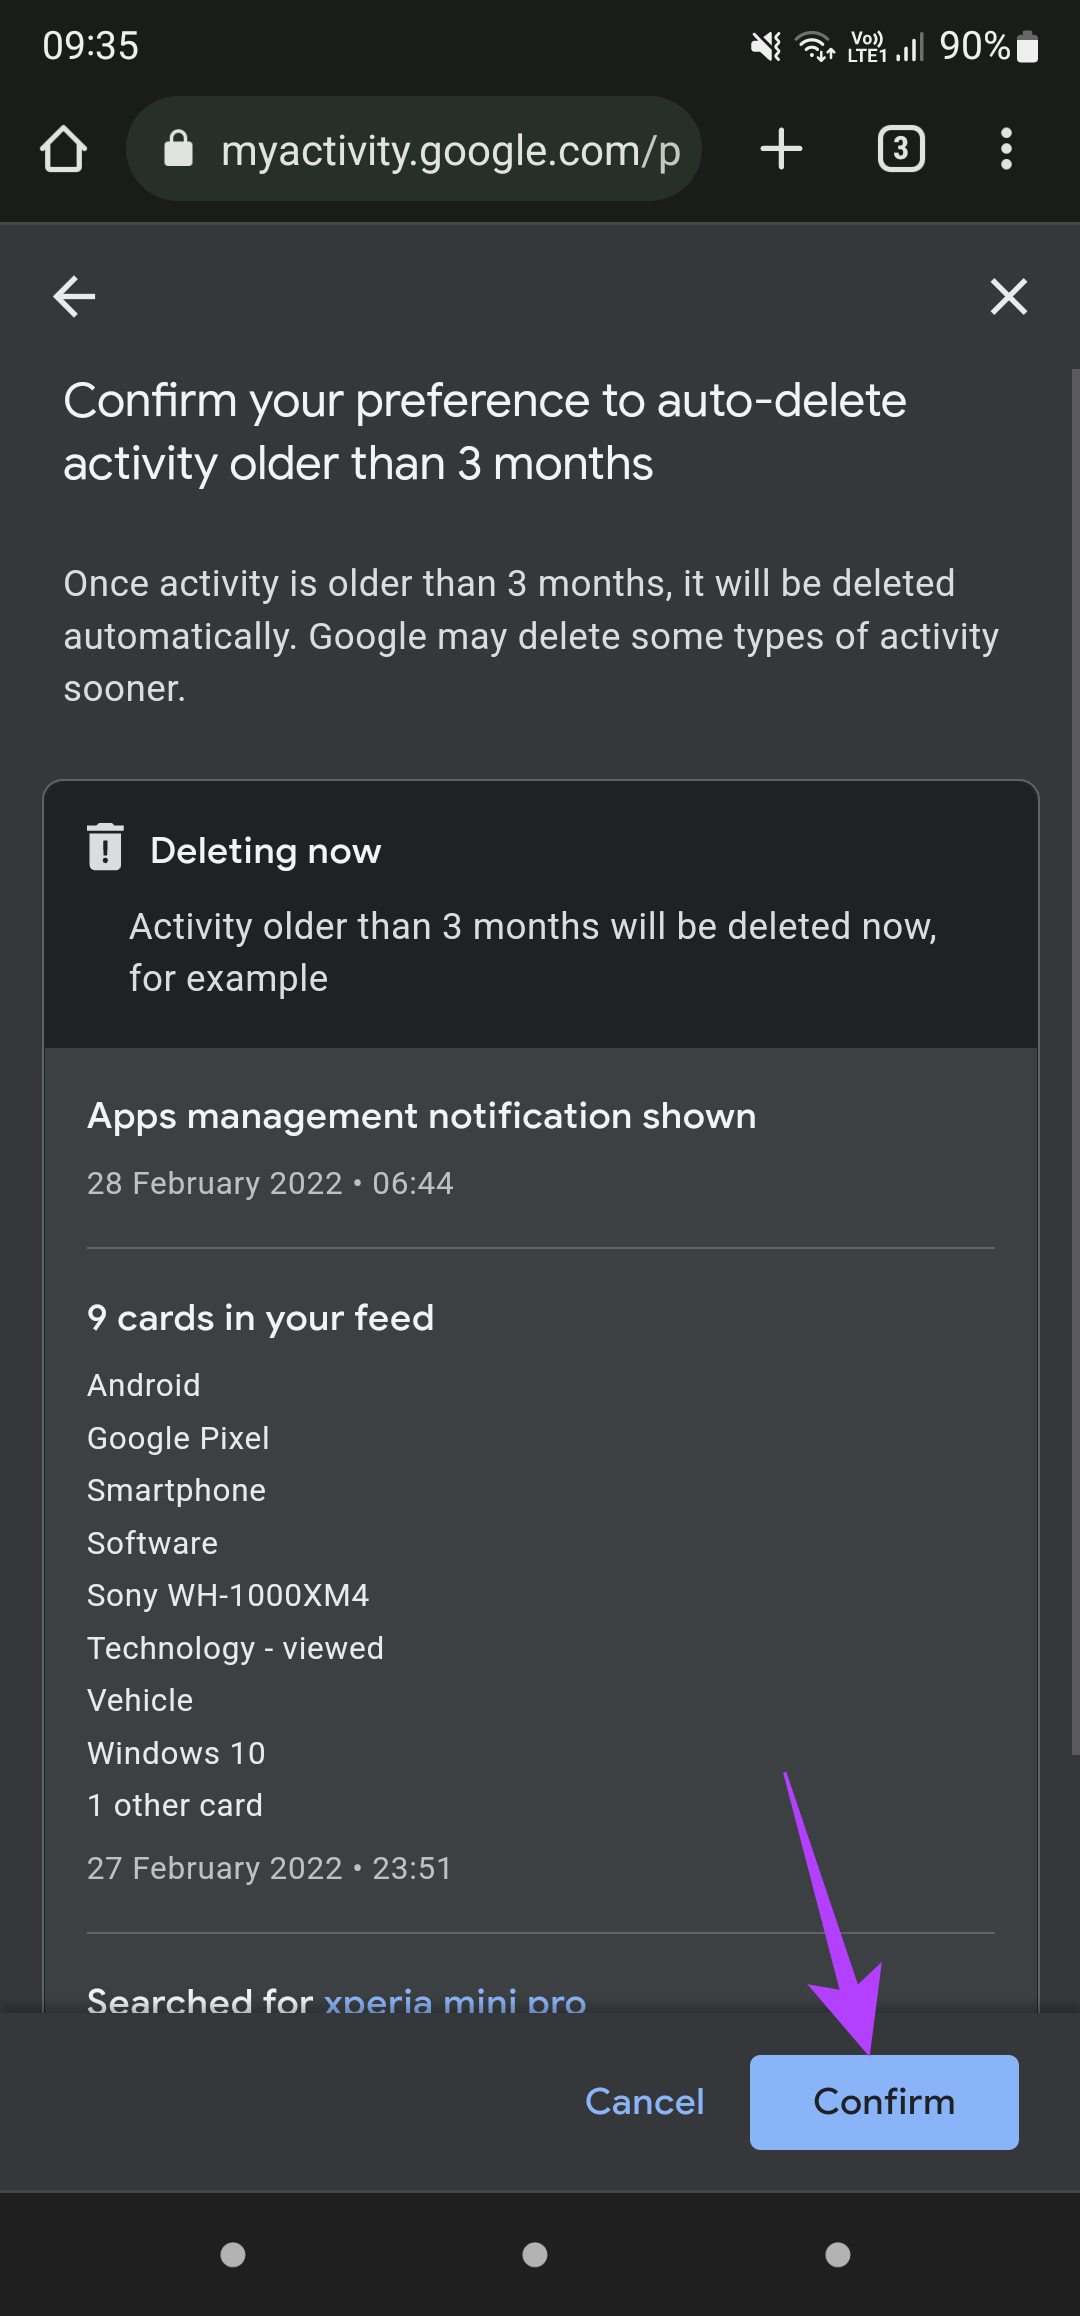
After enabling it, you won’t have to worry about deleting your voice history manually often.
How to Delete Google Assistant Voice History Directly From the Nest Speaker
If you don’t have a smartphone with the same Google account as that logged into the Nest speaker, you can use voice commands to delete your voice history directly via the Nest speaker or device itself. Here’s what you need to do.
Step 1: Trigger the Google Assistant on the Nest speaker using the wake word such as Hey Google.
Step 2: Say “Delete my activity from today” or “Delete this week’s activity” to erase voice history for the mentioned duration.
You will receive a confirmation from Google Assistant when the activity you asked for is deleted.
Keep Your Conversations Safe
It’s a good practice to delete your Google Assistant voice history from Nest speakers and devices periodically. If you’re having sensitive conversations, you can even consider muting the microphone on the Nest speaker or any smart speaker or device to avoid your voices being captured and stored.
