There are many reasons why you want to go back to the old modern design classic file explorer ribbon. Maybe you don’t like the level of options offered in the new design, or you’re used to the classic ribbon. Whatever the reasons, in this article we will tell you how to restore classic File Explorer ribbon in Windows 11.
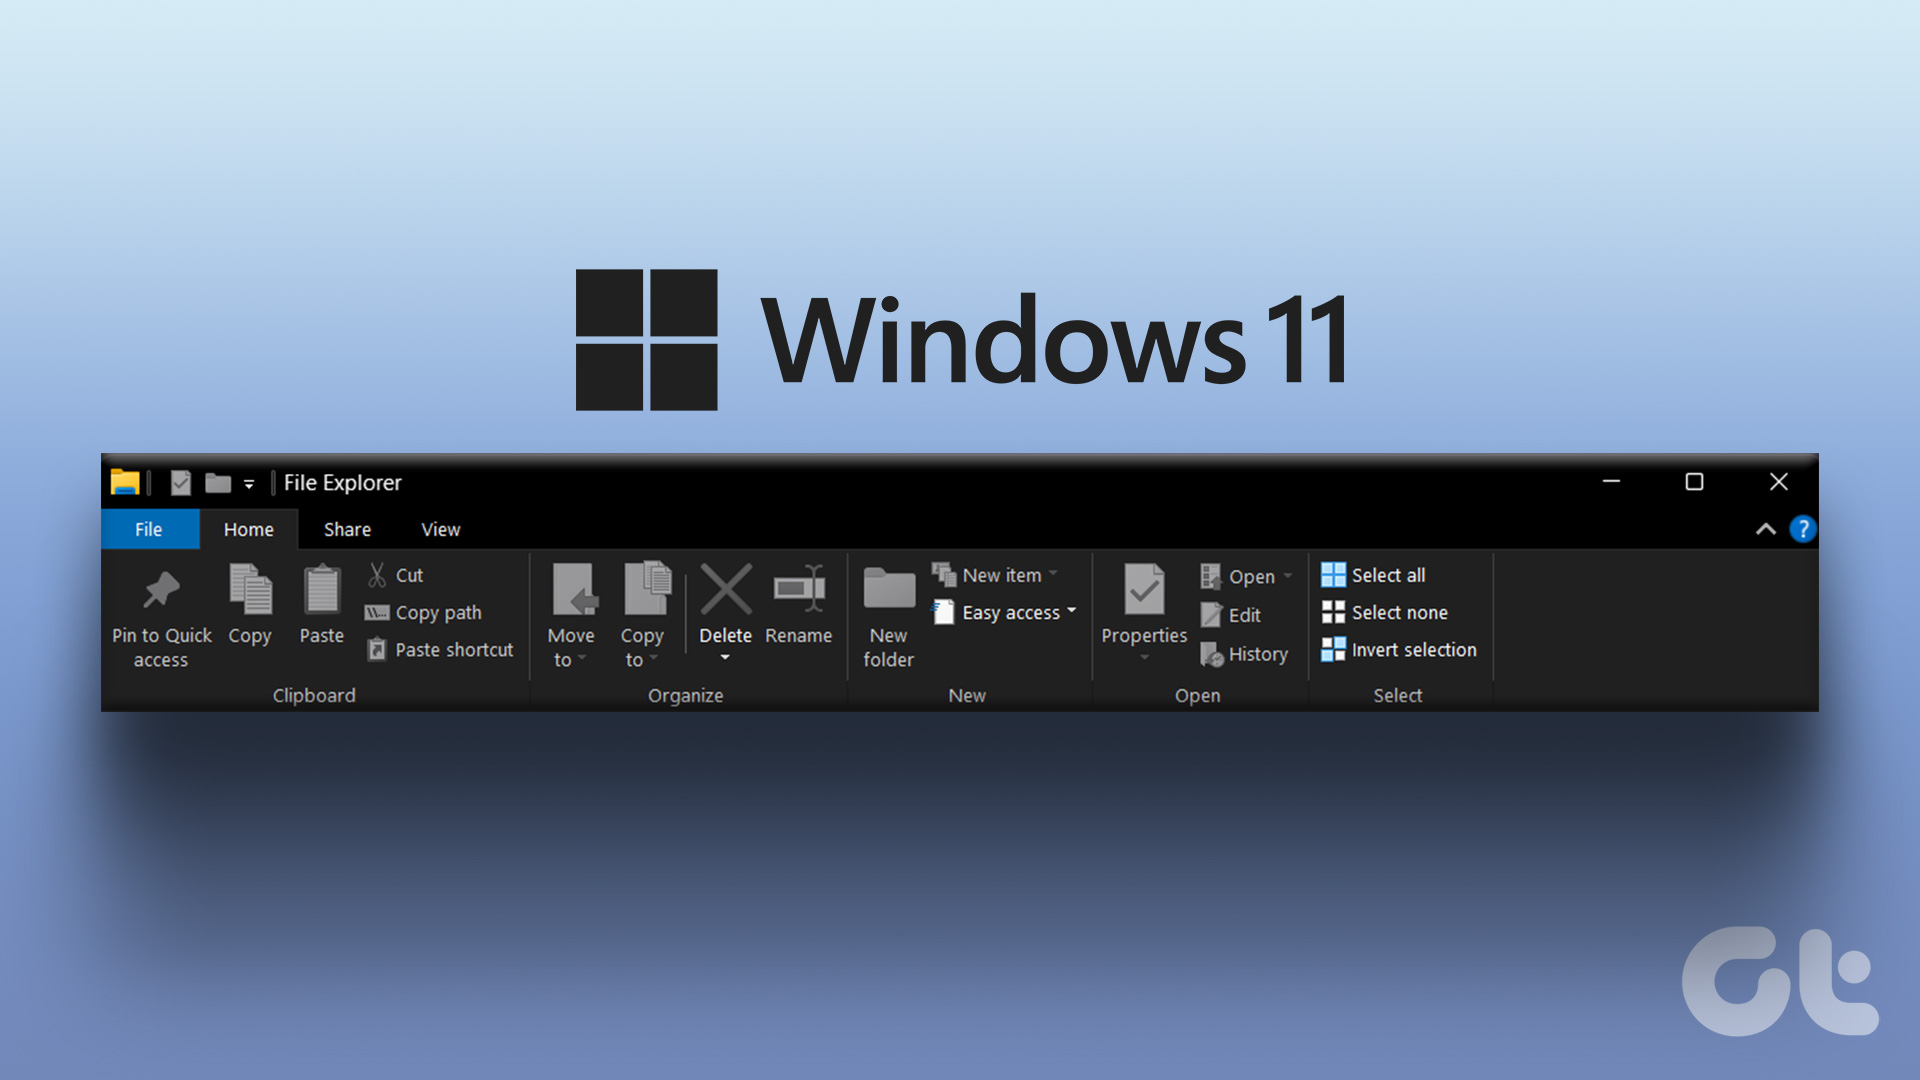
Before you begin, it’s important to note that some methods may not work depending on the version of Windows 11 you’re using. With that in mind, let’s start the article by understanding the difference between Classic Design Ribbons and New Design Ribbons on Windows 11.
Difference between classic ribbon menu and new design
There is a good difference between the old classic ribbon menu and the new modern ribbon design. Windows 11’s new ribbon is clean, visually appealing, and more focused on simplicity and clarity. In contrast, the classic ribbon makes it easier for users to find and use commands by organizing them into logical groups.

Additionally, the new modern ribbon is more responsive and adaptable to different screen sizes and displays only the most relevant commands based on the user’s current context. Although there are several additional features and functionality offered by the new Ribbon on Windows 11, some users would still prefer the classic Ribbon. So, let’s start with the methods.
1. Temporarily Restore Classic File Explorer Ribbon Using Control Panel
This method, as mentioned, is a temporary way to get the classic old ribbon on File Explorer. Still, it’s effective, considering it’s the only method that works if you’re on the latest version of Windows 11. There’s no other way to bring back the classic Ribbon.
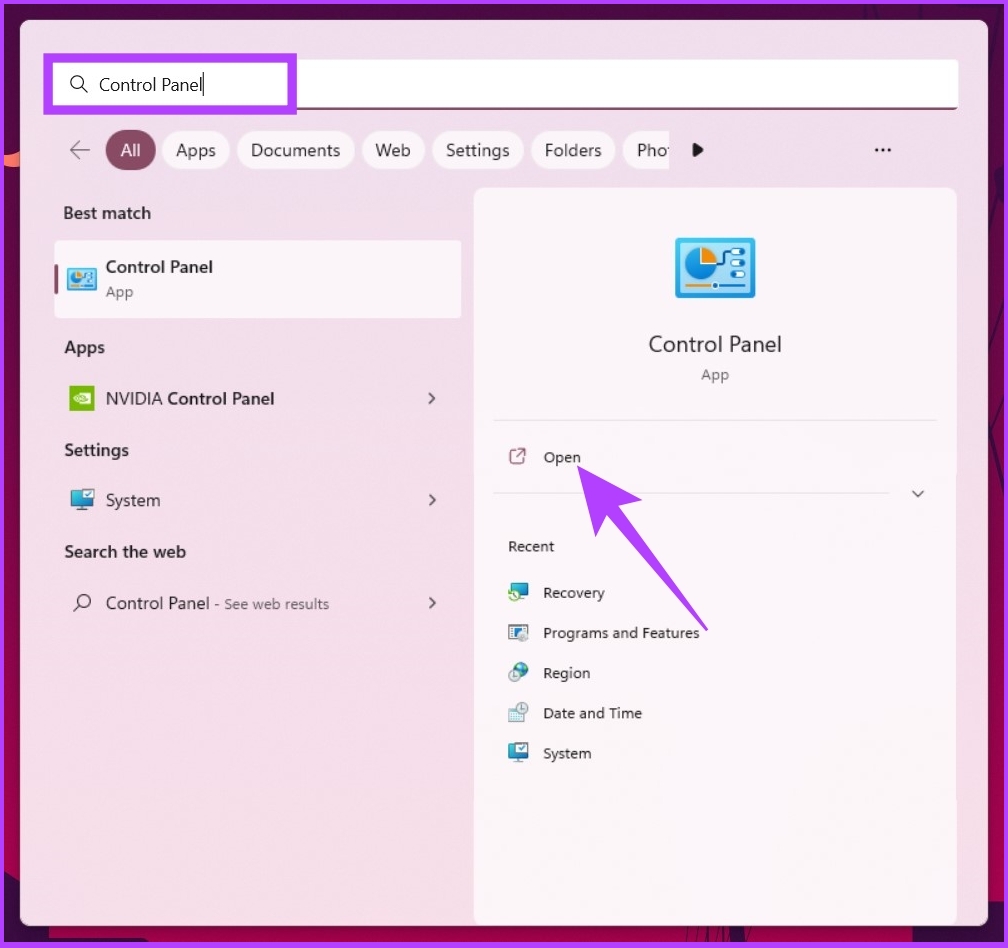
Step 1: Press the Windows key on your keyboard, type Control Panel and press Enter.
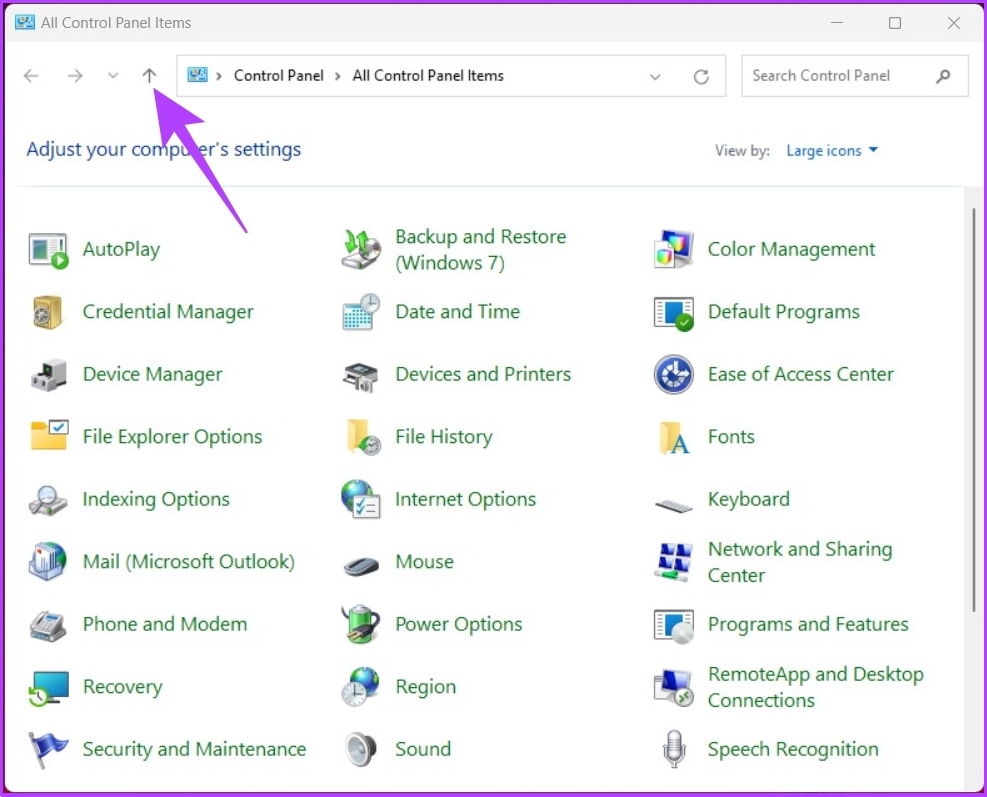
2nd step: Now click on the up arrow in the Control Panel.
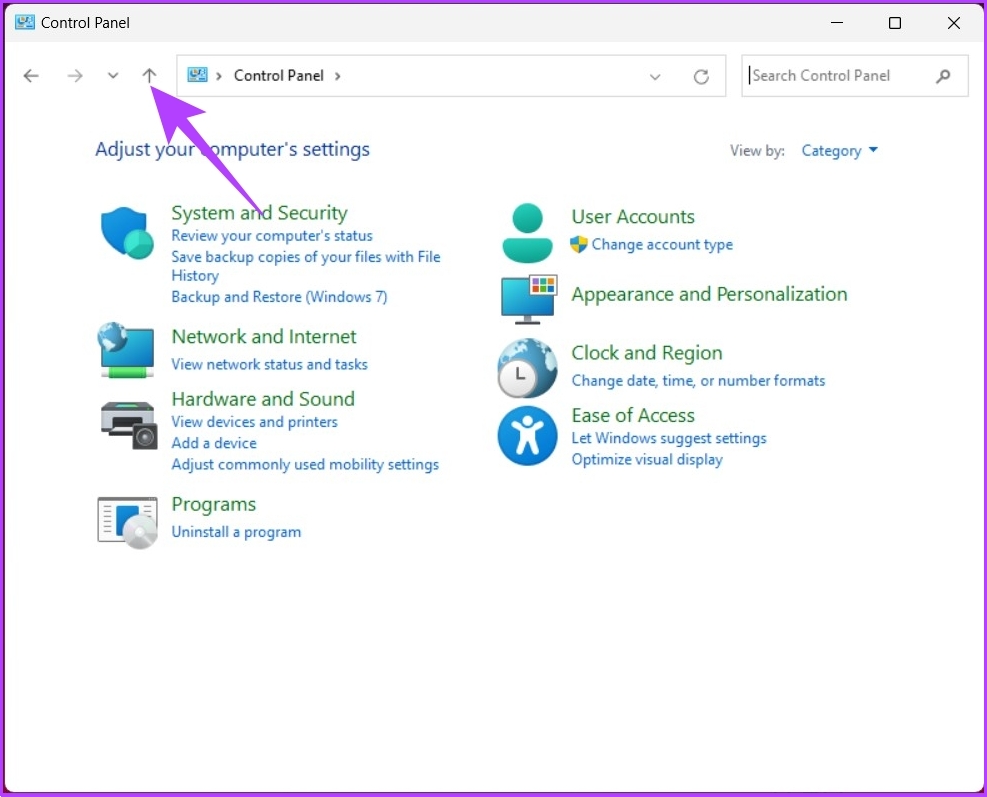
Step 3: Click the up arrow again. This will take you to the main Control Panel page.
Step 4: You will land on the desktop under File Explorer with the old classic ribbon.

You can move folders and other documents. However, the old ribbon will disappear when you close and reopen the window. If you don’t want a temporary but a permanent solution, move on to the next method.
2. Restore Classic File Explorer Using Registry Editor
Before starting with this method, it is important to understand that this method no longer works if you are on Windows 11 version 22H22 or higher. However, if you are not part of the specific set of users, restoring classic File Explorer in Windows 11 may seem complicated as it involves the registry editor, but it is quite simple. Follow the instructions below.
To note: We strongly advise you to backup windows registry before proceeding with the steps below.
Step 1: Press the Windows key on your keyboard, type Registry Editorthen click “Run as administrator”.
To note: You can also press “Windows key + R” to open the Run dialog box, type regedit.exe, then click OK to open Registry Editor.
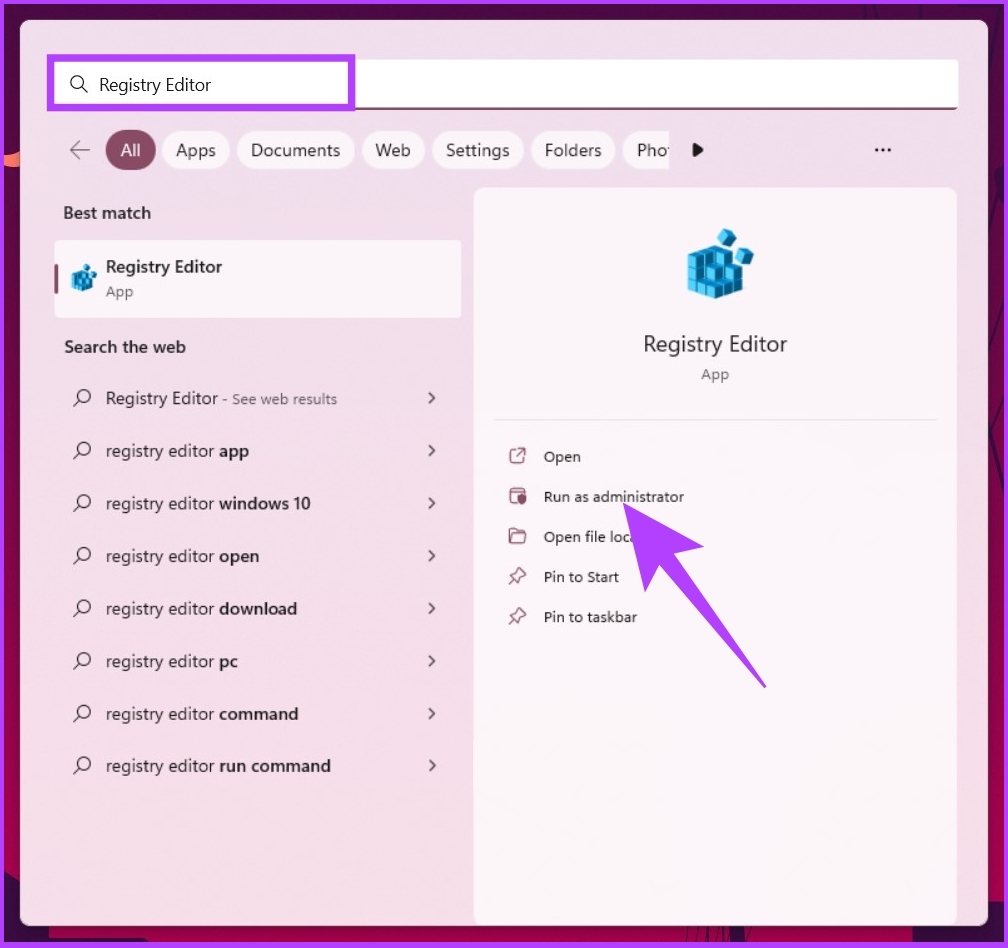
In the prompt, select Yes.
2nd step: In the top address bar, enter the address mentioned below.
ComputerHKEY_LOCAL_MACHINESOFTWAREMicrosoftWindowsCurrentVersionShell ExtensionsTo note: You can also manually access the location.

Step 3: Under the Shell Extensions folder, right-click on the right pane, select New, and then choose Key.

Step 4: Name the key as blocked.
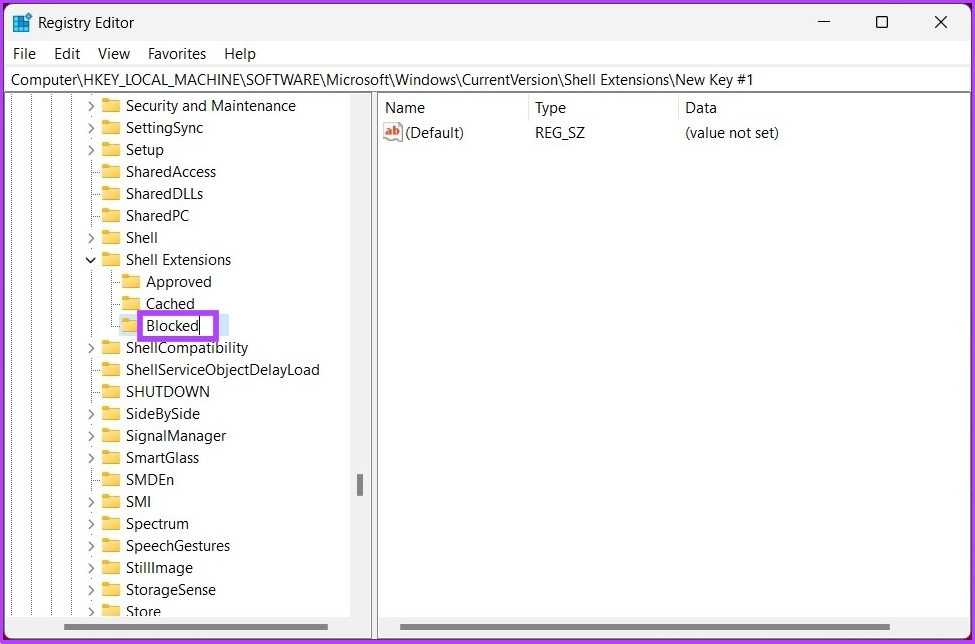
Step 5: Navigate to the Blocked folder, right-click, select New, then choose String Value.

Step 6: Now type below :
{e2bf9676-5f8f-435c-97eb-11607a5bedf7}
Step 6: Finally, restart your Windows 11 PC.
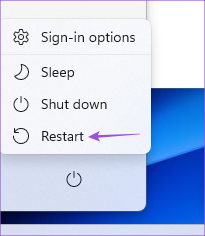
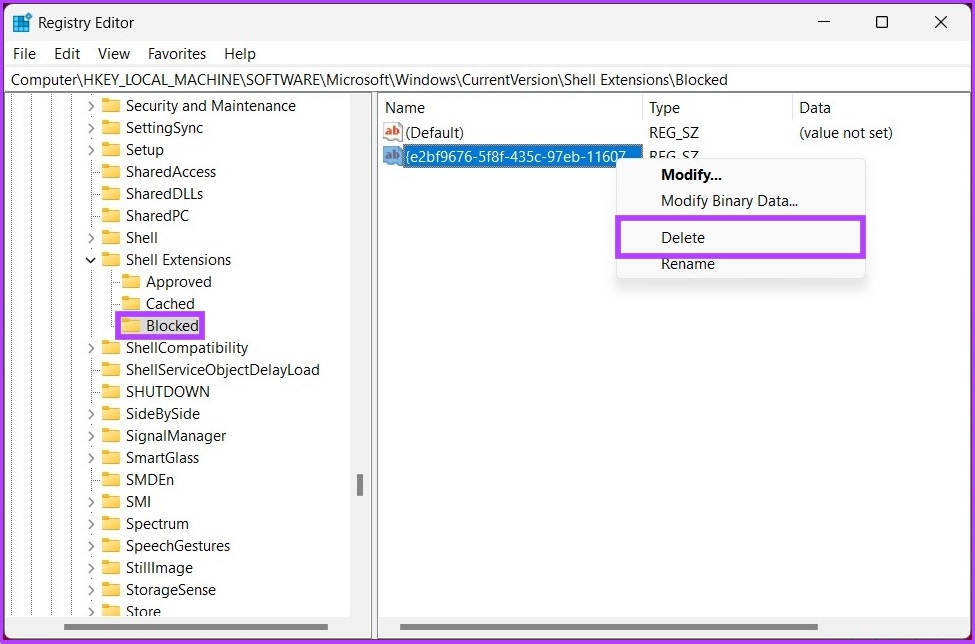
There you go, you have successfully brought back the old File Explorer ribbon in Windows 11. If you want to go back to the modern ribbon, click on the string {e2bf9676-5f8f-435c-97eb-11607a5bedf7}, right click on it , and then click Delete. At the “Confirm value deletion” prompt, click Yes.

If the steps are too long to follow, you can perform the same method using the command prompt. Keep reading.
3. How to Enable Classic File Explorer Using Command Prompt
Restoring the old File Explorer ribbon on Windows 11 is simple. However, similar to the above method, this method no longer works if you are using Windows 11 version 22H22 or higher. With that out of the way, let’s start with the steps.
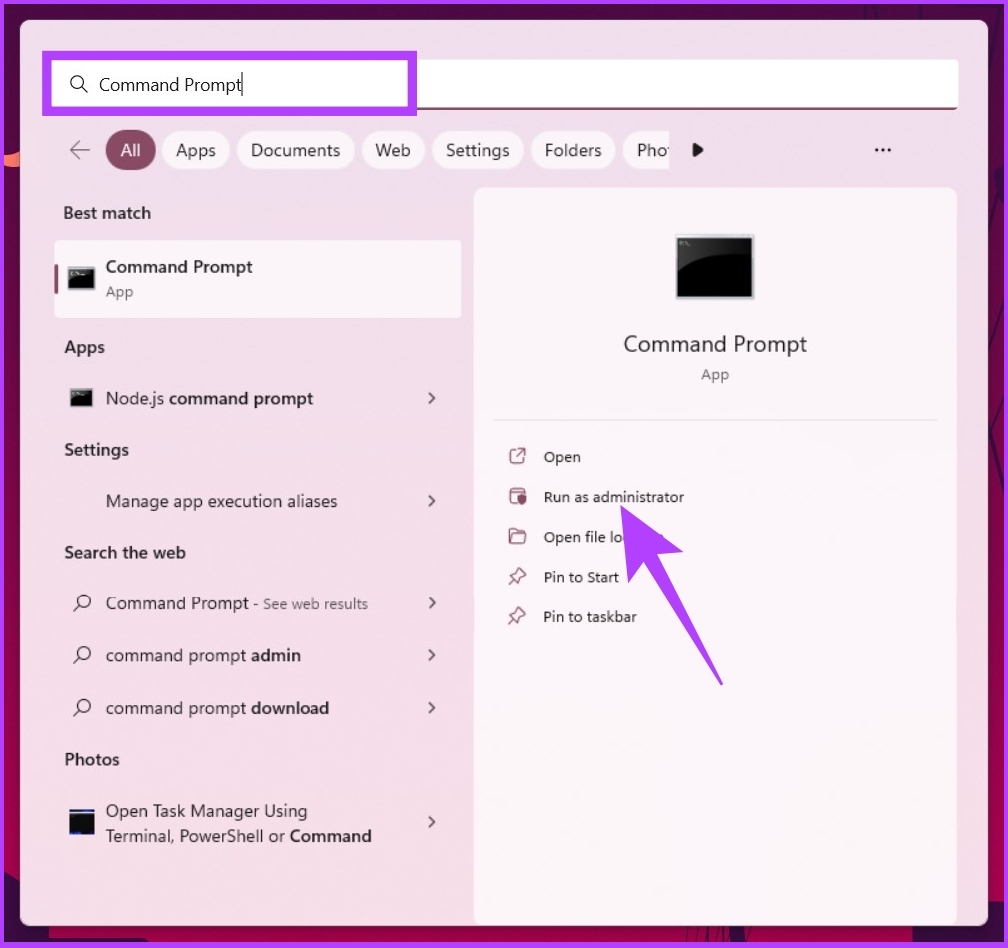
Step 1: Press the Windows key on your keyboard, type Command Promptthen click “Run as administrator”.
2nd step: Type the command below and press Enter.
To activate, type the command below:
reg delete "HKCUSoftwareClassesCLSID{d93ed569-3b3e-4bff-8355-3c44f6a52bb5}" /f
To disable, type the command below:
reg add "HKCUSoftwareClassesCLSID{d93ed569-3b3e-4bff-8355-3c44f6a52bb5}InprocServer32" /f /ve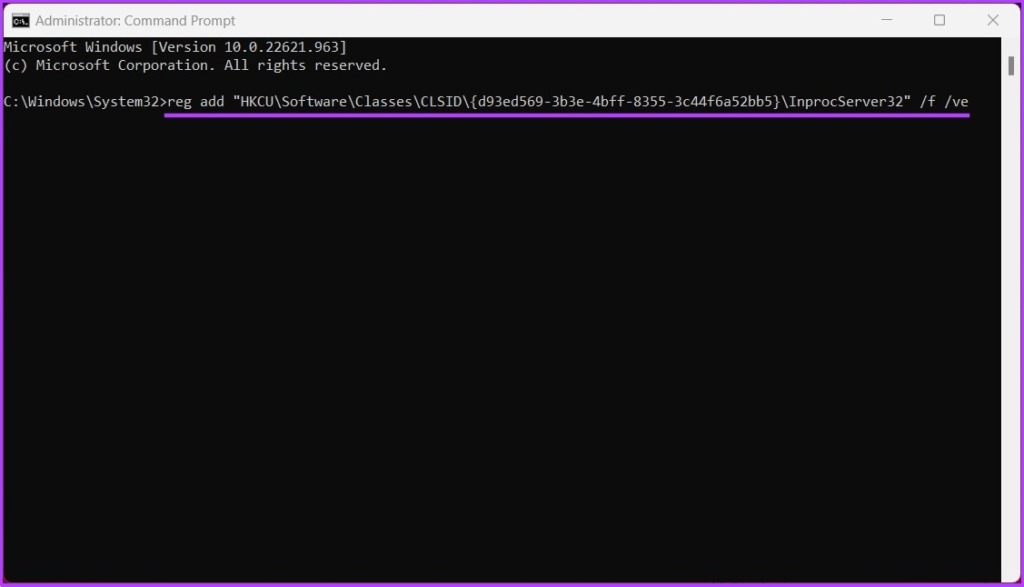
Step 3: Close the command window and restart your computer.

You will be greeted with the old classic File Explorer ribbon on your Windows 11. If you have any questions, check out the FAQ section below.
Classic File Explorer Ribbon Restore FAQ
The ribbon is a graphical user interface element in the Microsoft Windows File Explorer application. It replaces the menu bar and toolbar in earlier versions of the application. It is organized into a series of tabs, each containing a set of related buttons and menus. This makes it easier for users to find and access the features and options they need.
You can find many different tabs on the File Explorer ribbon. Each tab contains buttons and menus linked to it. Such as; Home: This tab includes buttons and options for managing files and folders. Share: This tab contains options for sharing files and folders with other users. Display: This tab contains options for adjusting the display of files and folders in the File Explorer window, etc. Additionally, the File Explorer ribbon may also include other tabs depending on the specific context or task you are performing.
Go back to classic
The above methods can restore the classic File Explorer ribbon in Windows 11. Now that you know, you can also disable the “Show mode options” context menu in Windows 11. That said, it is better to adapt to the evolution of design than to go back to the classic.
