If you’re looking for a quality digital canvas, then maybe you should check out Microsoft Whiteboard. With this tool, users can gather ideas, content and people. It is a great tool that we cannot help but that we recommend to anyone who can use it.
How to create a whiteboard
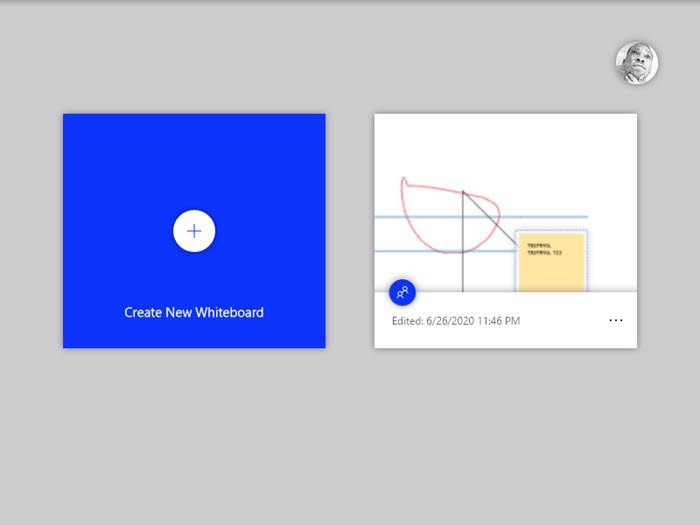
The first thing to do is open the Whiteboard application, then click on the section called Create a new Whiteboard. If when you launch but the start menu does not appear, please select the return icon which is the arrow pointing to the left.
This should present the boot menu. From there, follow the steps above to create your first whiteboard.
How to use Microsoft Whiteboard
One of the cool things about Microsoft Whiteboard is the ability to collaborate in real time anywhere in the world, as long as an Internet connection is involved. Additionally, the Whiteboard tool is also available in the web browser, which is a good idea.
Another great aspect of Microsoft Whiteboard is the fact that users can save their content in the cloud. Plus, files are saved automatically, so no need to be too heavy, let the app do the work.
- Collaborate with a team
- Access the Settings menu
Let us discuss it in more detail.
1]Collaborate with a team
We can say for sure that Microsoft Whiteboard is used a lot for collaboration, so let’s take a look at the basics.
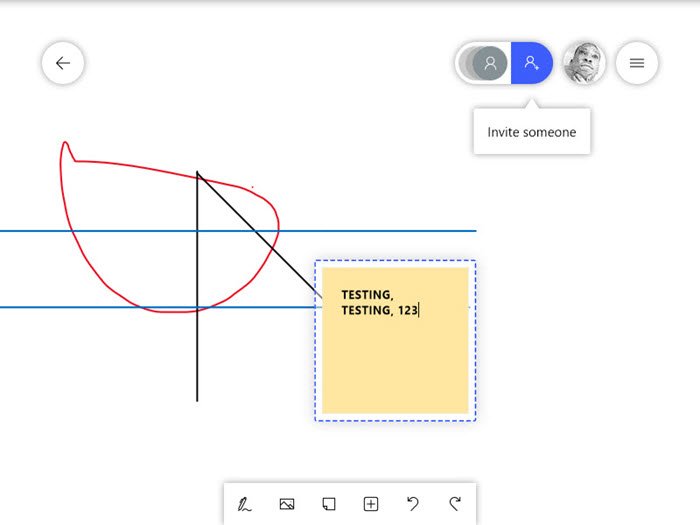
The first thing you need to do before collaborating on a project is to add a team member. This can be done by opening the whiteboard and then after logging in with your Microsoft account. From there, be sure to select the Invite Someone icon next to your profile photo.
Immediately, a section will appear giving you the possibility of creating a shareable link for the Web. Toggle the button to get the link, then copy and share it with everyone on your team.
2]Access the Settings menu
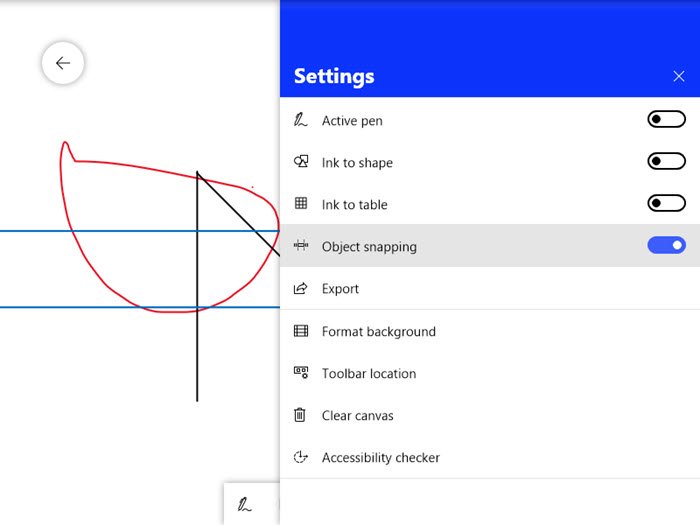
Another item that the beginner should consider before getting started is the Settings menu as it contains important items. Open this area by clicking on the hamburger menu, and from there, several options should appear.
Users can activate the Active Pen, Shaping Ink, Chalk Ink, and more. In addition, formatting the background is possible here, as well as removing an entire canvas.
Whiteboard tools you will use
- Take advantage of the ink mode
- Add a picture
- How to use the ruler
- How to lock the background image
- How to use Bing search in the whiteboard
1]Take advantage of the ink mode

By default, the inking mode is not activated, so you just need to click on the button to activate it, then start working on your masterpiece.
Now, as we can see in the image above, there are six pens to work with, and each has a unique color. In addition, people can take advantage of the highlighter, eraser, ruler and neon yellow lasso. In addition, if you click on one of the pens, an option will appear, allowing you to change the color and thickness of the tip.
2]Add a picture
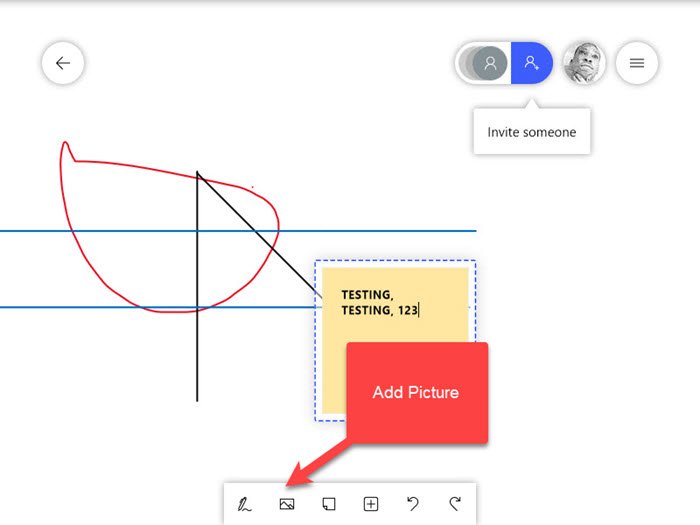
If the need arises when you need to add an image to the whiteboard, how about clicking on the image icon? This will open Windows Explorer, so from there locate your favorite image and add it to the whiteboard.
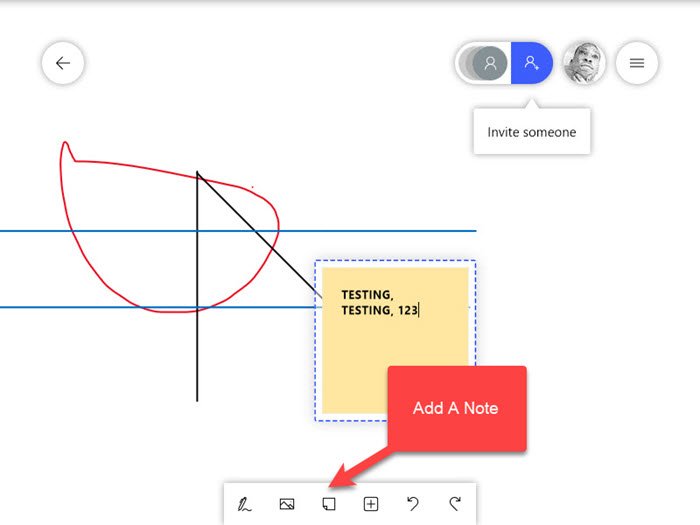
You can also add notes via the icon next to the image button. Click on the button then type your note and finish by pressing the Enter key on your keyboard.
3]How to use the ruler
On the screen, you should see a ruler icon designed to make sure the user doesn’t make too many mistakes while drawing. After tapping the icon, you must now position the ruler in the angle that suits you, then proceed to draw.
You can rotate the ruler with the mouse, but if you’re using a touch screen, just use two fingers to do the act.
4]How to lock the background image
OK, so when it comes to locking images in the background, the user must first press the right mouse button to launch the context menu, and from there select the image button . An open sho0uld dialog will now appear, so be sure to choose the image and press the OK button.
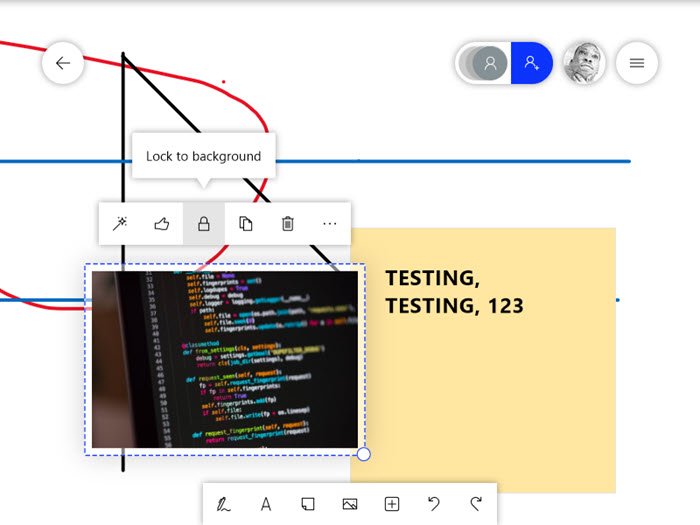
If necessary, please resize the image or make other changes, and from there right-click on the mouse to launch the context menu, then select Lock in background to complete the task. If you need to unlock the image, launch the context menu again and select Unlock background.
5]How to use Bing search in the whiteboard
Not everyone wants to use Bing Search, but it’s the only option when using the Whiteboard tool.
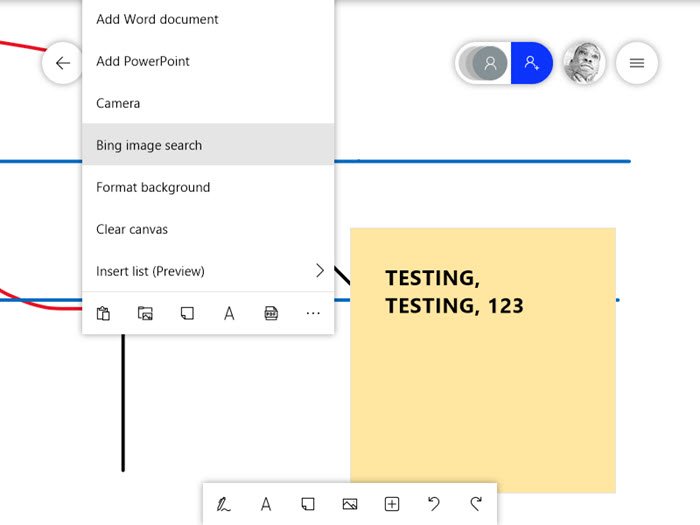
Now to use the Bing search, please click on the Insert button, then select Bing Image Search to start the Bing search. In this section, enter the name of an image and, when it appears, press Insert.
I hope the message will help you get started with Whiteboard.