Do you keep getting runtime errors every time you launch specific programs on Windows 11? Well, then that’s definitely cause for concern. If the standard fixes, such as restarting the program or your computer, haven’t worked, it’s time to dig a little deeper.
There can be several reasons behind a runtime error, ranging from damaged system files to improper program installation. Below are some effective troubleshooting tips that you can use to fix runtime errors on Windows 11.
1. Run SFC and DISM scans
Damaged or corrupted system files on your PC can cause runtime errors. Fortunately, Windows includes built-in tools that can help you easily repair these system files.
Before you start troubleshooting, it is essential to make sure that the file system of your hard drive or SSD is not suffering from any errors. For this, you can run an SFC (or System File Checker) scan on your PC by following the steps below.
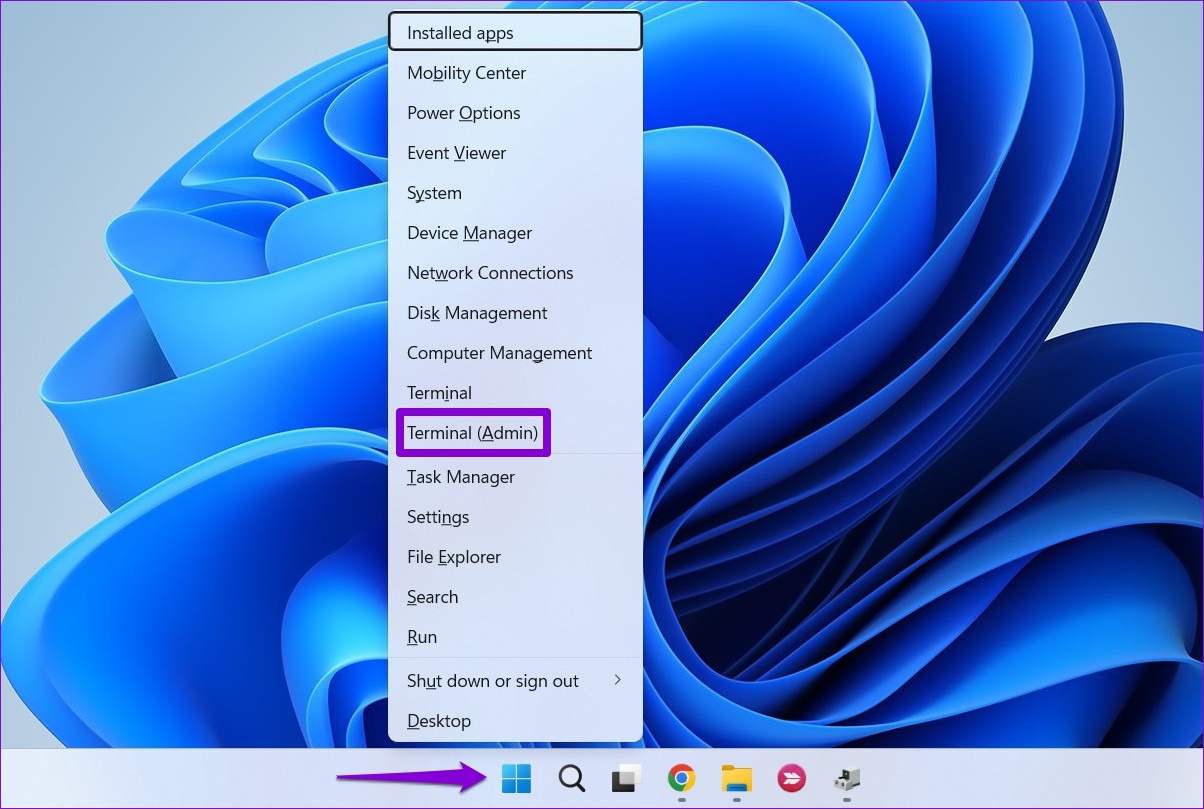
Step 1: Right-click the Start icon and select Terminal (Admin) from the list.
2nd step: In the console, run the following command and press Enter:
sfc /scannow
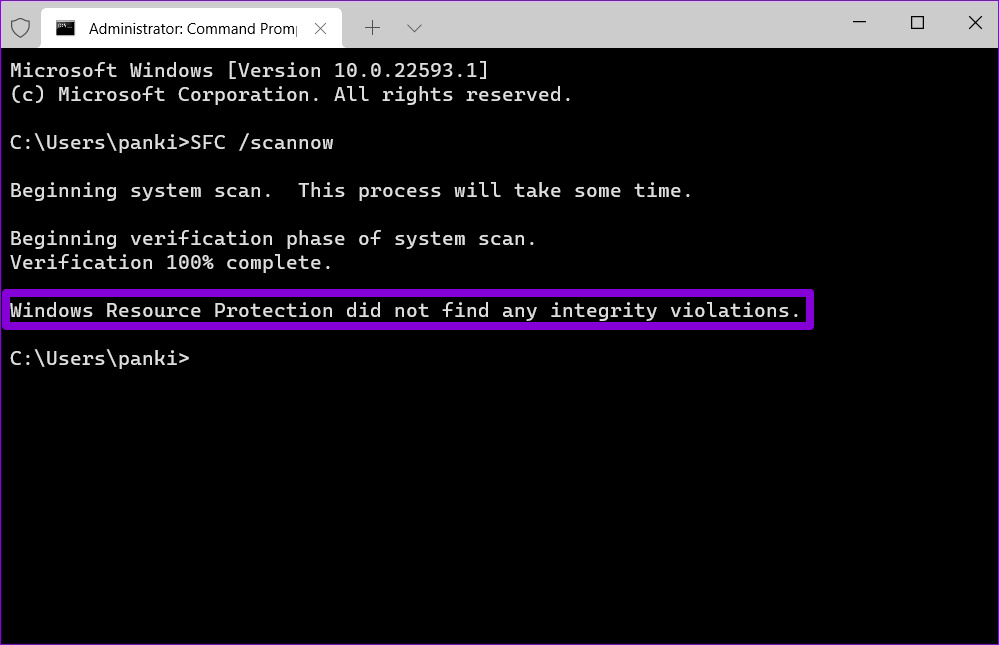
Once the scan is complete, you will see details if there are any errors. Also, you will find instructions to repair these errors from the command prompt.
After that, run DISM (Deployment Image Servicing and Management) scan.
Launch Windows Terminal with administrative privileges (as shown above), run the following commands one by one and press Enter after each command:
DISM /Online /Cleanup-Image /CheckHealth
DISM /Online /Cleanup-Image /ScanHealth
DISM /Online /Cleanup-Image /RestoreHealth
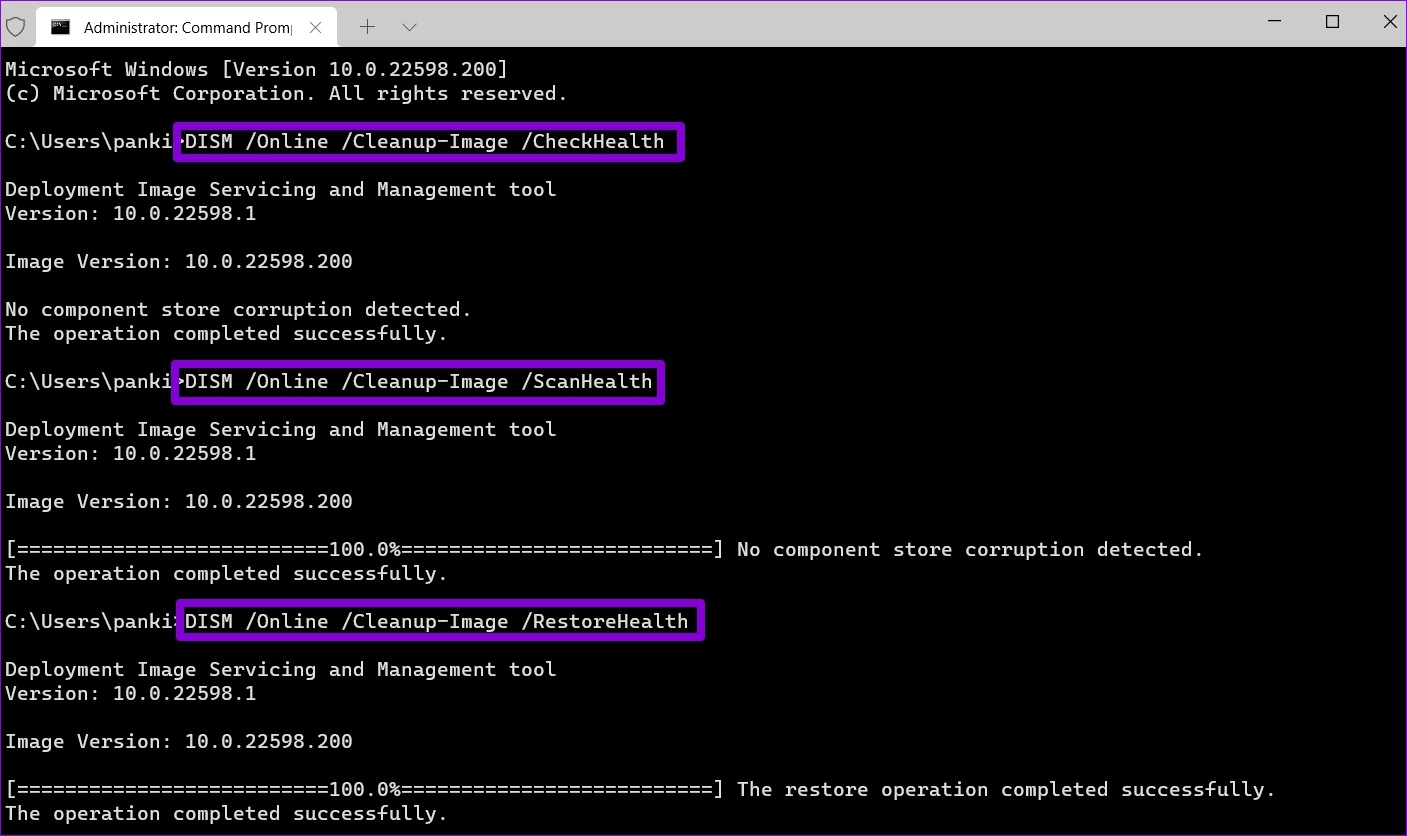
It is normal for the process to sometimes seem stuck. So don’t close the terminal window until the scan is complete. After that, restart your PC and see if the runtime error reappears.
2. Repair Microsoft Visual C++ Redistributable Packages
Problems with Visual C++ Redistributable Packages on your PC can also cause runtime errors on Windows 11. You can try fixing them to see if that helps.
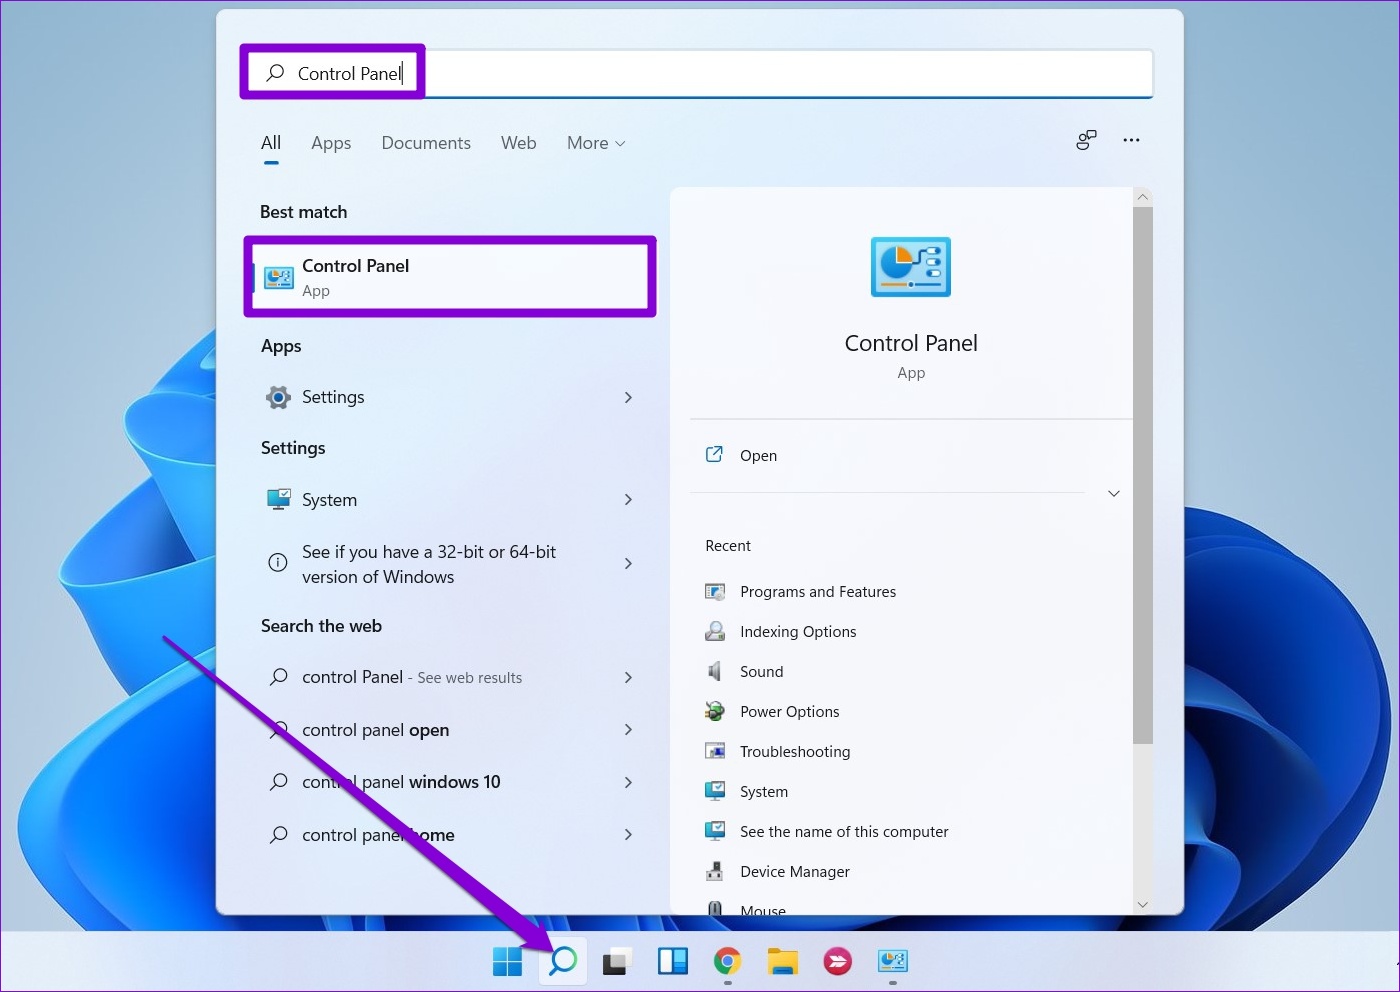
Step 1: Click the search icon on the taskbar, type control Panel, and press Enter.
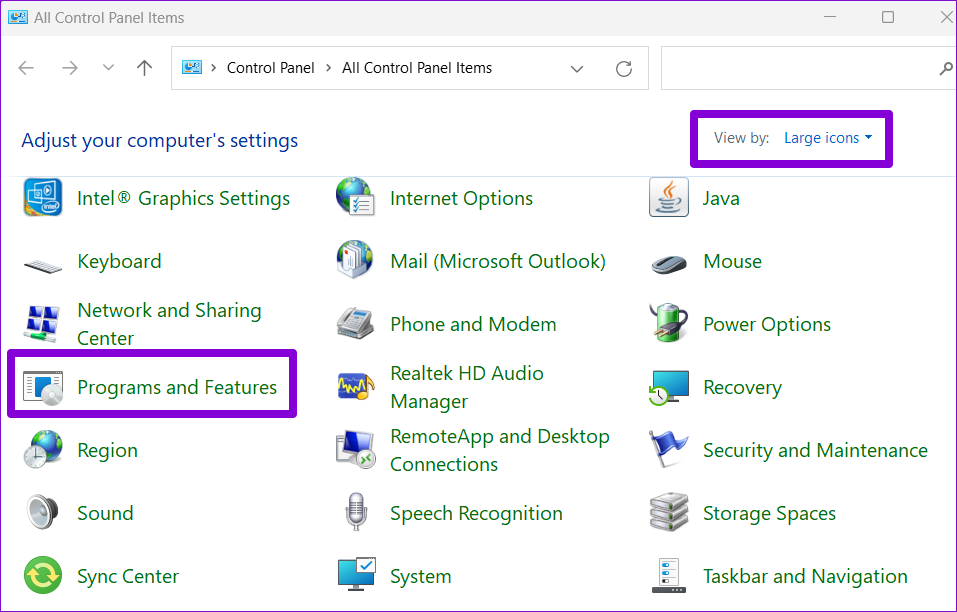
2nd step: Use the drop-down menu in the upper right corner to change the display type to large or small icons. Then go to Programs and Features.
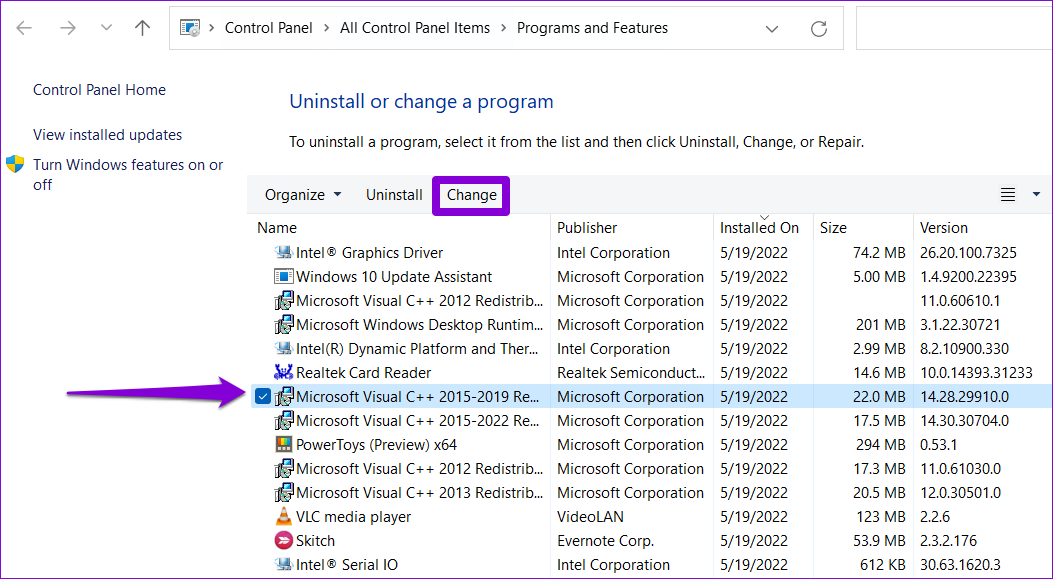
Step 3: Select the Microsoft Visual C++ Redistributable Package and click Edit. You will need to repeat this process to repair all packages.
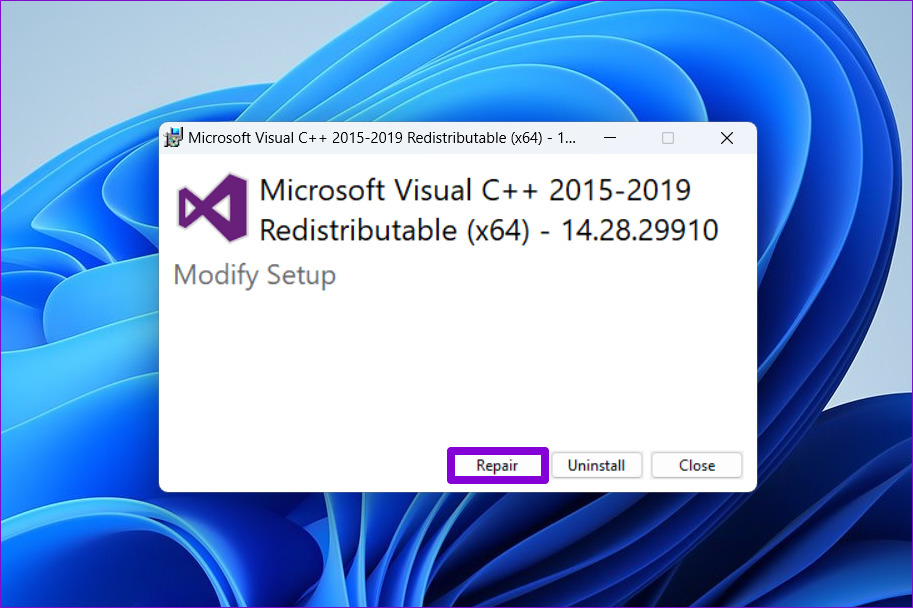
Step 4: Hit the Repair button and wait for the process to complete.
3. Reinstall Microsoft Visual C++ Redistributable Packages
If repairing the Microsoft Visual C++ Redistributable Packages does not fix the problem, you can try reinstalling them. Here’s how you can go about it.
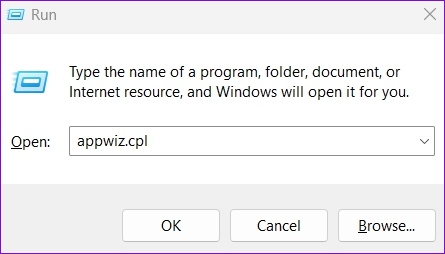
Step 1: Press Windows key + R to open the Run dialog box. Type appwiz.cpl in the Open field and press Enter.
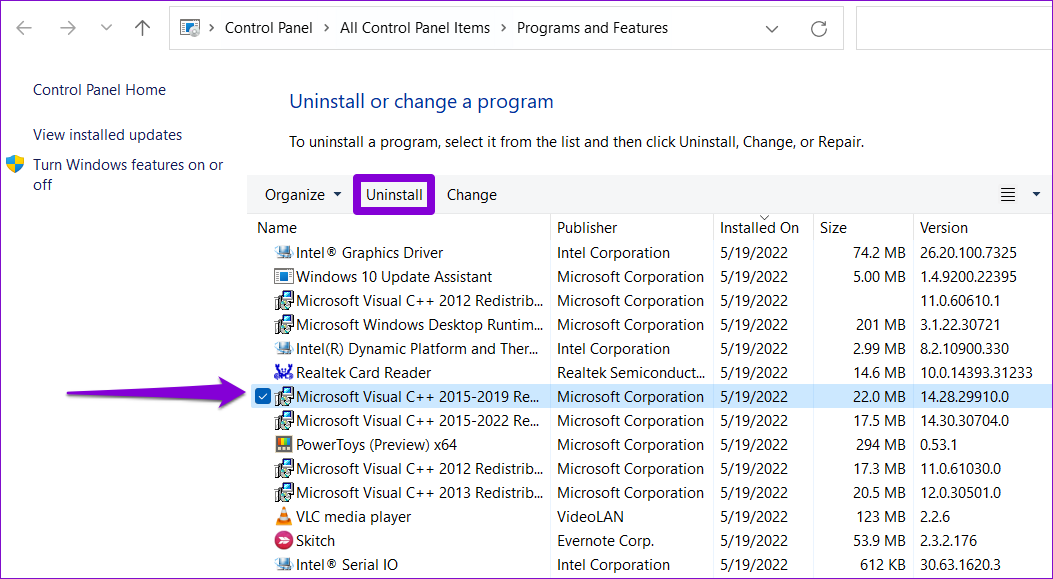
2nd step: Select the Microsoft Visual C++ Redistributable Package and click Uninstall.
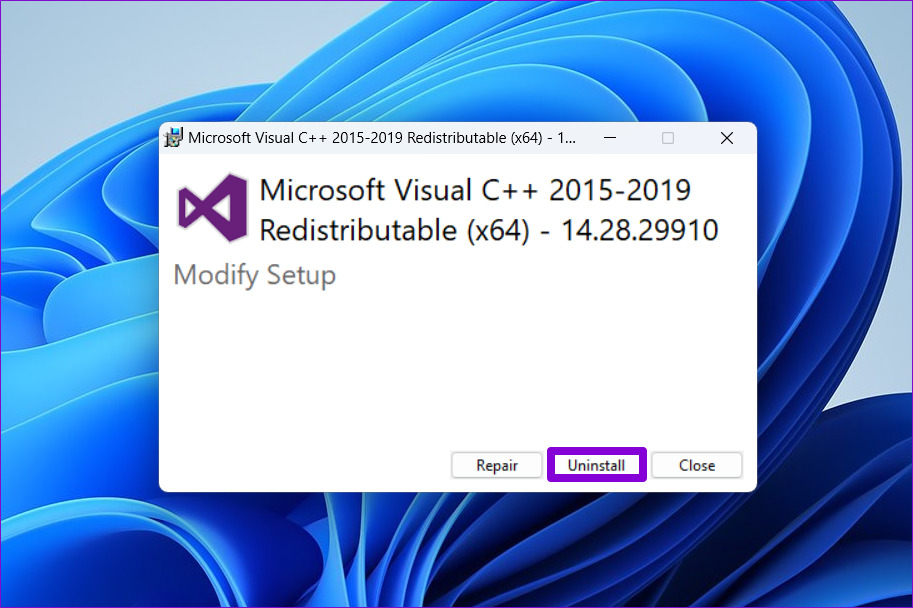
Step 3: Click Uninstall to confirm.
Repeat the above steps to remove all packages. Once removed, go to the Microsoft website to download the latest Microsoft Visual C++ Redistributable Packages.
Double-click the installer file and follow the onscreen prompts to complete the installation. Following this, runtime errors should no longer appear on Windows 11.
4. Reinstall the program causing the runtime error
If the runtime errors only occur when you launch a specific program, it may be due to improper installation. In this case, you need to uninstall this program and reinstall it.
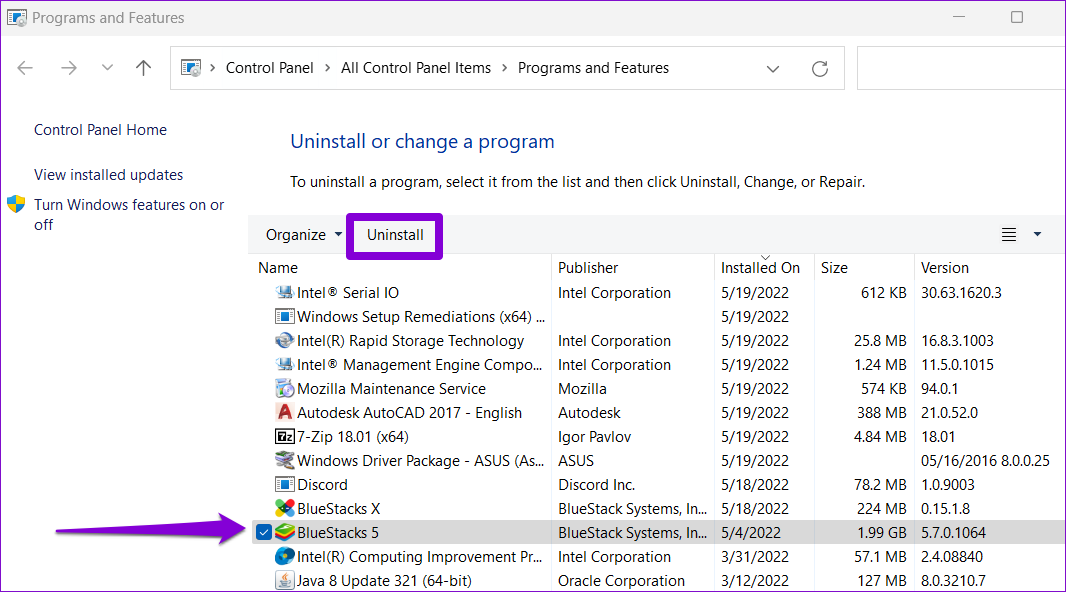
To uninstall a program, press Windows key + R to open the Run dialog box, type appwiz.cpl, and press Enter.

Select the program you want to remove and click Uninstall. Then follow the on-screen prompts to uninstall the program.
Reinstall the program and check if you still encounter the runtime error.
5. Install Windows Updates
Microsoft releases regular updates for Windows 11 to add new features, improve security, and fix known bugs. If runtime errors on Windows 11 occur due to a buggy build, updating Windows 11 to its latest version should help.
To check for system updates, press Windows key + I to open the Settings app. Switch to the Windows Update tab and click Check for updates.
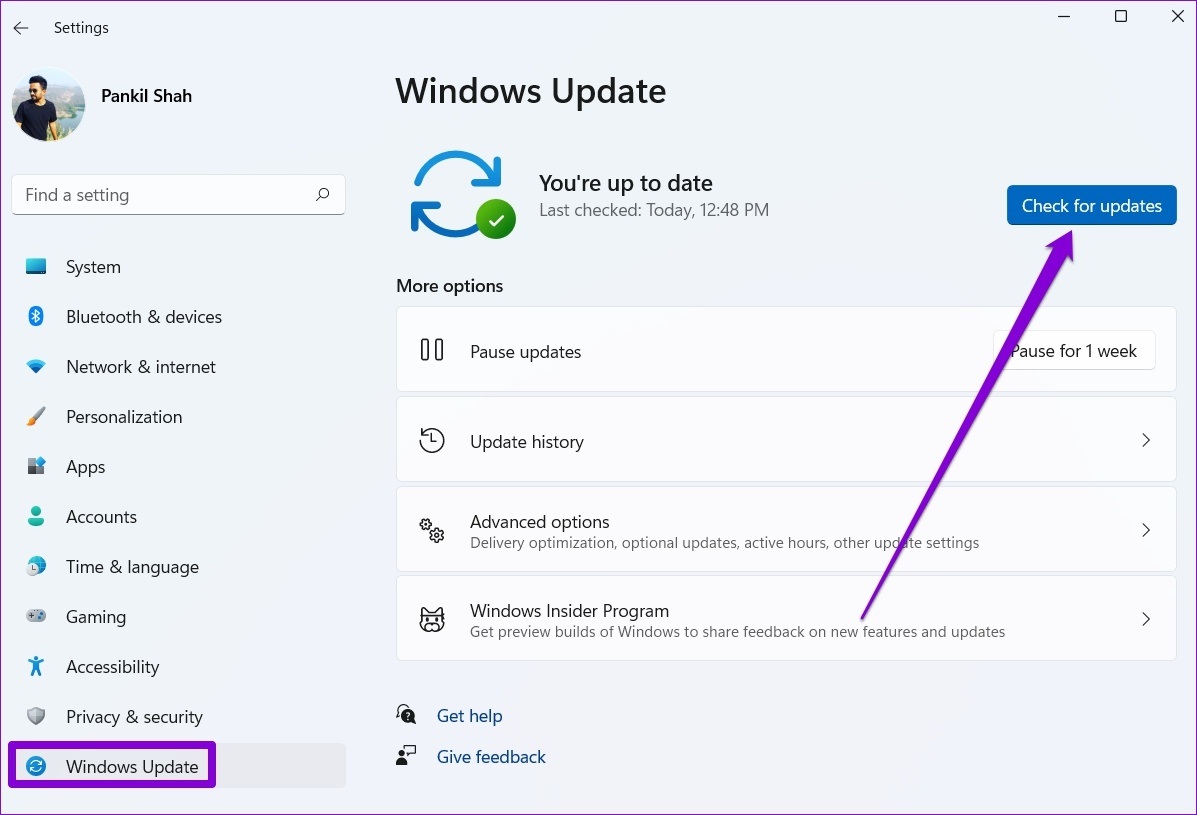
Download and install all pending Windows updates and check if that fixes the problem.
6. Try Clean Boot Mode
It is possible that a third-party program or service running in the background is interfering with Windows and causing such runtime errors. You can check for this possibility by starting your PC in a clean boot state. Here’s how.
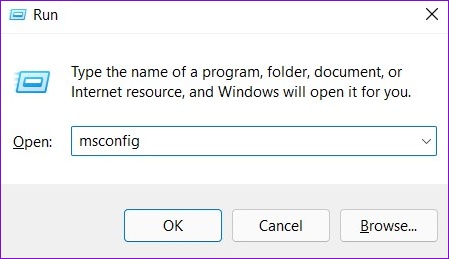
Step 1: Press Windows key + R to open the Run dialog box. Type msconfig in the box and press Enter.
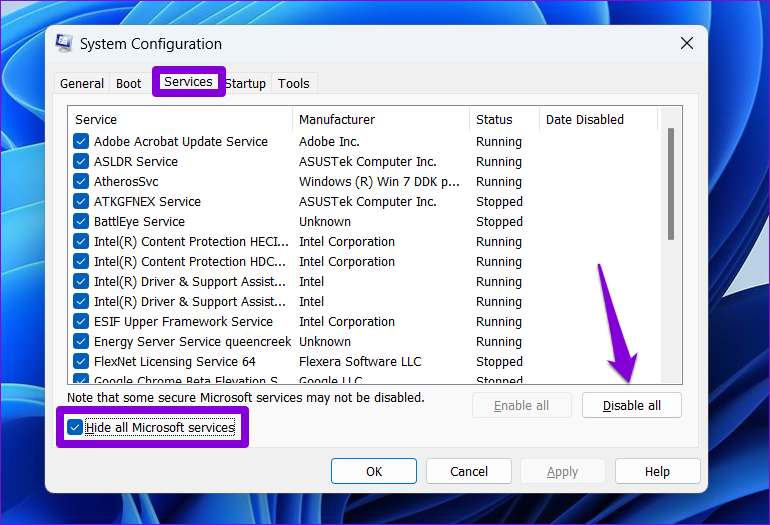
2nd step: Under the Services tab, check the “Hide all Microsoft services” box. Next, click on the Disable All button.
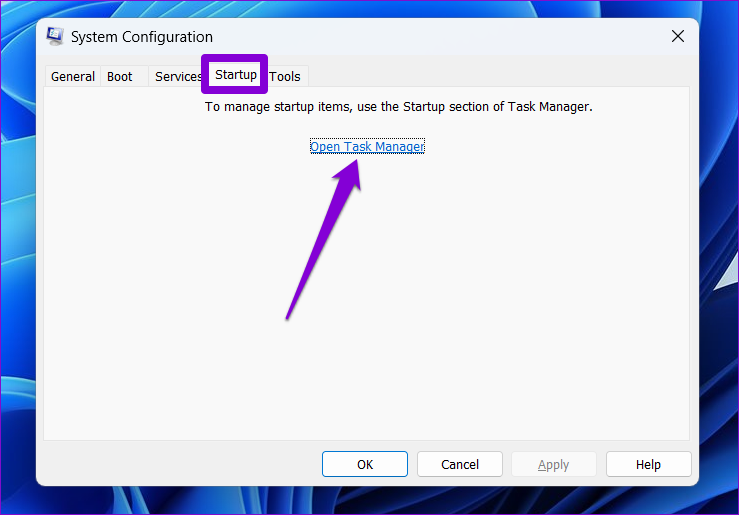
Step 3: Switch to the Startup tab and click Open Task Manager.
Step 4: On the Startup tab, select a third-party app and click Disable at the top. Similarly, disable all other third-party programs.
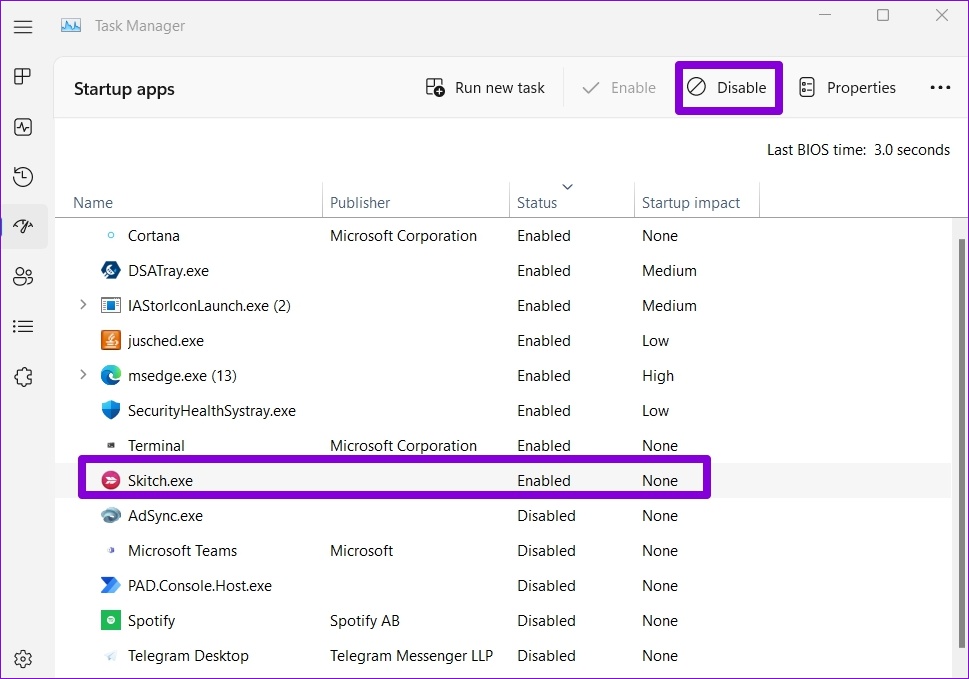
Restart your PC after that. If runtime errors no longer appear in Clean Boot State, one of the third-party apps or programs is to blame. You will need to remove recently installed apps and programs individually.
7. Perform System Restore
If all else fails, consider performing a System Restore. You can revert Windows to its previous state before runtime errors started showing up. Here’s how.
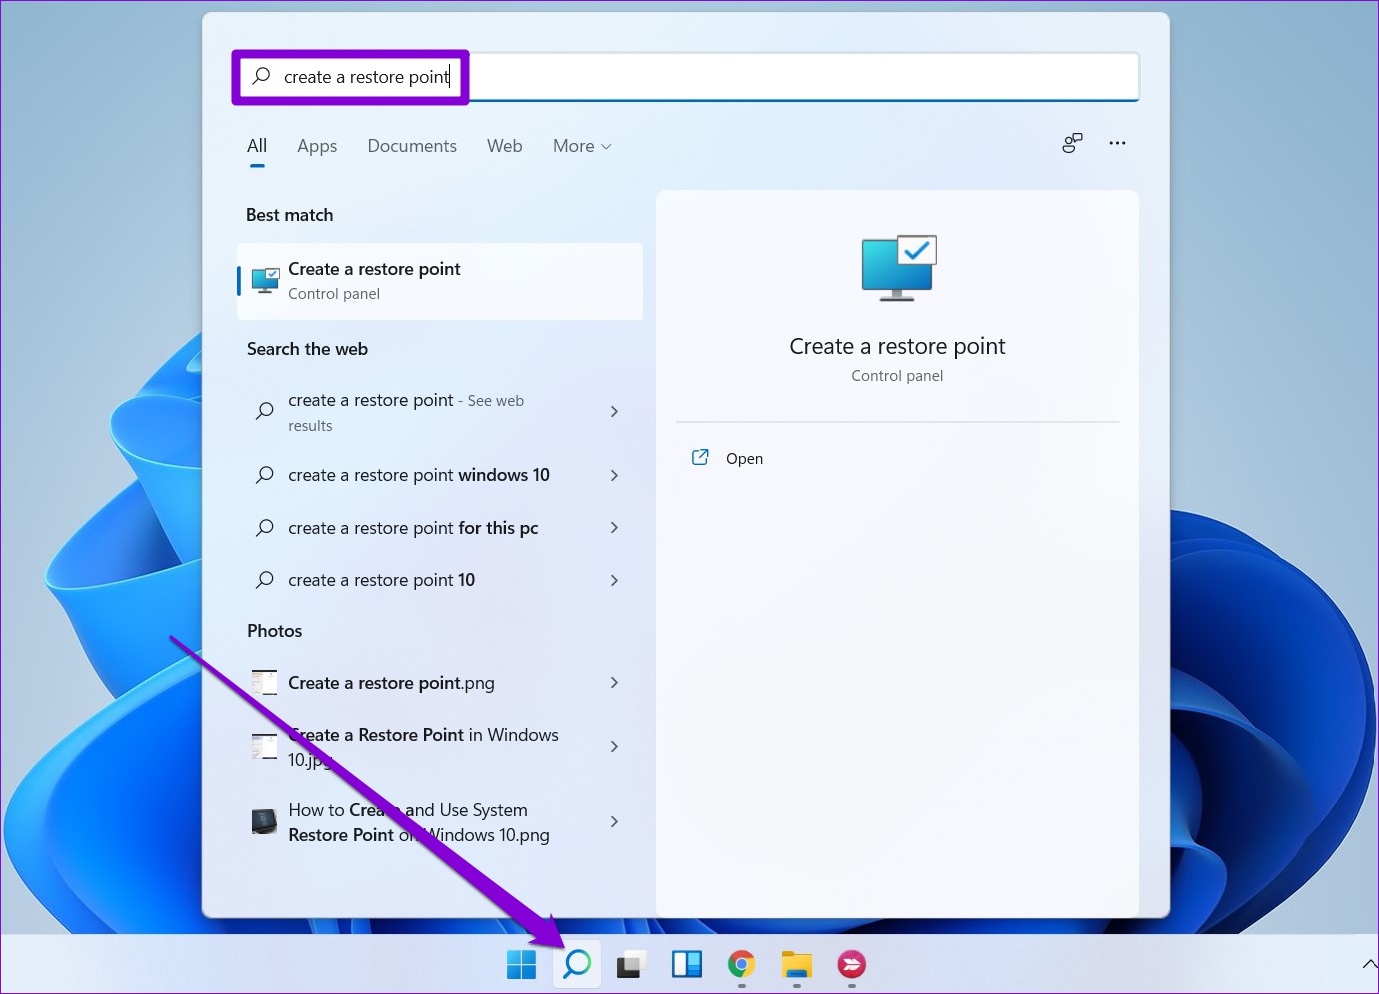
Step 1: Click the Windows Search icon in the taskbar, type create a restore pointand select the first result that appears.
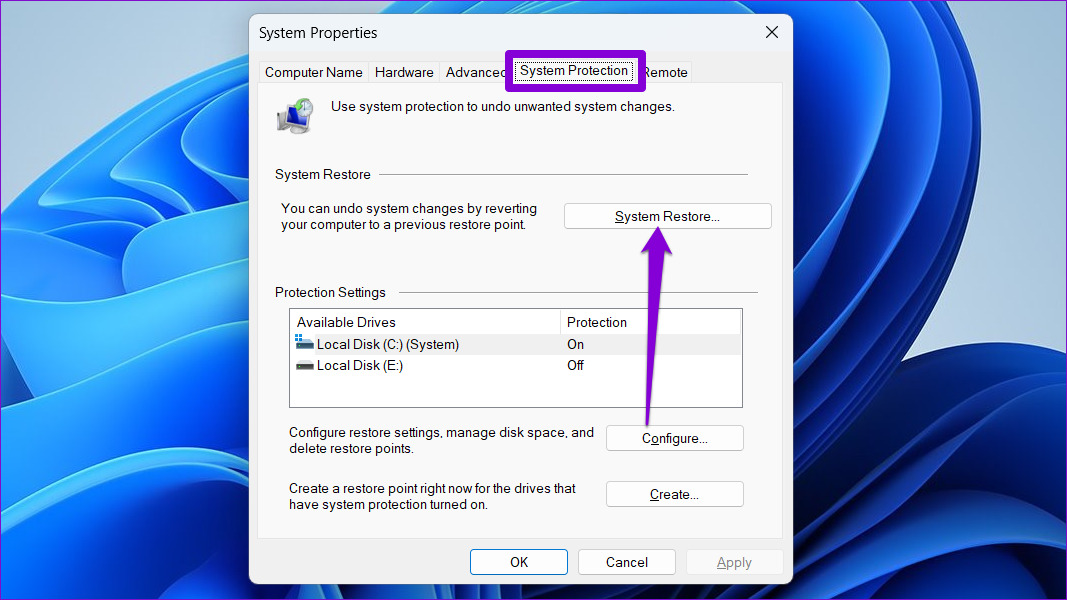
2nd step: Under the System Protection tab, click the System Restore button.
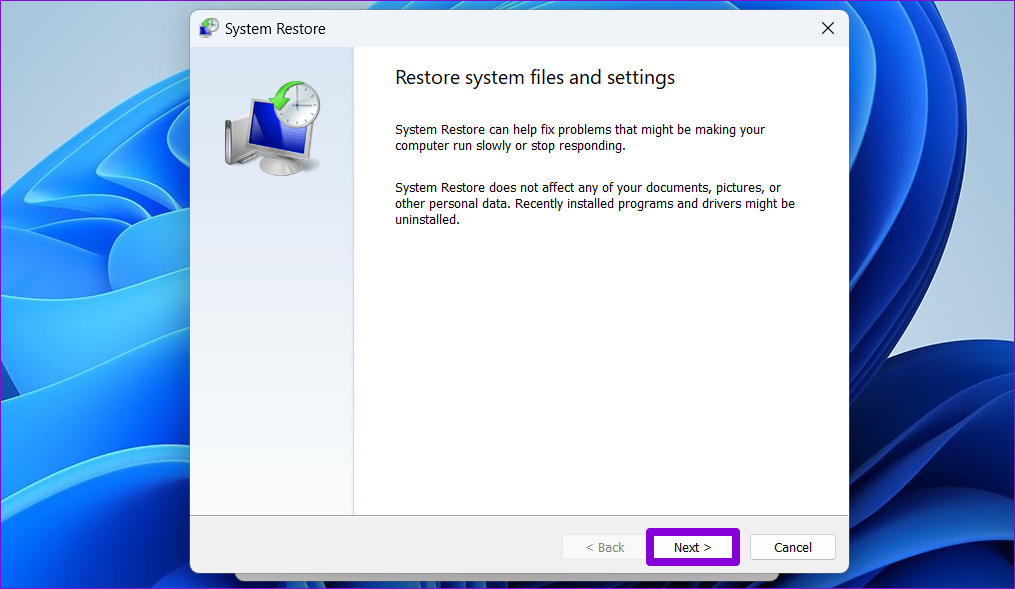
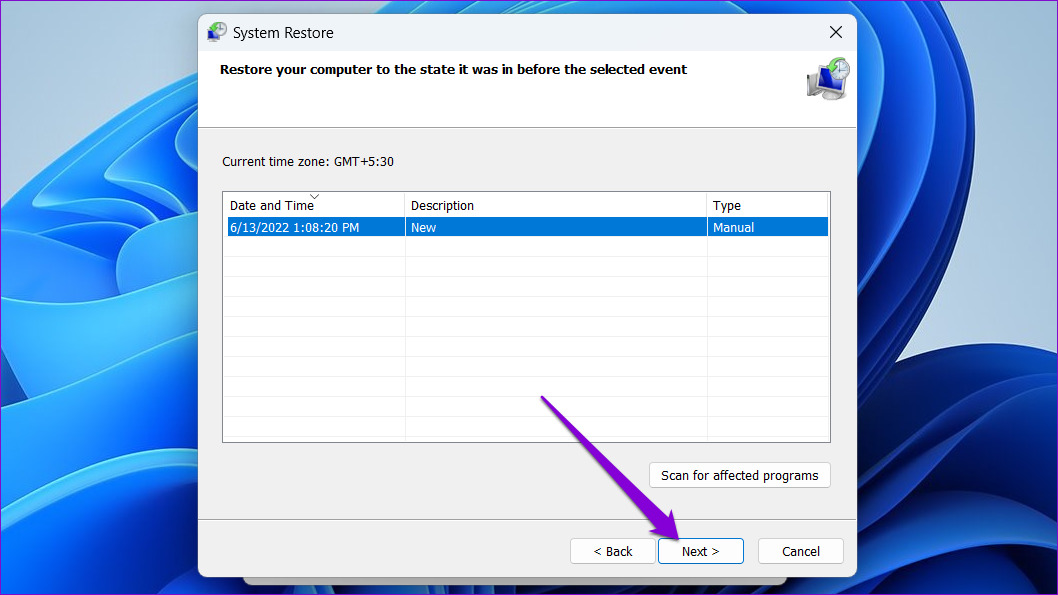
Step 3: Click Next.
Step 4: Select the restore point before the error first occurred. Then press Next.
Step 5: Finally, click Finish.
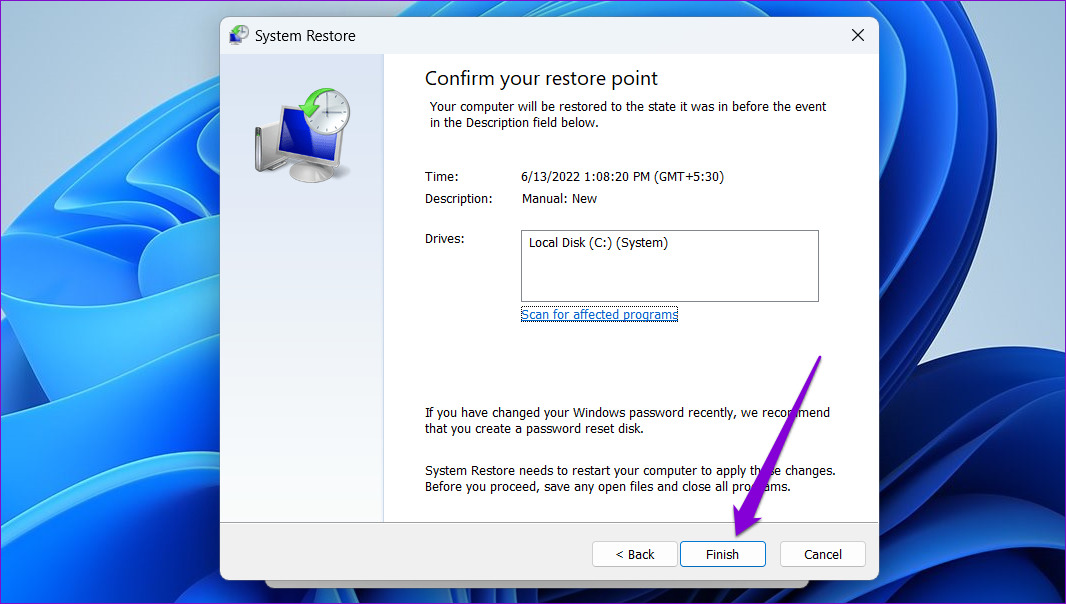
Your PC will restart and restore its previous state. After that, runtime errors should no longer bother you.
No more interruptions
Although runtime errors may appear with various error codes, you can deal with most of these errors using the solutions above. Go through the above fixes one by one and let us know which one worked for you in the comments below.
