The Windows registry is not something you would tickle every day. When Windows is not working properly, you need to clean the registry, but dumping the wrong file during this process can cause the system to crash or become corrupted. So, in this article, we will show you three ways to safely clean registry in Windows 10 and 11.

Let’s start by defining what a Windows registry is. It is basically a complex database containing information about your computer’s hardware and software. These entries can potentially cause you big problems if not cleaned properly. Let’s dig in to understand better.
What Causes Registry Errors in Windows
There are several reasons why registry errors can occur. In most cases, errors are caused by installing or uninstalling software. It often creates new registry entries when software is installed. But when software is uninstalled, these entries are not always removed. This causes errors.
Another common cause of registry errors is the buildup of junk files and invalid entries over time. These can be caused by a variety of things, such as closing programs incorrectly, installing/uninstalling programs without using the correct tools, etc.
Over time, as more and more entries are added to the registry, it can become bloated and inefficient. This can cause registry errors and slow down your computer’s performance. So,
Create a backup of registry files
As a precaution, before cleaning the registry, you should take a backup of the registry. You can use this backup to restore the registry back to its original state in case something goes wrong.
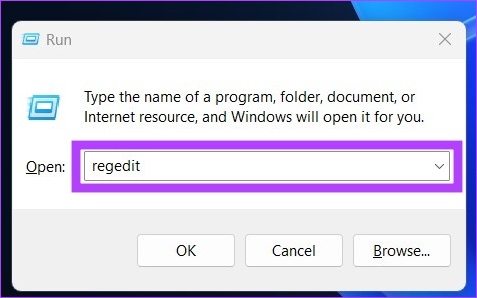
Step 1: Press ‘Windows Key + R’ and type the following command to open Registry Editor.
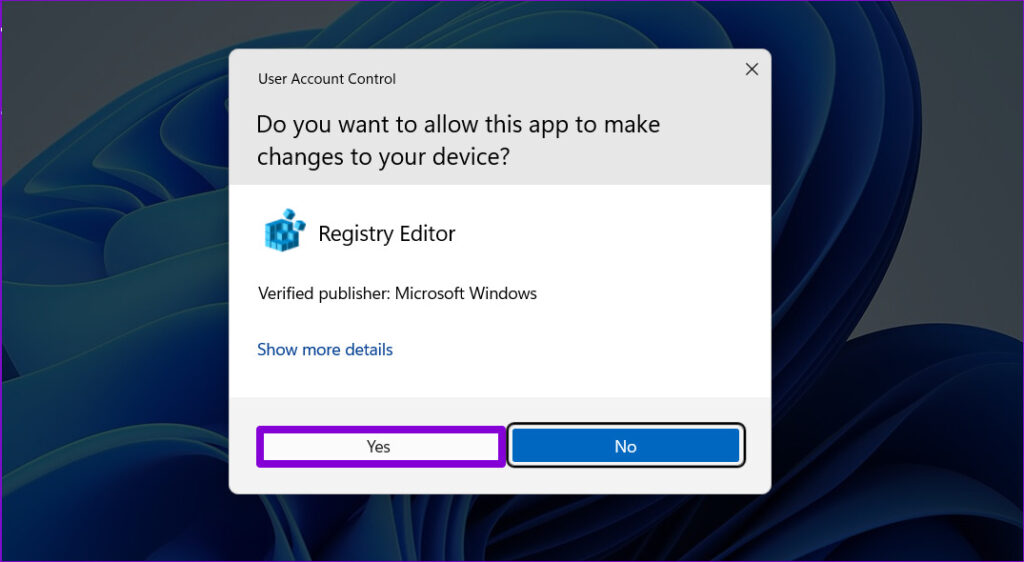
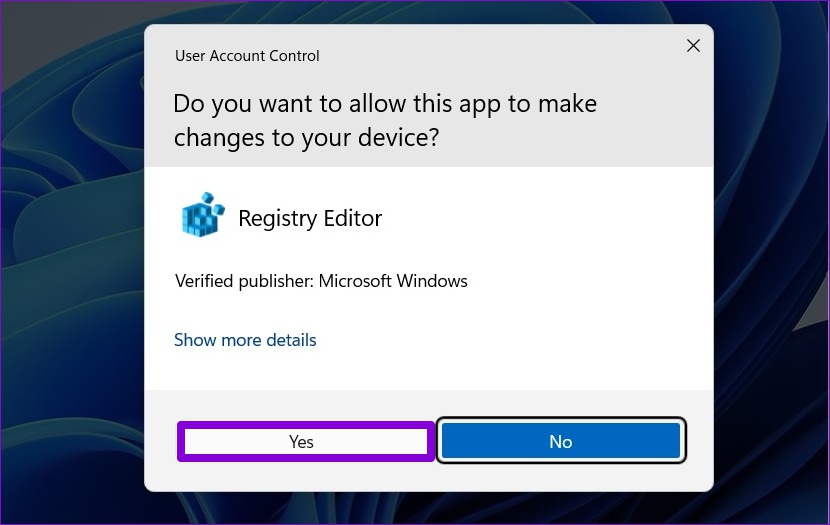
Regedit2nd step: Then click Yes when prompted.

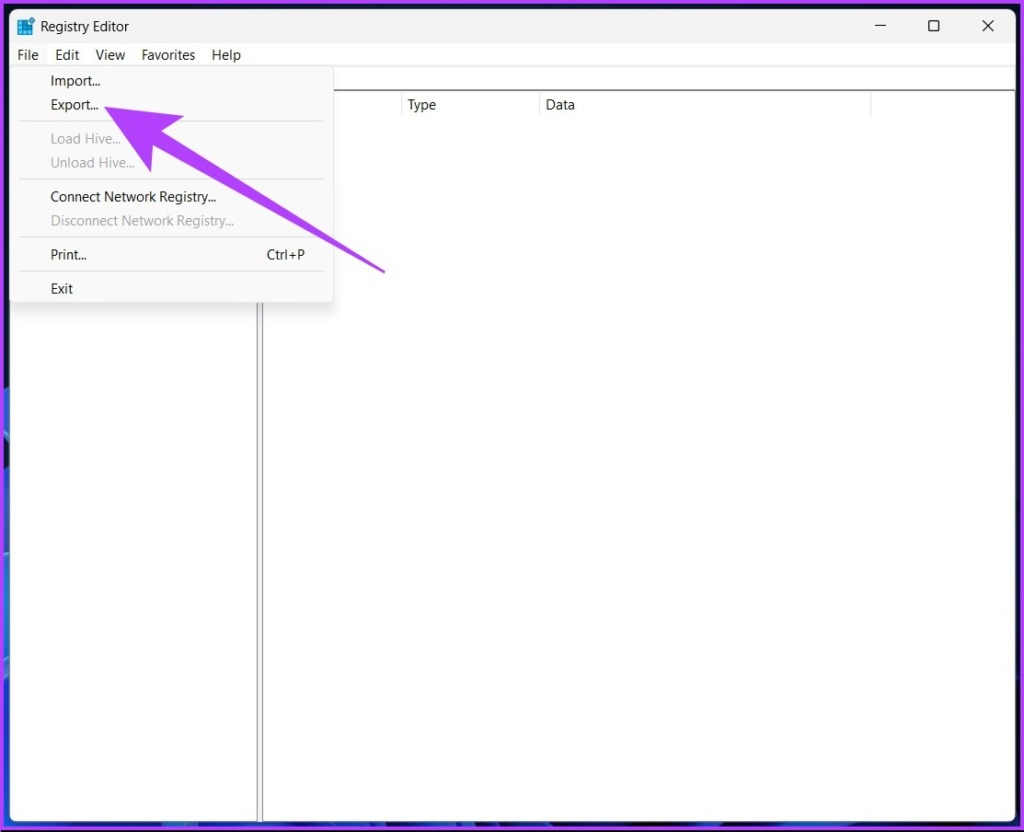
Step 3: Go to the File menu and select Export from the drop-down list.
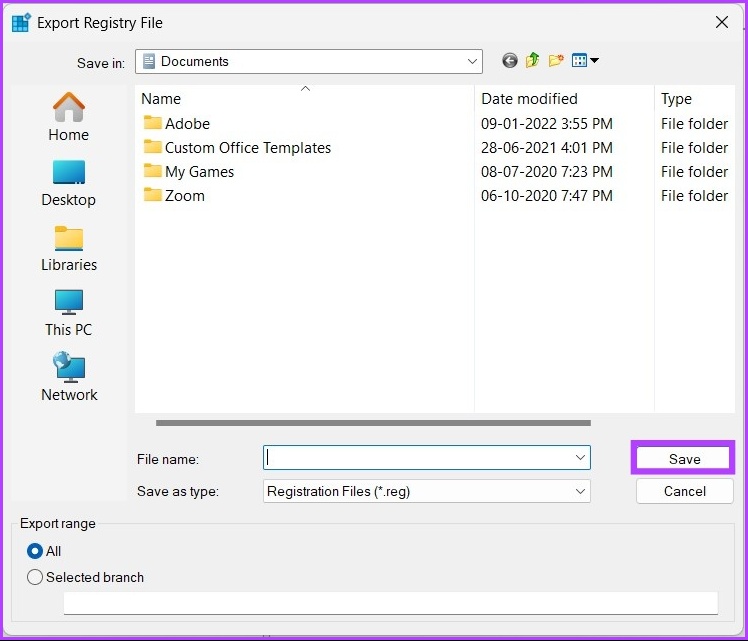
Select all of your export ranges to back up the entire registry. However, if you modify a specific branch, you can make a backup for it.

Step 4: Select the location and file name and click Save.

Sometimes while importing you may see a registry editor cannot import file error, and one of the common reasons is the location of the file. So we strongly recommend that you store this backup file on a flash drive or external hard drive for safety.
Once done, let’s move on to cleaning the Windows Registry.
How to manually clean the Windows Registry
Let’s discuss the different ways to clean the registry in Windows 10 and 11. There are many free registry cleaners, but Windows also has its own built-in registry cleaners that you can use.
To note: All the methods mentioned below are the same for Windows 10 and 11.
1. Using Disk Cleanup
This tool is not specific to cleaning registry files; however, it is a handy tool for cleaning leftover registry files and by far the easiest way to do it.
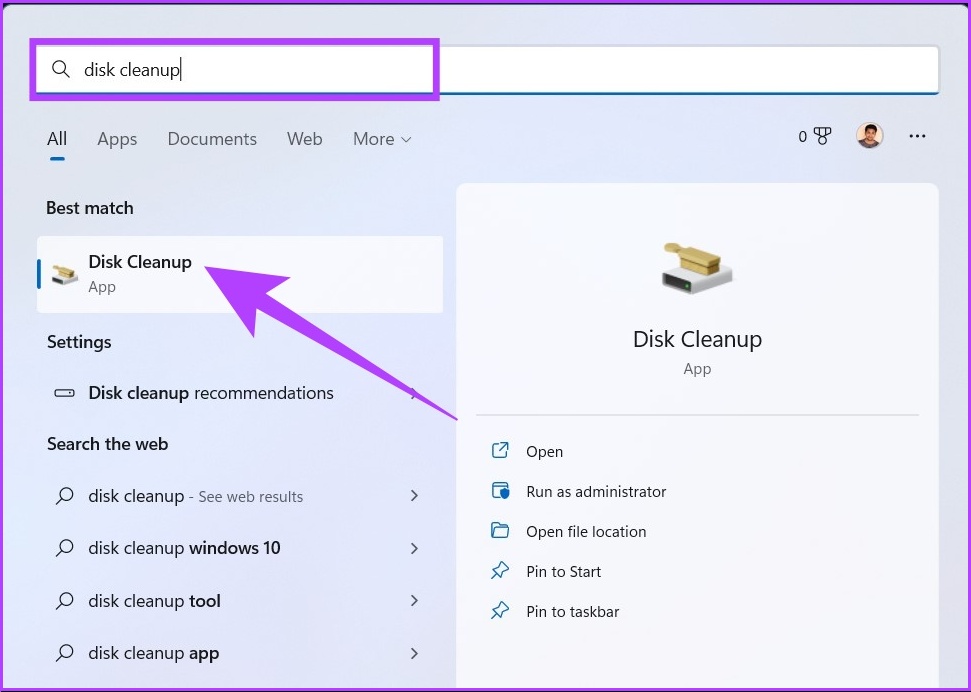
Step 1: Press the Windows key, type Disc cleaningand press Enter.

2nd step: In the “Select the drive you want to clean” prompt, select the drive where the Windows operating system (C:) is installed and click OK.

The tool automatically calculates the amount of space that can be freed up on the selected drive.
Sometimes you may get stuck in the calculation window. A simple undo and restart would work; if not, see different ways to solve the problem.
Step 3: Now click on ‘Clean up system files’, select the necessary folders and press OK.
You can tick all the options; just make sure you don’t have anything in the trash that you would like.
2. Use DISM to Clean Registry Files
DCIM (Deployment Image Servicing and Management) is another Windows tool/command that can fix updates and system errors. It can also repair broken registry entries. Here’s how:
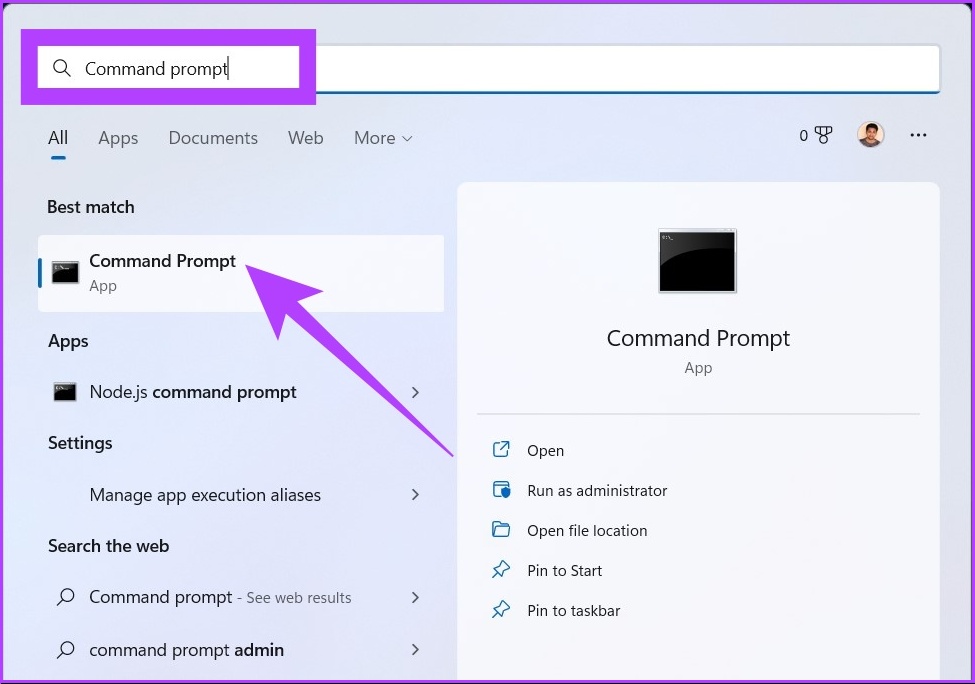
Step 1: Press the Windows key, type Command Promptand click “Run as administrator”.

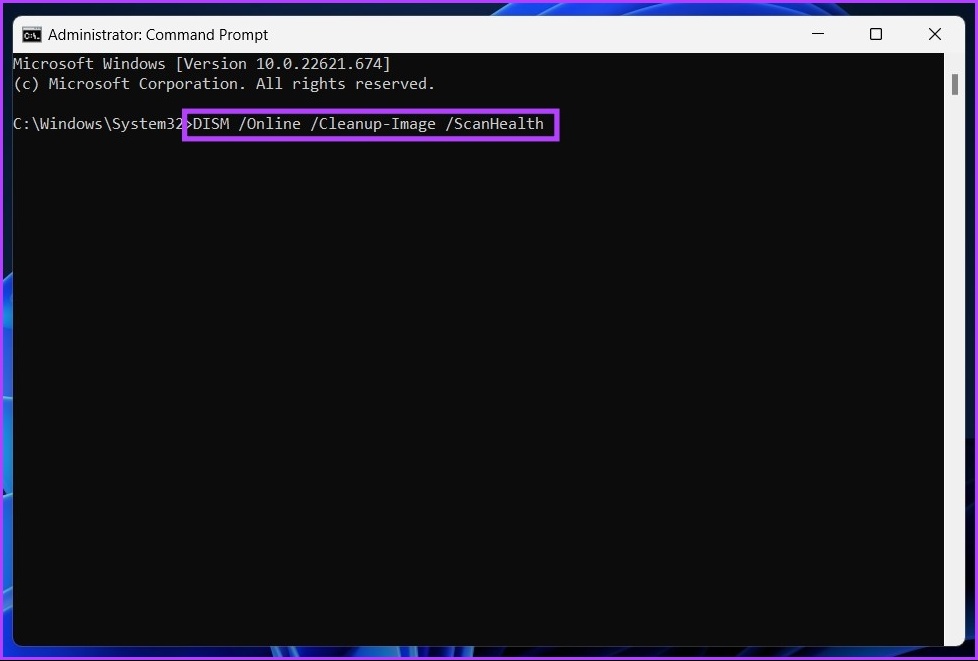
2nd step: Now type the following command in the command prompt.
DISM /Online /Cleanup-Image /ScanHealth
That’s it. The scanner will find and clean all errors and sort them out itself. Note that not all errors are related to the registry, but with this you can fix issues that you didn’t even know existed.
3. Clean the Windows registry using third-party tools: CCleaner
If you are a Windows user, you have probably come across CCleaner, a popular Windows PC cleaning software. This freemium software does a bit of everything, from deleting cookies to flushing temporary files (including registry files).
To note: If you go directly to this method, we recommend that you make a backup of your registry, which we mentioned at the beginning of this article.
Step 1: Download and install CCleaner for free using the link below, and run it.

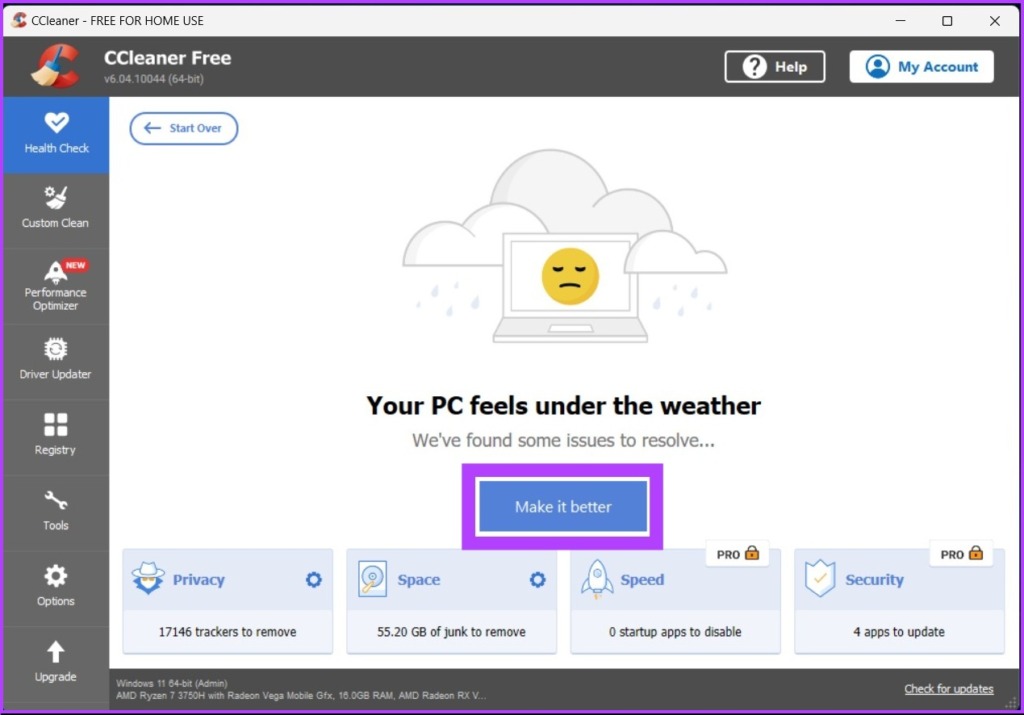
2nd step: Click Start.

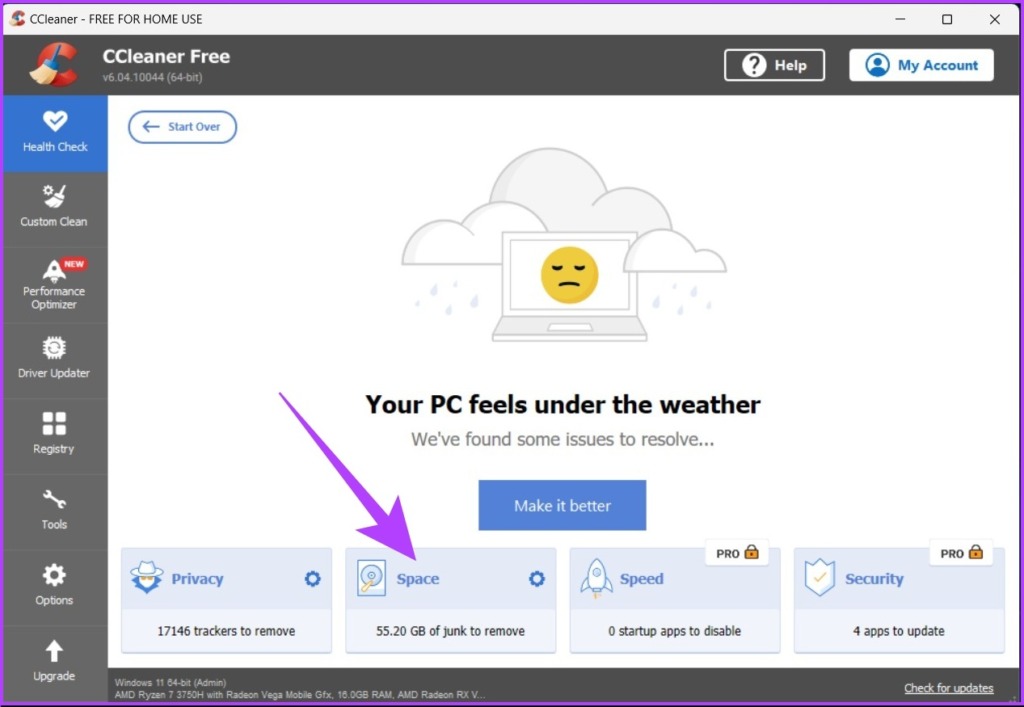
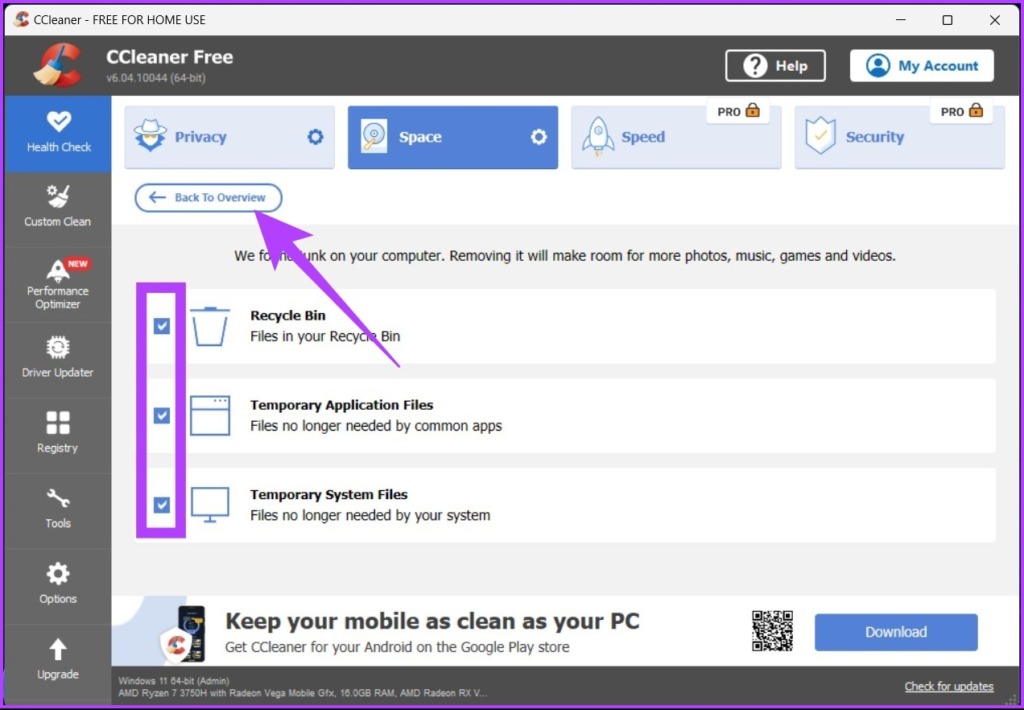
Step 3: Go to Space.

Step 4: check all the boxes (recycle bin, temporary application files and temporary system files) and click “Back to overview”.

Step 5: Now click on the “Upgrade” button.

So. CCleaner will clean your temporary files as well as your registry files. This software offers many other features, which you can explore on your own or check out our guide.
Windows Registry Cleaner FAQ
No, because Microsoft does not support the use of registry cleaners.
Yes, because a fragmented registry directly impacts your computer’s performance and slows it down.
Registry cleaning is essential to prevent your system from crashing or slowing down. For optimal performance, we recommend that you clean your Windows registry every three days.
Quickly get rid of registry files
Registry files play a role in keeping Windows running smoothly, but they are also responsible for system irregularities and crashes. After learning how to safely clean the registry in Windows 10 and 11, you might find it useful to learn how to fix the registry editor when the program stops working properly. Happy cleaning!

