Windows Defender is a built-in security application from Microsoft that scans and protects your computer against malicious agents. You can get detailed information about the scans and detections performed by Windows Defender on the Protection history page. Usually, the protection history log is cleared automatically every 30 days, but if you want, you can speed things up manually.
Clearing the protection history will create additional space on your computer. Also, it can help you fix Windows security when it won’t open. This guide introduces four ways to clear Windows Defender protection history on Windows 11. So, let’s check them out.
1. Clear Windows Defender Protection History Using File Explorer
Like many apps, Windows Defender stores the Protection History log on your computer as an accessible file. The fastest and easiest way to access and delete the Protection History log in Windows 11 is to use File Explorer. Here’s how:
Step 1: Press Windows Key + E to open File Explorer. Click on the Windows operating system drive, which is usually C for most users.
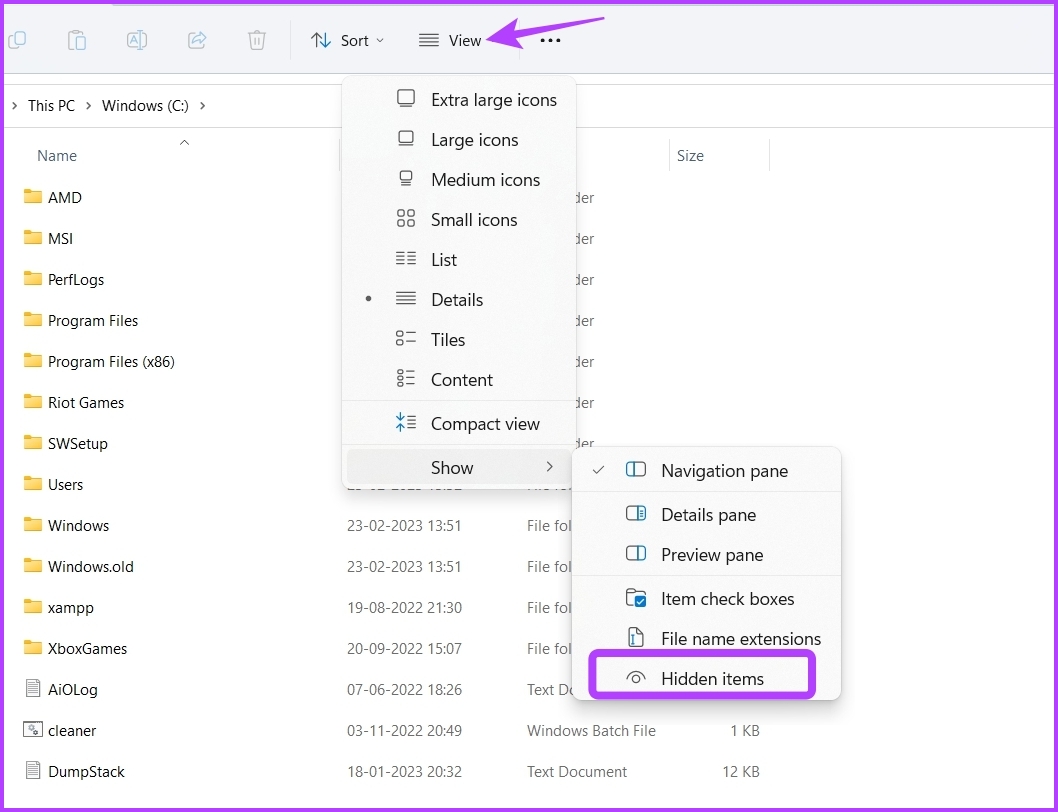
2nd step: Click on the Show option at the top, select Show from the context menu and choose the Hidden Items option from the submenu.
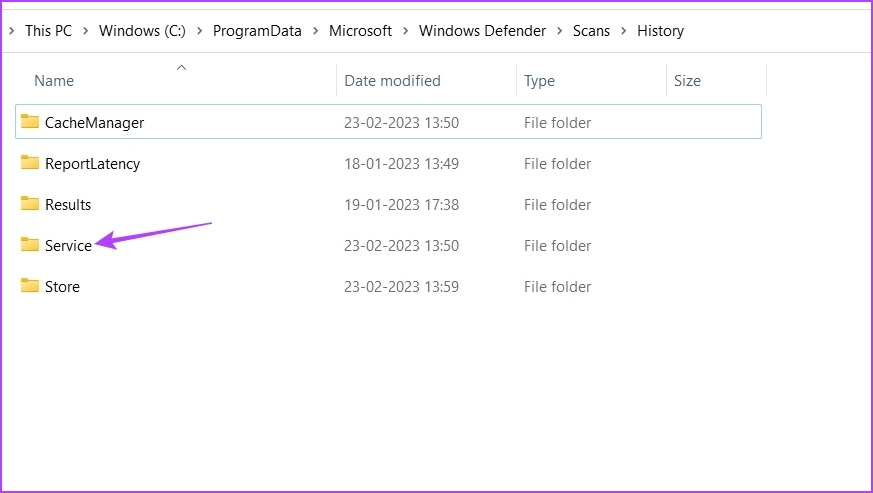
Step 3: Then navigate to the following location or you can copy and paste it into the File Explorer address bar:
C:ProgramDataMicrosoftWindows DefenderScansHistory
Step 4: Click on the Services folder.
Step 5: Press Control + A keys to select all and press Shift + Delete key to permanently delete all history files.

You will gain storage space if this is your first time deleting Windows Defender protection history from your computer.
2 . Clear Windows Defender Protection History Using Group Policy Editor
Group Policy Editor is a Windows utility from which you can manage and edit important Windows policies. However, Group Policy Editor is not available in Windows 11 Home Edition. If you are using the edition on your computer, skip this solution.
To use it to clear the protection history log, follow the instructions below:
Step 1: Press Windows + R keys to open the Run dialog box.
2nd step: Type gpedit.msc in the search bar and click OK.

Step 3: In the Group Policy Editor, navigate to the following location in the left sidebar:
Computer Configuration > Administrative Templates > Windows Components > Microsoft Defender Antivirus > Scan
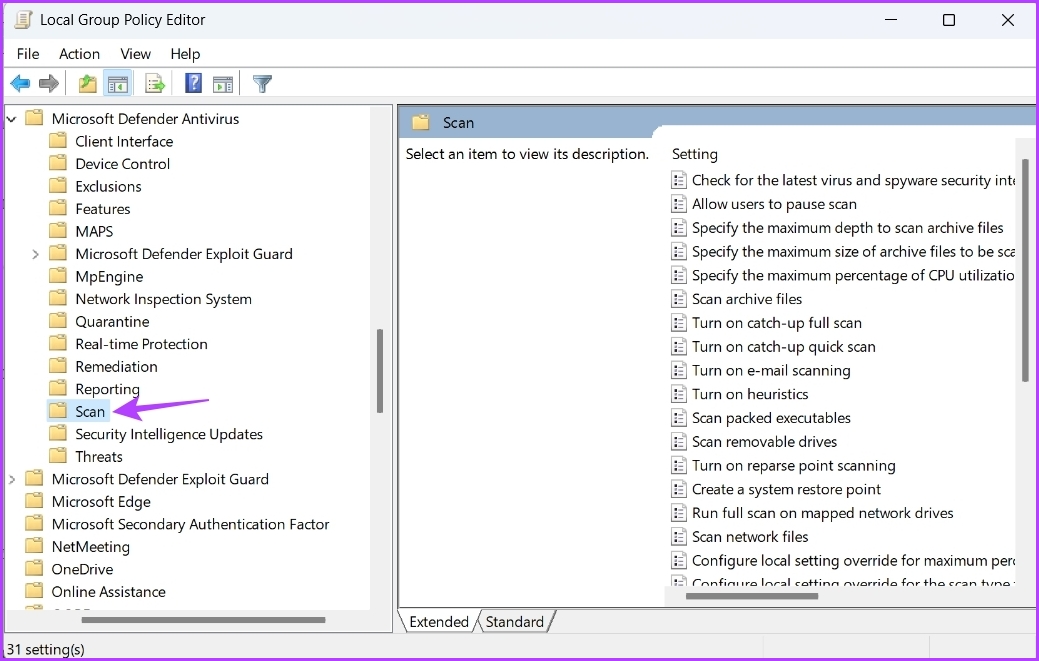
Step 4: In the right pane, double-click “Enable deleting scan history folder items”.
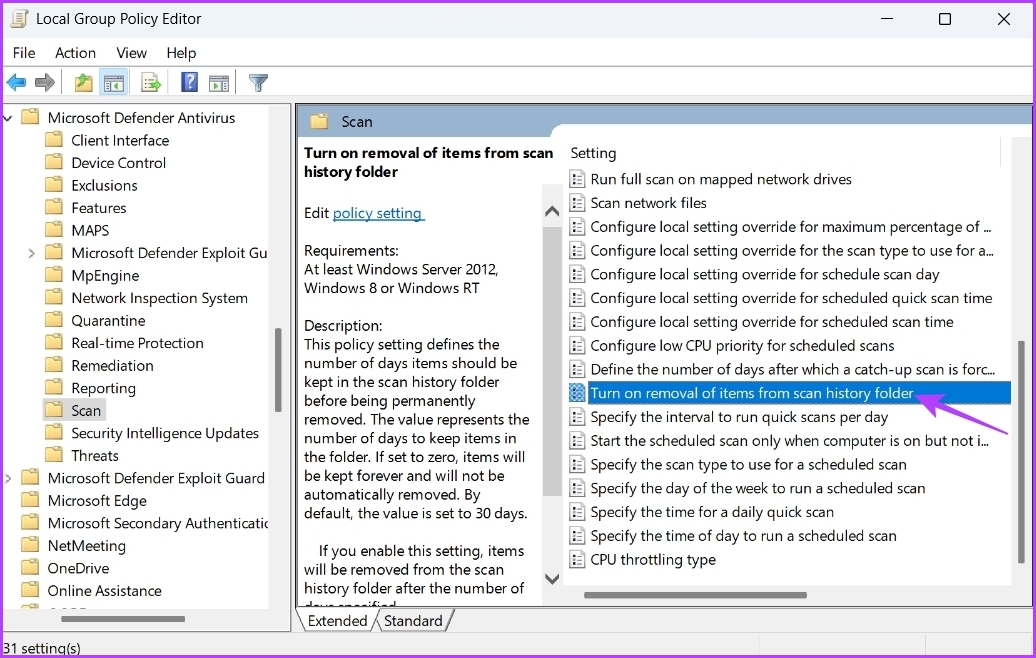
Step 5: Choose Enabled. Also assign a number of days after which the history is automatically cleared. By default, it is set to 30 days.

Step 6: Click Apply and OK.
3. Clear Windows Defender Protection History Using Event Viewer
Windows stores a message log of system functionality such as errors, warnings, information, and other messages in Event Viewer. So, another quick way to clear Windows Defender protection history is to use Event Viewer. Here’s how:
Step 1: Press the Windows key to open the Start menu, type Event Viewer in the search bar, then choose Open in the right pane.
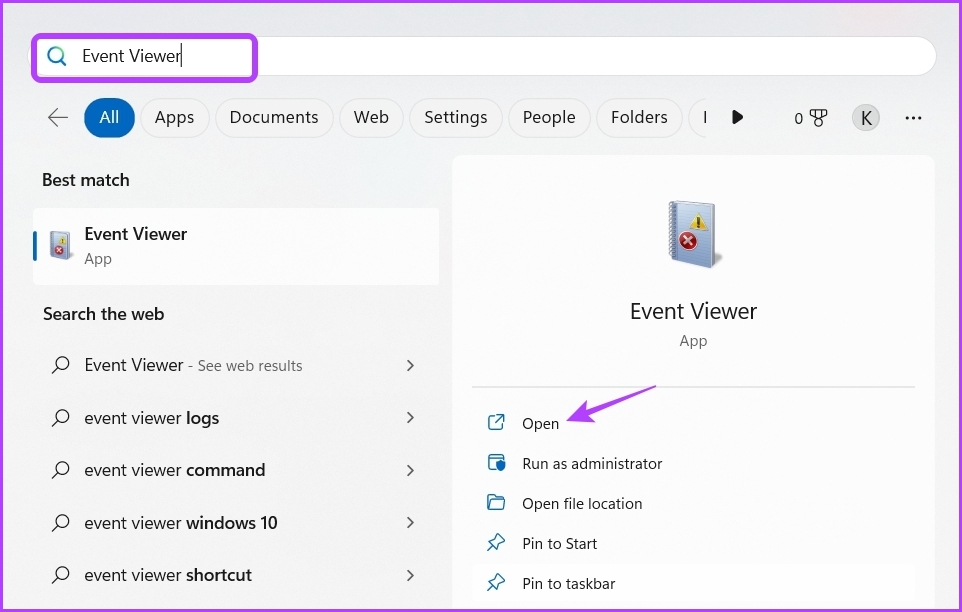
2nd step: Click the drop-down arrow in front of Apps and Services logs in the left sidebar.

Step 3: Click the drop-down arrow next to the Microsoft folder in the left sidebar.

Step 4: Now click on the drop-down arrow before the Windows folder in the left sidebar.
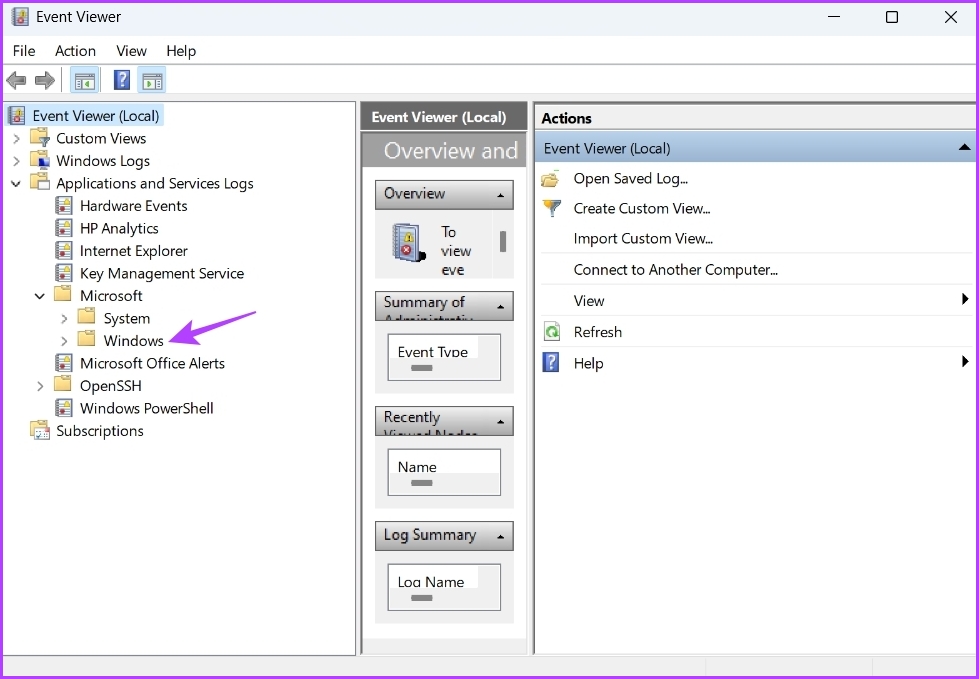
Step 5: Locate and double-click the Windows Defender folder in the left sidebar.

Step 6: Right-click the operational log and choose Clear Log from the context menu.

Step 7: Choose “Save and Clear” in the confirmation box that appears.

4. Clear Windows Defender Protection History Using Windows PowerShell
Windows PowerShell is a command-line tool you can use to manage programs, troubleshoot system issues, and more. You can also use it to clear the Windows Defender protection history log on Windows 11. Here’s how:
Step 1: Open the Start menu, type WindowsPowerShell in the search bar, then choose Run as administrator in the right pane.

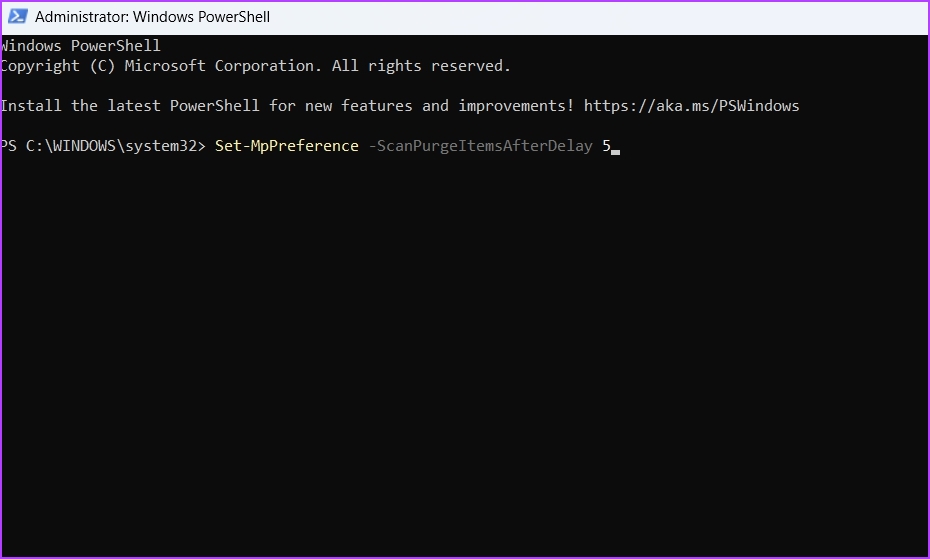
2nd step: In the elevated PowerShell window, type the following command and press Enter. Be sure to replace Days in the command with the number of days after which you want the protection history log to be cleared automatically. For example, we chose 5 days.
Set-MpPreference -ScanPurgeItemsAfterDelay Days
How to Fix Protection History Crash Issue
Does Protection History crash every time you open it in Windows 11? If so, you might be above to see the history first. Follow the solutions below to fix Protection History crashing issue in Windows 11.
1. Temporarily disable real-time protection
The best way to fix the protection history crashing issue is to temporarily disable real-time protection on the Windows security app. Here is exactly what you need to do:
Step 1: Open the Start menu, type Windows Securityand press Enter.

2nd step: Choose Virus & threat protection from the left sidebar.
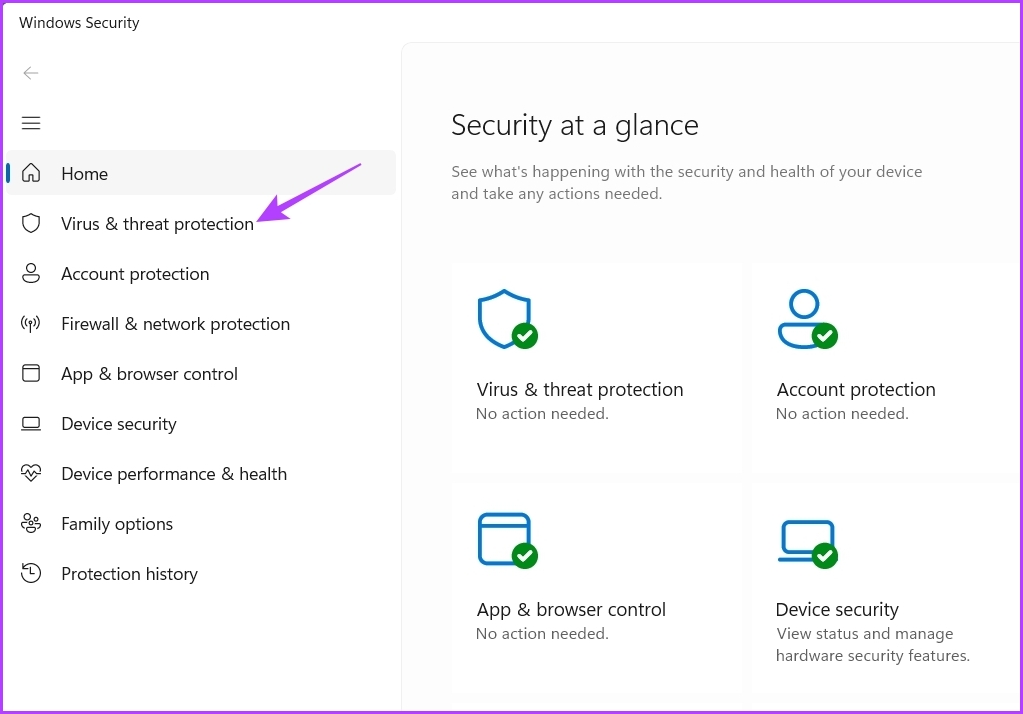
Step 3: Click Manage Settings.

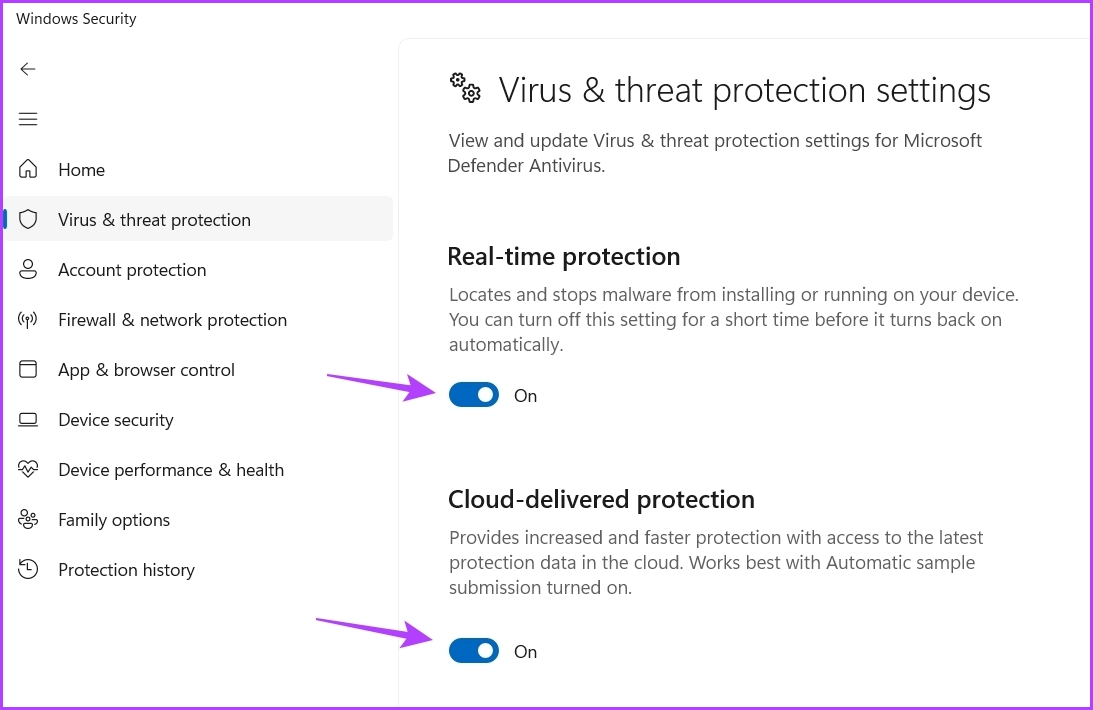
Step 4: Disable the toggle under Real-time protection and Cloud-delivered protection.

Step 5: Press Windows + E keys to open the File Explorer file and navigate to the following location or you can copy and paste it into the address bar:
C:ProgramDataMicrosoftWindows DefenderScansHistory

Step 6: Open the Windows Security app and enable real-time protection and cloud-delivered protection.
2. Reset Windows Security
If you are still having the problem, you can reset the Windows Security app as a last resort. You can do this by following the steps below.
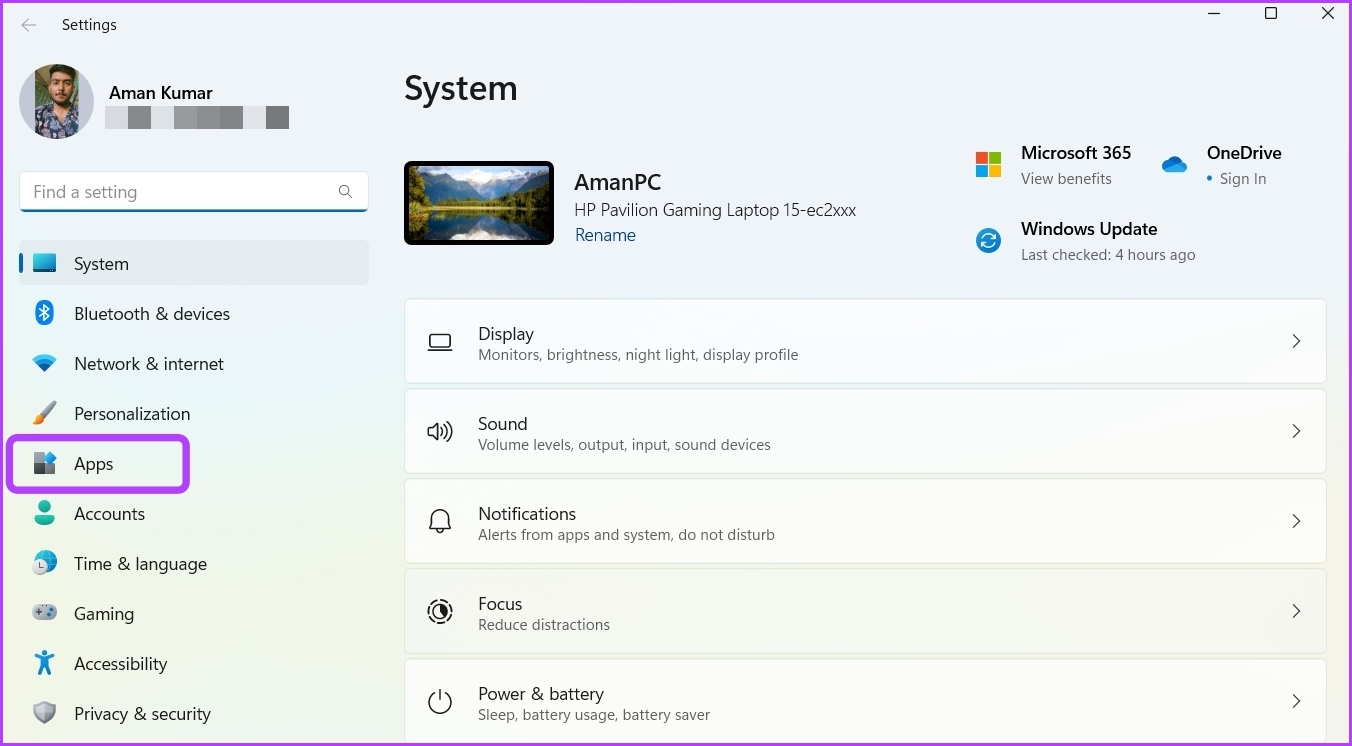
Step 1: Press Windows + I to open the Settings app.
2nd step: Choose Apps from the left sidebar.
Step 3: Select Installed apps.

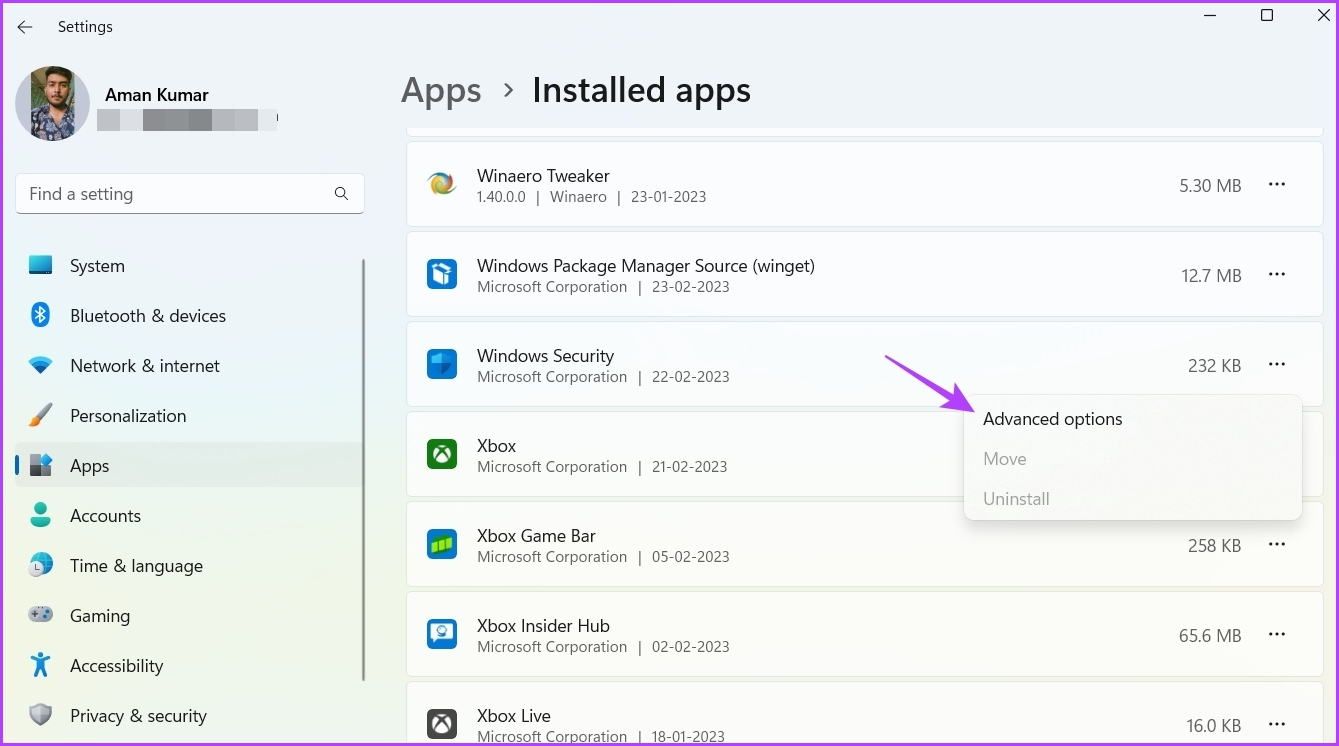
Step 4: Click on the three horizontal dots next to Windows Security and choose Advanced options.
Step 5: Click the Reset button.

Keep protection history clean
Whether it’s temporary system files or Windows Defender protection history logs, you should keep clearing them regularly. This ensures that your system always delivers the best performance. You can clear Windows Defender protection history by following any of the methods mentioned above.
