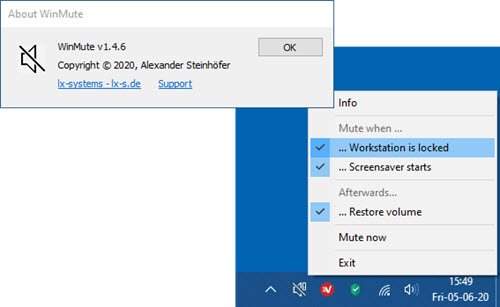
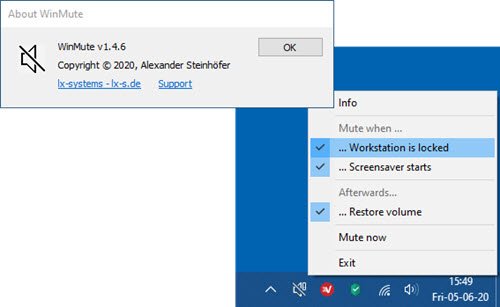
Most users, when watching movies or listening to music on their Windows 10 PC, decide to take a break, regardless of the media player or application used, the media will continue to play with audio / l audio even after locking the system. The Windows 10 system lock feature simply prevents other users from accessing the PC while away from the PC. This does not end the ongoing tasks and processes. In this article, we will show you how to automatically turn off the sound on the system lock with the WinMute application on Windows 10.
In Windows 10, the new sound settings have improved advanced features such as the ability to control audio preferences for individual apps. And it also replaces the volume mixer available in previous versions. Using this, you can choose the volume levels for each individual application as well as the default input and output devices for each.
Windows sound settings memorize the volume level of each device individually.
If you connect headphones, the volume level will immediately change to the previous level when it is last used. If you are watching movies with the audio system connected, you may want to consider automatically disabling the system lock.
There are apps like Netflix that automatically pauses audio when it is minimized or when the system locks up.
Automatically mute the sound on System Lock with WinMute
WinMute is a free open source application compatible with all media player applications and web browsers.
The WinMute application does not mute the media player application per se – it rather controls the volume at the system level – it simply mutes the audio from the system. This app does not pause the video or audio being played when the system locks up. If the system locks up, the sound will be cut but the video will continue to play.
Install WinMute to mute the system lock
Download the WinMute app of GitHub and extract the Zip file.
Open the folder and right click on the application and create a shortcut.
Now copy the shortcut and paste it into the Windows startup folder.
Then double-click on the WinMute application and check if the application works correctly or not. You may receive the following error message:
The program cannot start because VCRUNTIME140.DLL is missing from your computer
You can uninstall the WinMute app and also delete your personal WinMute settings at any time – just navigate to or navigate to the registry hive location below and delete the lx-systems folder.
HKEY_CURRENT_USERSoftwarelx-systemsWinMute
Exit the system tray application from the taskbar, then proceed with the removal WinMute.exe and ScreensaverNotify.dll file from your hard drive.
And that’s all about how you can automatically mute the sound / sound on the system lock with WinMute on Windows 10!

