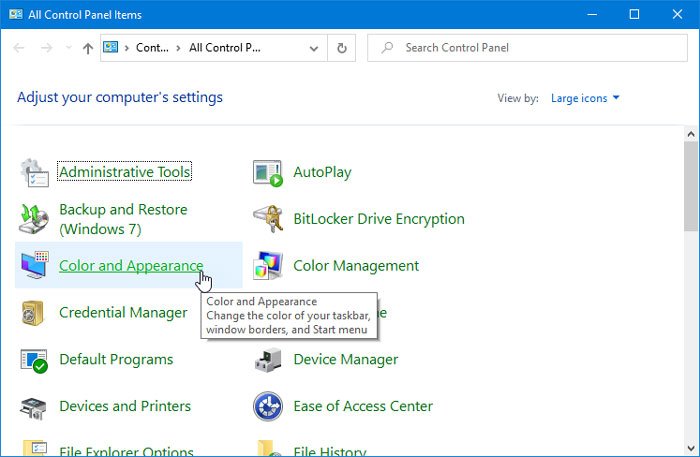
In the early days of Windows 10, the Color and appearance The panel was handy for changing the color of various elements of the user interface. However, users can now do the same from Windows settings. However, if you want to use the same old options, you can add Color and Appearance to Control Panel in Windows 10 using this tutorial.
If you need to change the color of the taskbar or the color of the title bar, you can open the Windows Settings panel and do so. However, it is also possible to change the taskbar, window borders and color of the Start menu using Color and appearance. It is an old but practical tool, which can allow you to define any custom color according to your needs. If you need to access this tool often, you can include this option in Control Panel and open it from there.
To do this, we will use the Registry Editor. Before using this tool, it is recommended to backup or export the registry files and create a system restore point to be on the safe side.
How to add color and appearance to the control panel
To add color and appearance to the control panel in Windows 10, follow these steps:
- Open Notepad on your PC.
- Paste the registry code into Notepad.
- Click it File option and select Save as from the list.
- Choose a location where you want to save.
- Give it a name with the extension .reg.
- To select All the files of Save as type.
- Click it to save
- Double-click the .reg file.
- To select Yes in the UAC window.
- Click on Yes in the confirmation window.
- Look for color and appearance in the control panel.
Let’s see in detail all these steps.
At first, you need to create a .reg file. To do this, open Notepad on your computer and paste the following text:
Windows Registry Editor Version 5.00

[HKEY_CLASSES_ROOTCLSID{106ee807-9e5d-451b-a9c5-74908630cefb}]
@="Color and Appearance"
"InfoTip"="Change the color of your taskbar, window borders, and Start menu"
"System.ApplicationName"="Microsoft.Personalization"
"System.ControlPanel.Category"=dword:00000001
"System.Software.TasksFileUrl"="Internal"

[HKEY_CLASSES_ROOTCLSID{106ee807-9e5d-451b-a9c5-74908630cefb}DefaultIcon]
@="%SystemRoot%System32imageres.dll,-197"

[HKEY_CLASSES_ROOTCLSID{106ee807-9e5d-451b-a9c5-74908630cefb}ShellOpencommand]
@="explorer shell:::{ED834ED6-4B5A-4bfe-8F11-A626DCB6A921} -Microsoft.PersonalizationpageColorization"

[HKEY_LOCAL_MACHINESOFTWAREMicrosoftWindowsCurrentVersionExplorerControlPanelNameSpace{106ee807-9e5d-451b-a9c5-74908630cefb}]
@="Color and Appearance"
Click it File button and select Save as option.
Now select a location where you want to save the file. After that, give it a name with the extension .reg (for example, twc.reg), choose All the files of Save as typeand click on the to save button.
Then, you need to double-click this .reg file to add the values in the Registry Editor.
You may receive the UAC prompt. If yes, you can click on the Yes button. Then a confirmation window appears, and you have to click on the Yes button again.
After finishing the last step, you open the Control Panel to find the Color and Appearance option.
If you want to remove this option from Control Panel, you need to open Registry Editor on your computer, go to this path-
HKEY_CLASSES_ROOTCLSID
and delete this key:
{106ee807-9e5d-451b-a9c5-74908630cefb}Then go on this path-
HKEY_LOCAL_MACHINESOFTWAREMicrosoftWindowsCurrentVersionExplorerControlPanelNameSpace
and delete this key:
{106ee807-9e5d-451b-a9c5-74908630cefb}That’s all!


