If you use the Calendar feature in the Outlook desktop app on your Windows 10 PC and want to export Outlook calendar to CSV, here’s how. Outlook comes with built-in functionality that allows users to export all calendar entries to a Comma separated value so that users can manage them manually. Whether you have five appointments in a month or fifty, you can export and manage them all from any PC.
The calendar in Outlook helps you manage all appointments, meetings, and it works as a reminder as well as a task list application. If you are switching from Outlook Calendar to something else or just want to get a list of all the scheduled entries that you have in your Outlook Calendar account, you can use this step by step guide. There is no need to use a third party service as this can be done using the built-in options.
Export Outlook calendar to CSV file
To export the Outlook calendar to CSV format, follow these steps:
- Open Outlook and click File.
- Select the Open and Export option.
- Click the Import / Export button.
- Select Export to file from the list.
- Select Separate values by command.
- Choose Calendar and click the Next button.
- Select a path and give it a name.
- Select the action you want to perform.
- Choose a date range.
- Save your file.
Read on to learn the steps in detail.
First, open Outlook on your PC and click on the File visible button in the upper right corner. After that select the Open and export option and choose Import / Export from the list.
You can now see some of the options listed in a pop-up window. You must select Export to file in the list and click on the Next button.
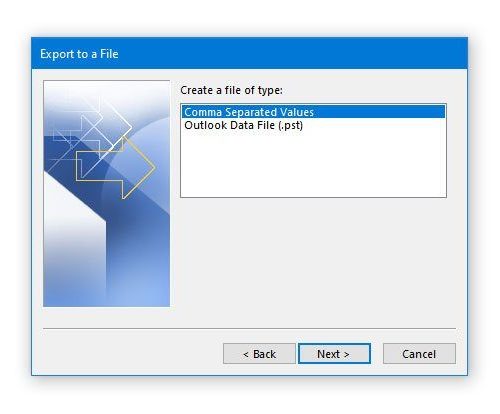
Then you will have two options, namely CSV and PST. You must choose Comma separated values between these two options and click on the Next button.
Now choose Calendar from the list. If you expand it, you will get other options so you can select something individually. For example, you can choose birthdays, appointments, holidays, etc. Do it according to your needs and click on the Next button.
After that, you need to choose a path where you want to save the comma separated values or the CSV file. You must also give it a name. To do this, click on the Browse , select a location on your computer and enter a name as desired.
After clicking on Next button, it will show the action that is about to be performed. Make sure there is a check mark in the respective action. If yes, click on finish and choose a date range.
After doing this and clicking the OK button, it will be saved to the preset location.
Now you can open the .csv file with Excel or Google Sheets to check all appointments or entries.


