Windows keeps all your deleted files in the Recycle Bin if you change your mind or accidentally delete something. Over time, the amount of data the Recycle Bin accumulates can be enormous. Therefore, it is essential to empty the Trash regularly.

However, if Windows won’t let you empty the Trash or you’re curious about other methods, you’ve come to the right place. This article will cover different ways to clear Recycle Bin in Windows 11. So, let’s have a look.
1. Empty the trash via the context menu
Let’s start with a method that most of you may be familiar with. The fastest way to empty the Recycle Bin in Windows is to use the context menu. Right-click the Trash icon and select Empty Trash from the resulting menu.

You can also right-click anywhere on an empty spot in the Trash window and select the Empty Trash option.

2. Empty Recycle Bin Using File Explorer Toolbar
Another easy way to empty the Recycle Bin in Windows 11 is to use the File Explorer toolbar. Open the Trash on your PC and select the Empty Trash option from the toolbar at the top. If you don’t see the option, maximize the Trash window.

3. Empty Trash via Settings app
If the above methods don’t work, you can try clearing files from the Recycle Bin from the Settings app. With this method, you can also configure Windows to automatically empty the Recycle Bin.
Step 1: Open the Start menu and click on the gear icon to launch the Settings app.

2nd step: On the System tab, click Storage.

Step 3: Click Temporary Files.

Step 4: Check the Trash box and uncheck everything else. Next, click the Delete Files button at the top.

Wait for Windows to empty the Recycle Bin.
Alternatively, you can also use the Storage Sense feature on Windows to automatically empty the trash. To do this, return to the storage settings page and click on Storage Sense.

Activate the option “Automatic cleaning of user content”. Next, use the drop-down menu under Run Storage Sense to specify how often Windows should run this tool. Use the Trash drop-down menu to specify how long a file should remain in the Trash before Storage Sense deletes it.

4. Empty Trash with Disk Cleanup Utility
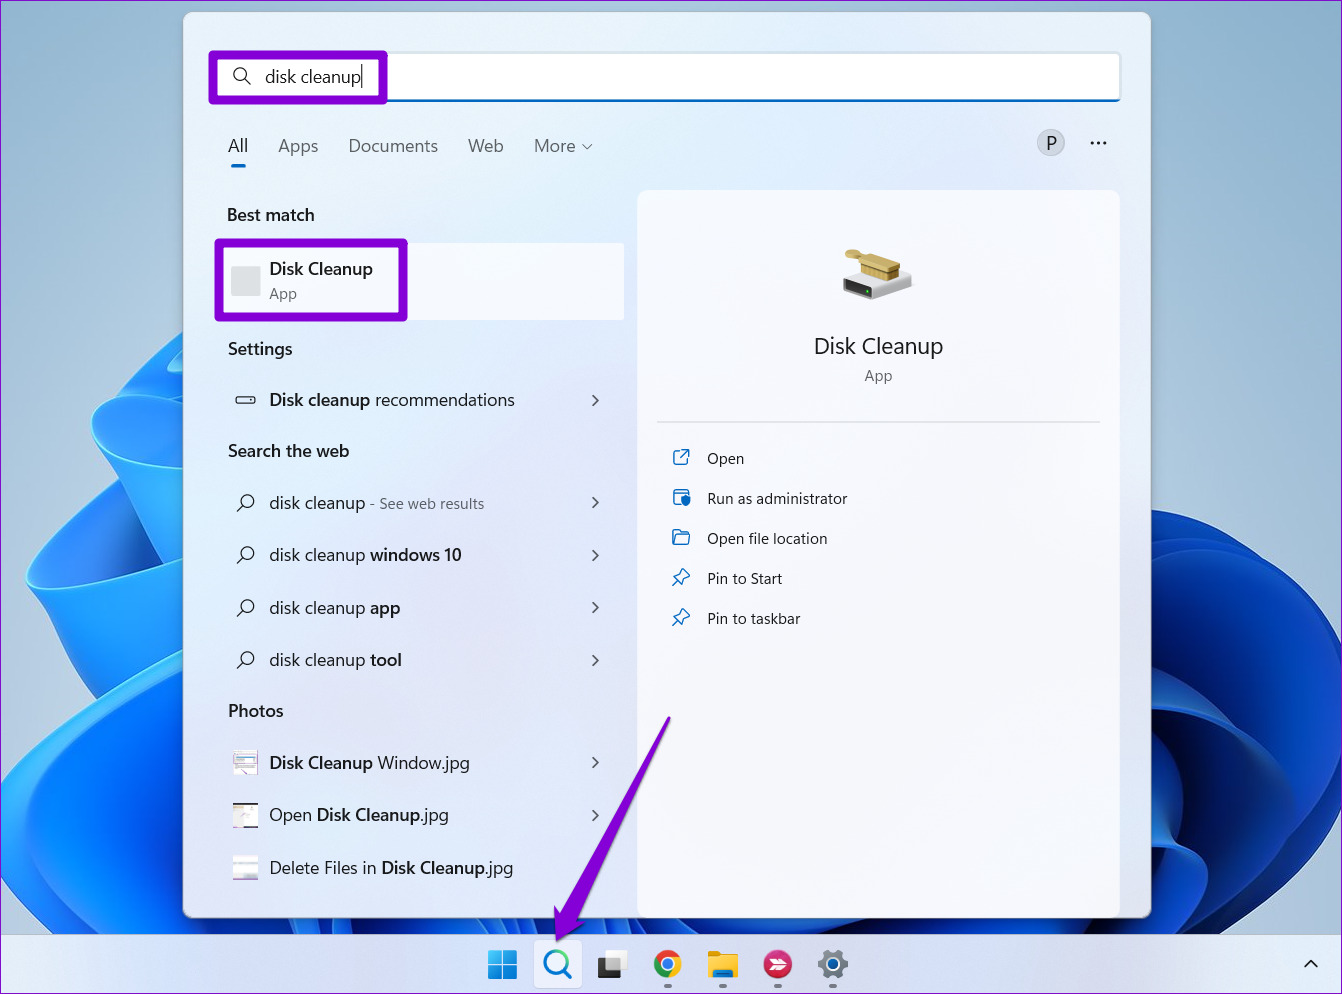
Disk Cleanup is a useful Windows tool for removing temporary files from your system. You can also use it to empty the Trash if the above methods don’t work. Here’s how.
Step 1: Click the Search icon on the taskbar, type disc cleaningand select the first result that appears.

2nd step: Use the drop-down menu to select your primary drive and click OK.

Step 3: Under Files to delete, check the Recycle Bin box. Uncheck everything else and click OK.

Step 4: When a confirmation prompt appears, click the Delete Files button.

5. Empty Trash with Command Prompt
The command prompt allows you to communicate with your computer through text commands. It is a handy tool that lets you perform complex tasks such as processing batch files, formatting hard drives, etc. Here’s how you can use it to empty the Recycle Bin on Windows.
Step 1: Right-click the Start icon and select Terminal (Admin) from the list.

2nd step: Select Yes when the User Account Control (UAC) prompt appears.

Step 3: Enter the following command to empty the Trash.
rd /s %systemdrive%$recycle.bin
Step 4: Press Y then Enter to confirm your choice.

6. Empty Recycle Bin Using Windows Powershell
You can also empty files from the Trash by typing a quick command in the PowerShell window. Here’s how.
Step 1: Open the search menu, type WindowsPowerShelland click Run as administrator.

2nd step: Select Yes when the User Account Control (UAC) prompt appears.

Step 3: Paste the following command and press Enter.
Clear-RecycleBin
Step 4: Type Y and press Enter to confirm.

Wow, so empty
Files in the Trash are not meant to stay, but sometimes they do anyway. One of the above methods should help you get rid of it. However, a third-party app or service may interfere with the process if none of the above methods work. In this case, you can start your computer in a Clean Boot Environment and then try one of the methods listed above to empty the Trash.


