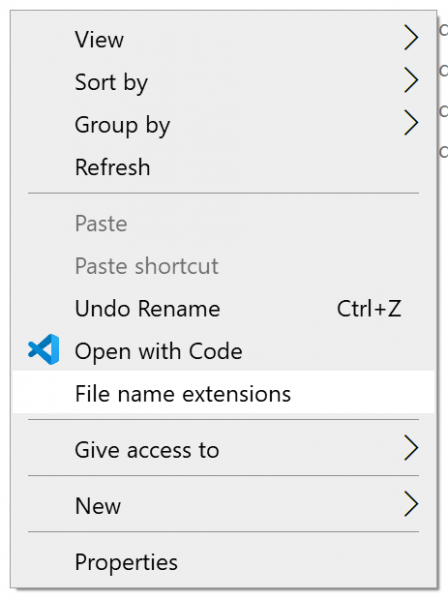
Microsoft added a feature on the File Explorer Options or Folder Options ribbon and mini-window under Windows 10 allowing the user to enable or disable the visibility of file extensions in the file explorer. However, some users allow it to use it for a few minutes, and then hide the file extensions. Following the path of file options often takes longer and is tedious. The best solution would be to activate this option from the contextual contextual menu. These file extensions vary depending on the type of file that a user is trying to run.
If you add a "File name extensions" item to the Windows 10 context menu, you will be able to show or hide file extensions with just one click! Useful if you need to activate the option temporarily.
Add file name extensions to the context menu
To add the "File name extensions" option in the context menu of Windows 10, the user must use the Windows 10 registry editor. The context menus discussed in this step are those of the Desktop, File, Folder and the background of the folder. We will discuss two aspects of this guide. They are as follows:
- Adding file name extensions to the context menu.
- Delete file name extensions from the context menu.
1] Option Add file name extensions to the context menu
It's a pretty simple method to follow.
Download this registry file, double-click on the file and give your consent to add the registry entries.
If you still do not see the option, just restart your computer for it to appear.
2] Remove file name extensions option in the context menu

To do this, open the Windows 10 registry editor and navigate to the following paths:
- HKEY_CLASSES_ROOT AllFilesystemObjects shell Windows.ShowFileExtensions
- HKEY_CLASSES_ROOT Directory Background shell Windows.ShowFileExtensions
Delete these two folders.
Restart your computer and the option would disappear.
I hope you find this useful.
