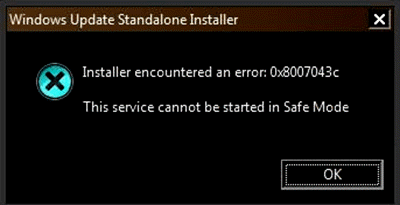
It would be a very irritating situation if Windows updates throw an error code 0x8007043c. This error usually occurs if a Windows service required by Windows Update is having problems. This can happen if you try to run the Windows Update standalone installer in safe mode or if you also run Windows Update in normal mode. If you are having this problem, see this article for troubleshooting.
Windows update error 0x8007043c
There are many possible causes for this problem, but one thing we do know is that this error has been around for over a decade without a fix. The most likely causes of error 0x8007043c are overprotective third party, system file corruption, or incompatible update.
- Run the Windows Update Troubleshooter
- Check the status of the following Windows services
- Use DISM to fix corrupt Windows Update system files
- Install Windows Update in a minimal boot state.
Try the following solutions sequentially to resolve the problem:
1]Run the Windows Update Troubleshooter
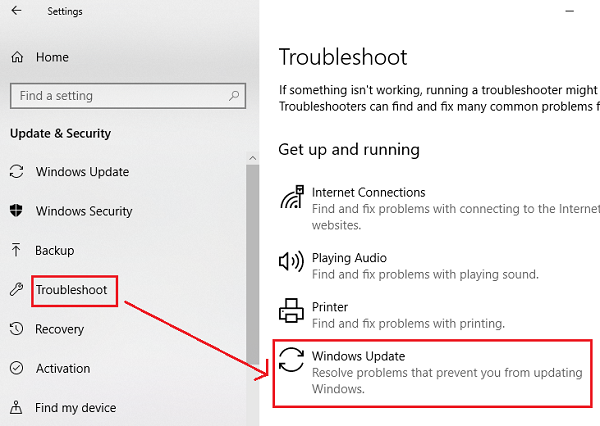
The Windows Update Troubleshooter is a great tool for checking for irregularities with Windows Updates, related services, and fixing an incompatible update. The procedure to run the Windows Update Troubleshooting utility is as follows:
Click on Start and go to Settings> Updates and security> Troubleshooting.
Select the Windows Updates Troubleshooter from the list and run it.

Restart the system after the process is complete.
You can also run the Windows Update Online troubleshooter.
2]Check the status of the following Windows services
Open Windows Service Manager and verify that Windows Update related services such as Windows Update, Windows Update Medic, Update Orchestrator Services, etc. are not disabled.
The default configuration on a standalone Windows 10 PC is as follows:
- Windows Update Service – Manual (triggered)
- Windows Update Medic Services – Manual
- Cryptographic services – Automatic
- Background Intelligent Transfer Service – Manual
- Windows Installer – Manual.
This will ensure that the required services are available.
3]Use DISM to fix corrupt Windows Update system files
To fix corrupt Windows Update system files, type the following command, then press Enter to run DISM:
DISM.exe /Online /Cleanup-image /Restorehealth
Please note that here you need to be patient, as the process can take several minutes.
When you run the above mentioned command, DISM will replace potentially corrupt or missing system files with good ones.
However, if your Windows Update client is already broken, you will be prompted to use a running Windows installation as the repair source or to use a Windows folder side by side from a network share as the source for the files.
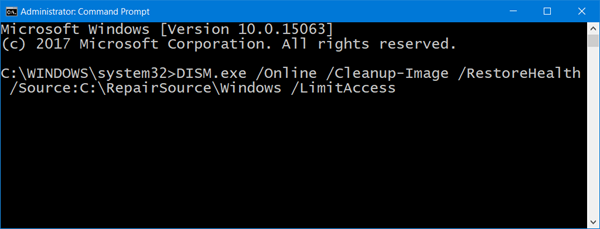
You will then need to run the following command instead:
DISM.exe /Online /Cleanup-Image /RestoreHealth /Source:C:RepairSourceWindows /LimitAccess

Here you need to replace the C: RepairSource Windows placeholder with the location of your repair source.
Once the process is complete, DISM will create a log file in % windir% / Logs / CBS / CBS.log and capture any problems detected or resolved by the tool.
Close the command prompt, then run Windows Update again and see that it helped.
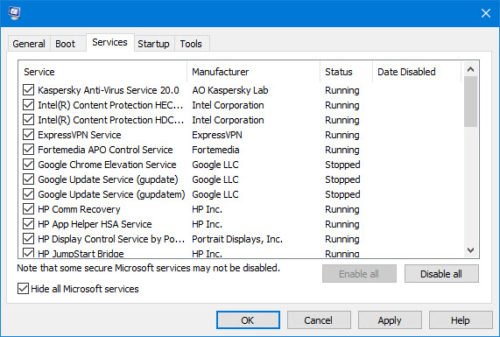
4]Install Windows Update in minimal boot state

In the event that third-party software interferes with the Windows Update process, thereby causing the error in the discussion, you can try to install Windows Updates after restarting the system in minimal boot state. In this state, all third-party programs remain disabled at startup.
If it works, your problem is resolved for now, and for the future, you can investigate the problematic program by hit and test and remove it unless it is significant.
If the solutions mentioned above do not work, you may need to perform a repair installation or a fresh installation on your system. On the contrary, many users have finally solved this problem after a new installation.

