Google Photos is private by default, making it one of the best photo storage services. If you wanted to add photos to Google Photos, you’ve come to the right page. Here we will tell you how to upload photos to Google Photos from Android, iPhone and PC.
You can use Google Photos to view photos, back up photos, or manually save selected photos to cloud storage. All of these things make Google Photos different from your regular gallery app. Let’s see different ways to save photos to Google Photos.
How to Upload Photos to Google Photos from Mobile
There are two ways to add images to Google Photos from Android or iOS devices. In the first method, you can enable the backup feature which will automatically upload existing and new photos or videos to Google Photos.
However, if you don’t want to add all photos to Google Photos, you can use the second method of manually uploading selected photos. Let’s check the steps for both methods.
Method 1: How to Automatically Upload All Photos to Google Photos
Step 1: Open the Google Photos app on your mobile.
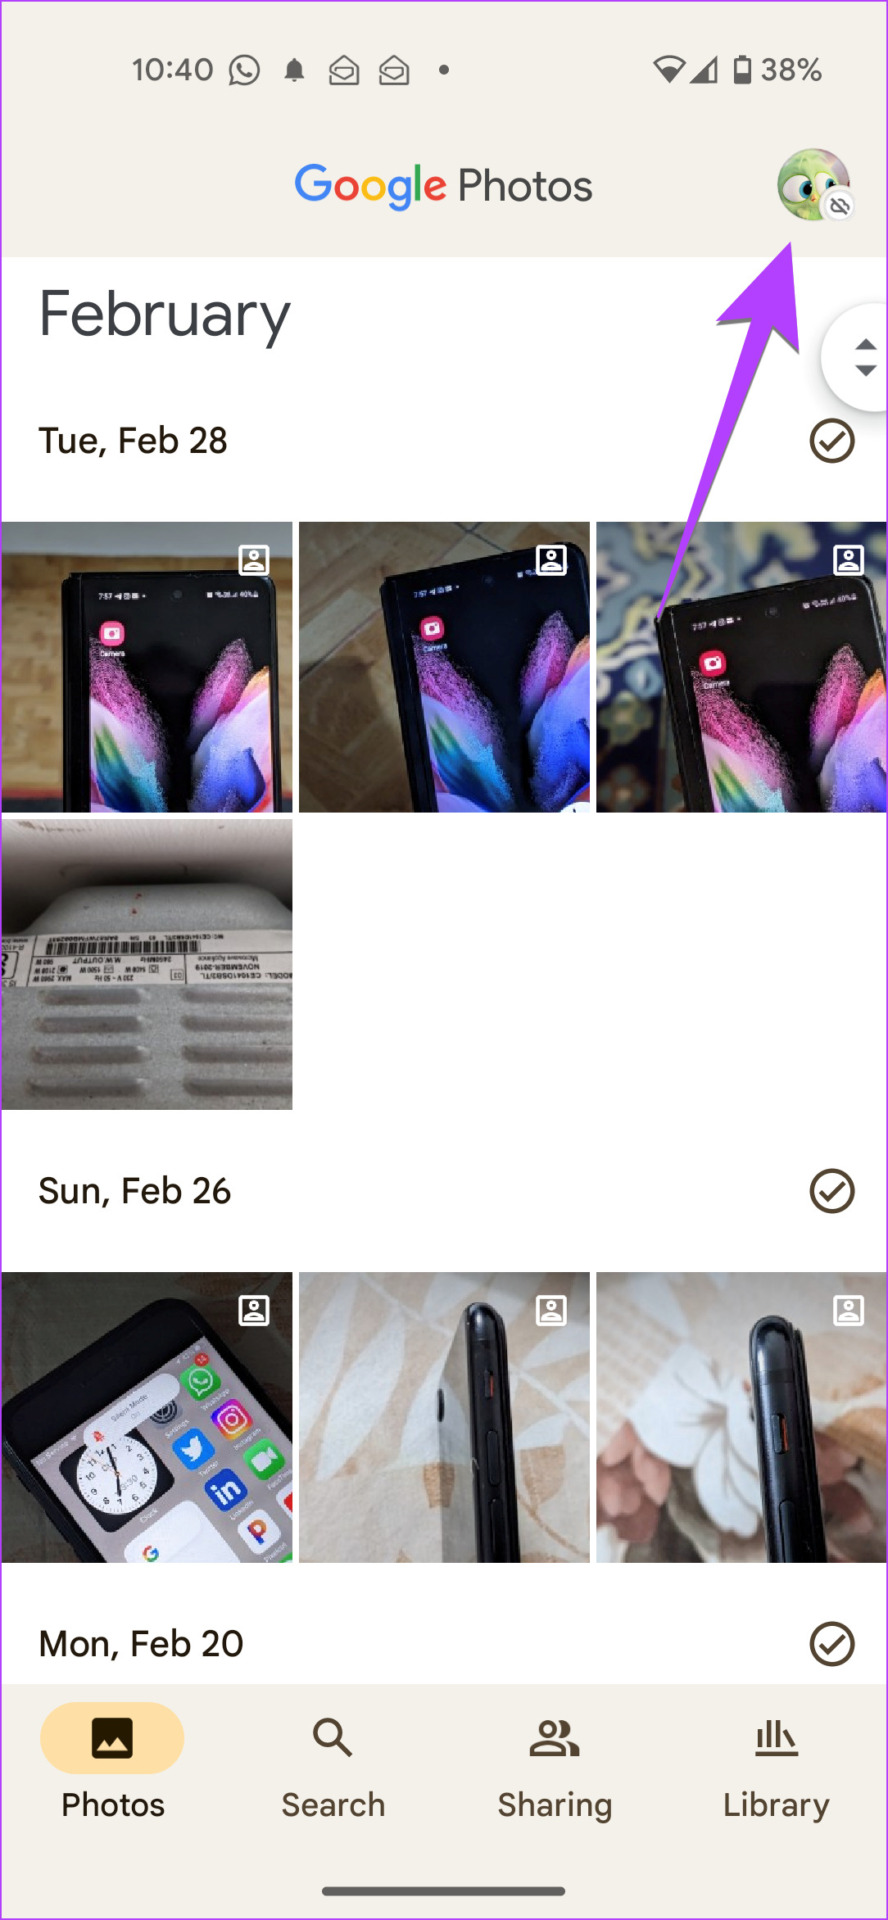
2nd step: Tap the profile picture icon in the upper right corner.

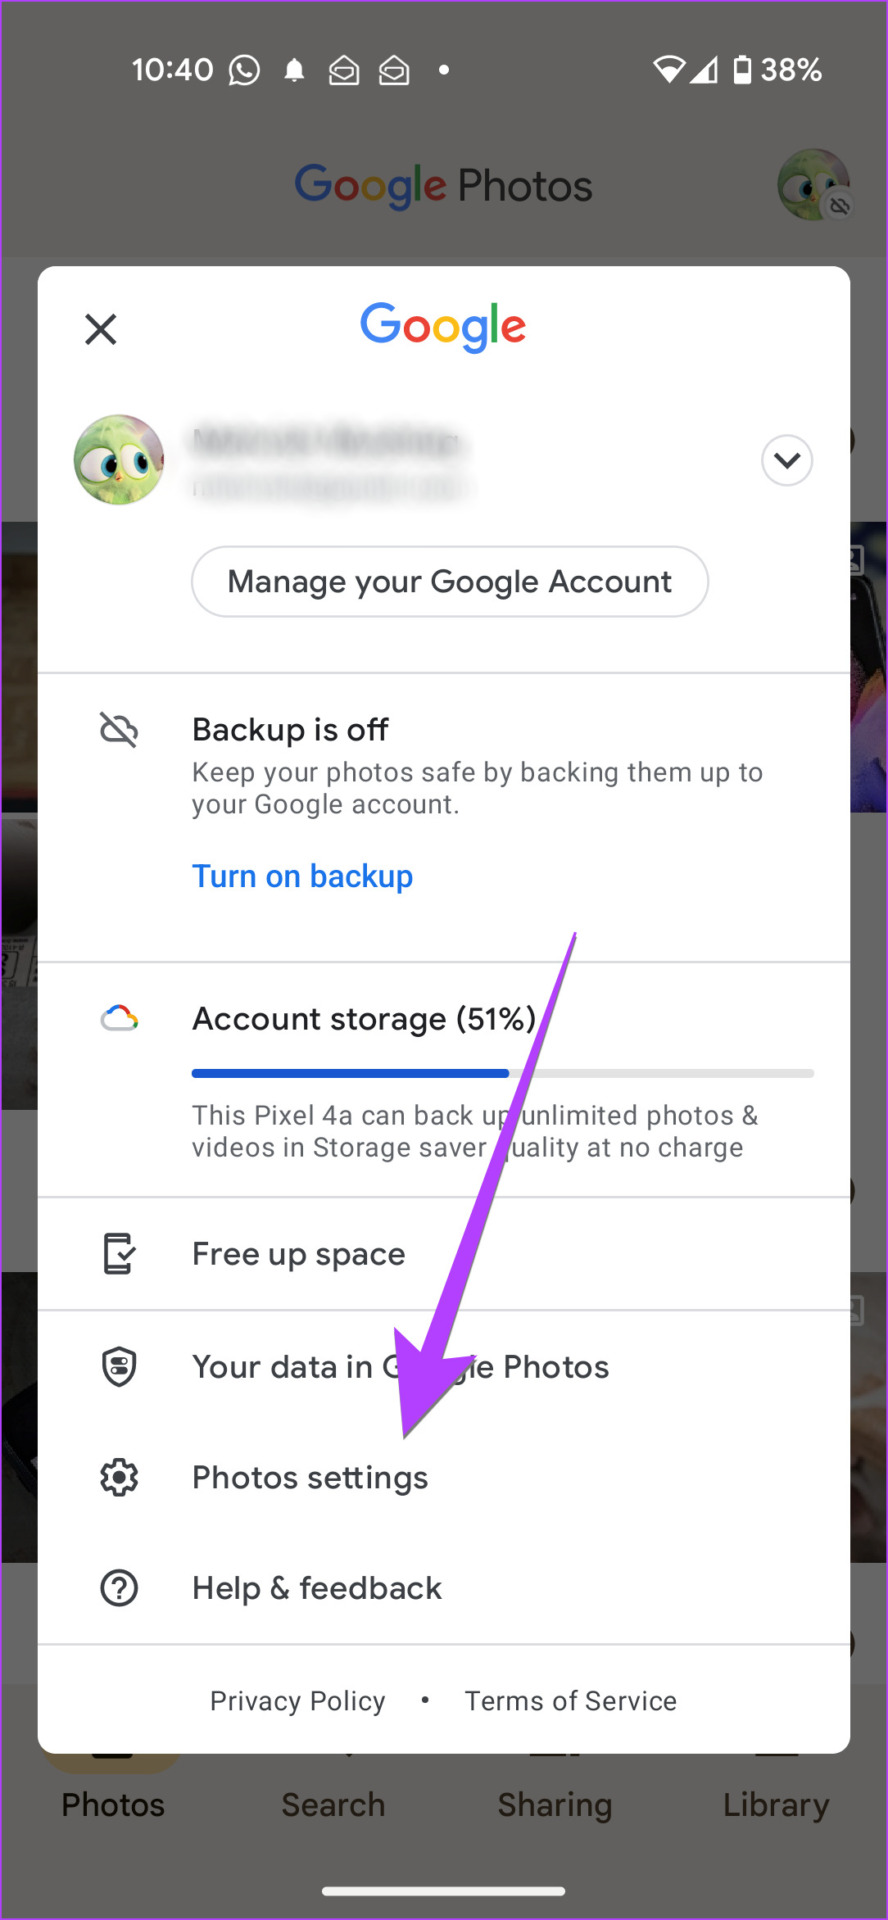
Step 3: Tap Photo Settings followed by Backup.


Note: Your iPhone may request permission to access photos. Go to iPhone Settings > Privacy > Photos. Enable the toggle next to Google Photos.
Step 4: Enable the toggle next to Backup. Choose your photo backup settings.


Advice: If you love Google Photos, know how to move photos from iPhone to Google Photos.
How to Add Pictures from Device Folders to Google Photos on Android
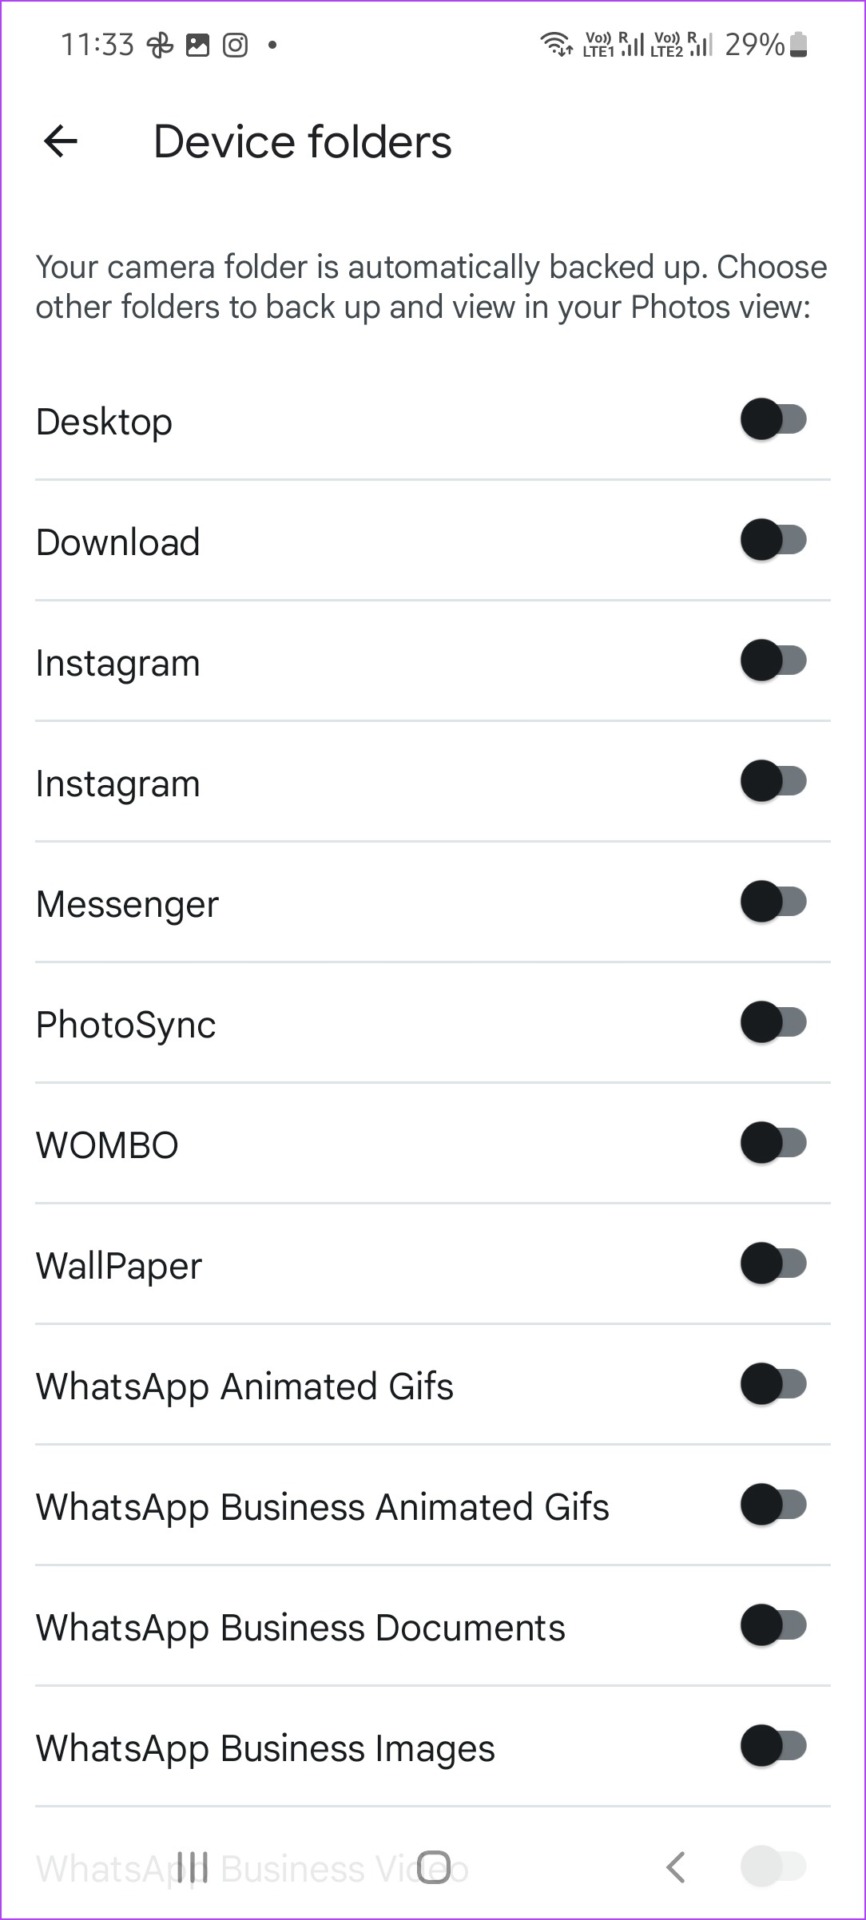
Google Photos app on iPhone will download all photos. But it will only automatically back up images from the camera when it comes to Android. To backup images from other folders like WhatsApp, Screenshots, etc., to Google Photos, follow these steps:
Step 1: In the Google Photos app, tap the profile picture icon at the top.


2nd step: Go to Settings Photos followed by Backup.


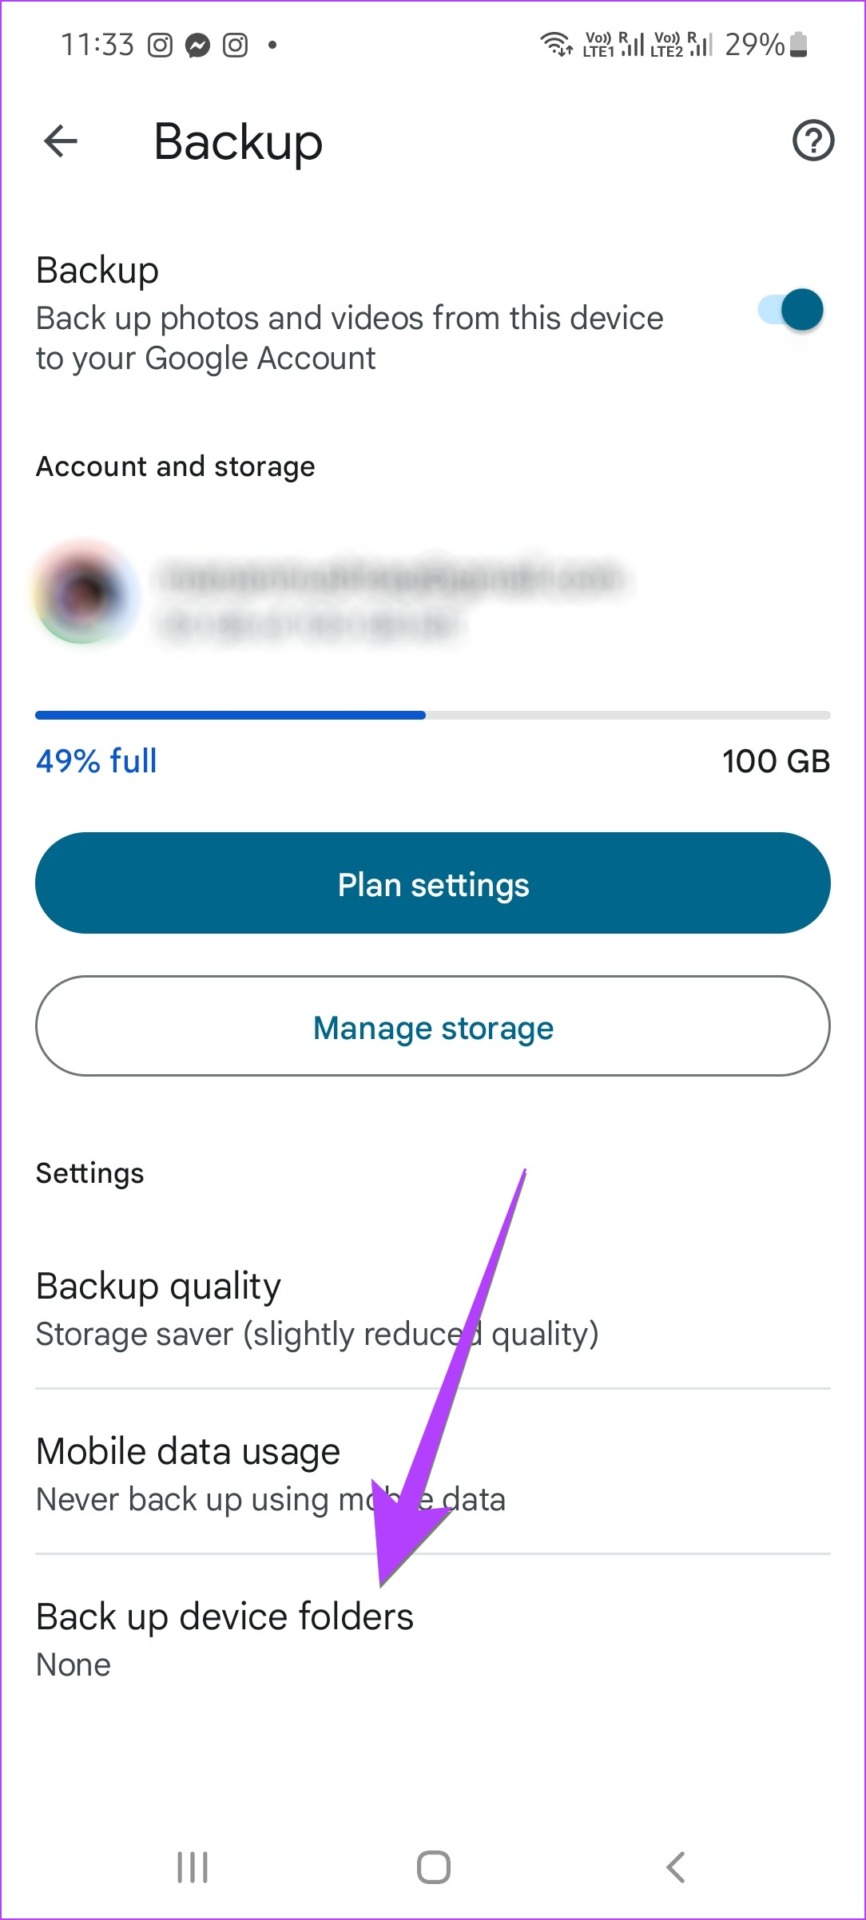
Step 3: Tap Back up device folders and select the folders you want to back up.


Method 2: How to manually add photos to Google Photos
To manually add selected photos to Google Photos, follow these steps:
Step 1: Launch the Google Photos app on your iPhone or Android phone.
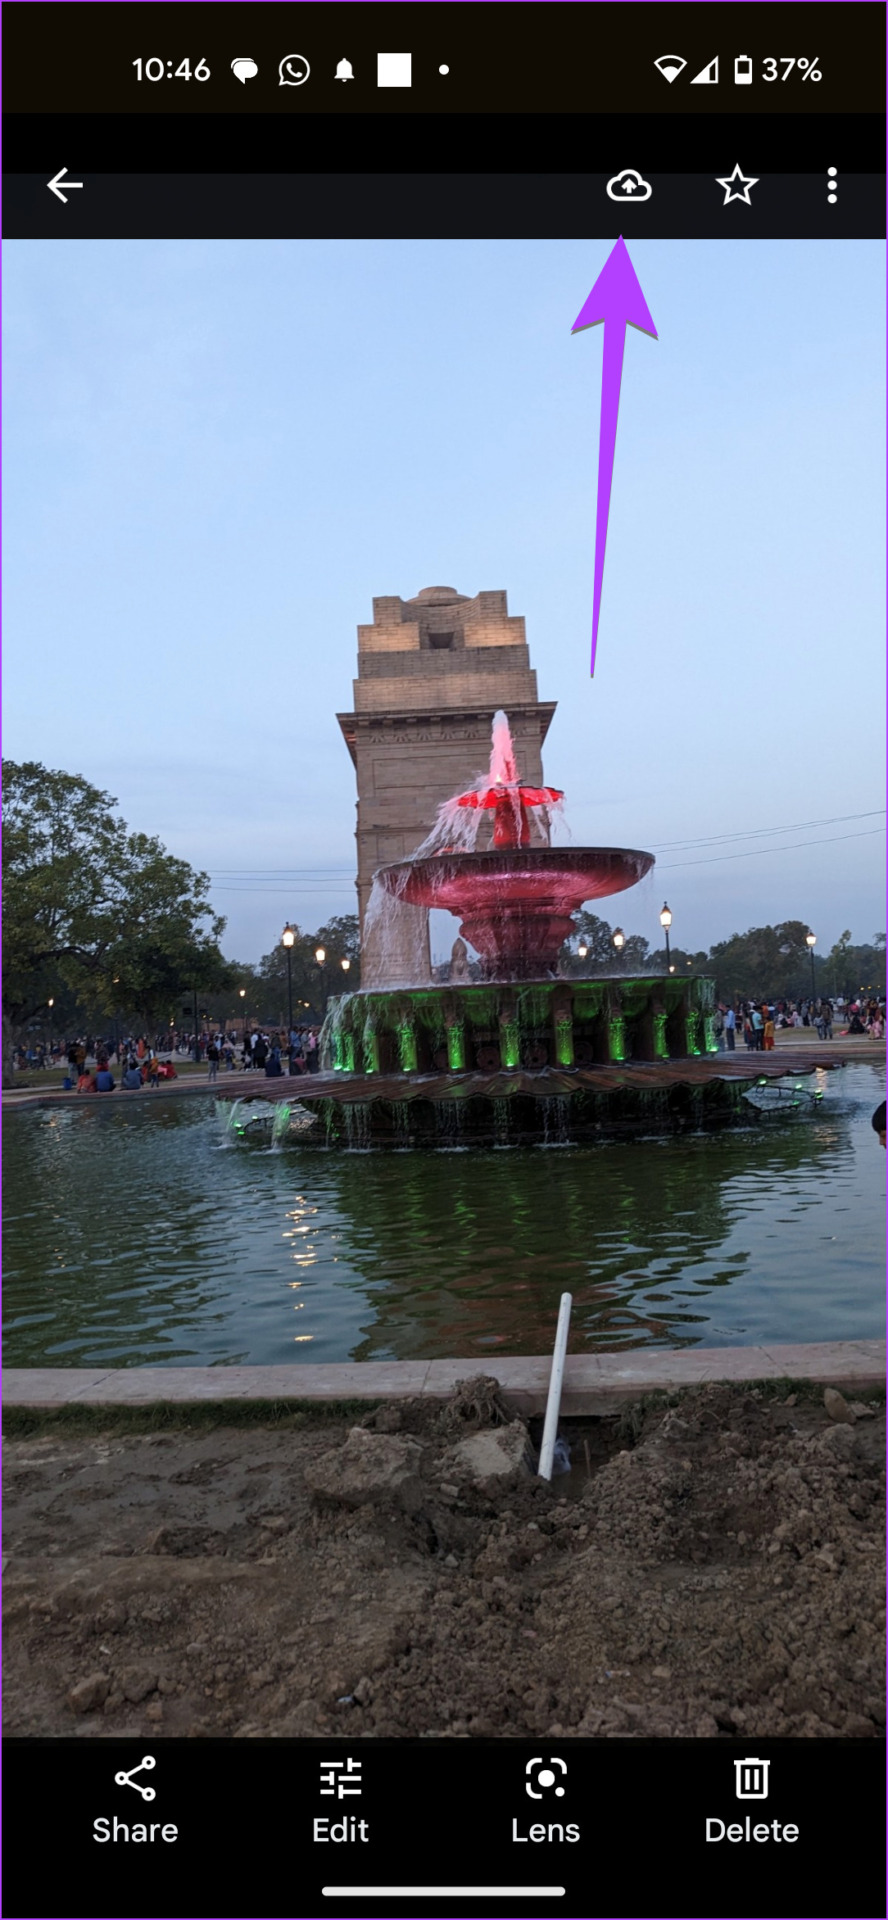
2nd step: Tap the photo to open it in full screen mode. Tap the save icon at the top to upload the image to Google Photos.

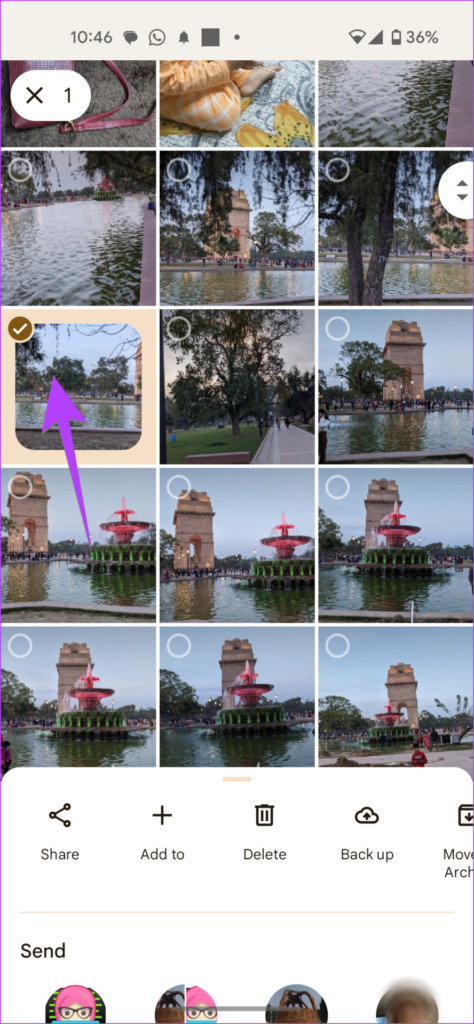
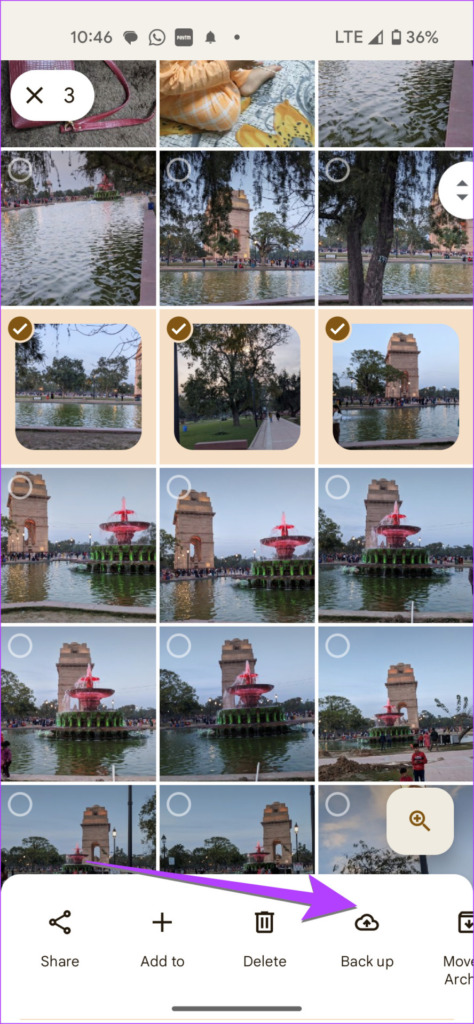
Step 3: To upload multiple photos, long press one of the photos on the main screen of the Google Photos app to activate selection mode. Tap the photos you want to select.
Step 4: After selecting the images, tap the Save button at the bottom to add them to your Google Photos account.


Note: You will find all the photos on your phone in the Photos tab of your iPhone. On Android, you will need to go to the Library tab where you will find different device folders. Open a folder to select and upload photos from it.
How to Upload Photos to Google Photos from Computer
To add photos to Google Photos from your PC, follow these steps:
Step 1: Open the Google Photos website in a browser on your computer.
2nd step: Sign in to your Google account.
Step 3: Click the Download button at the top.
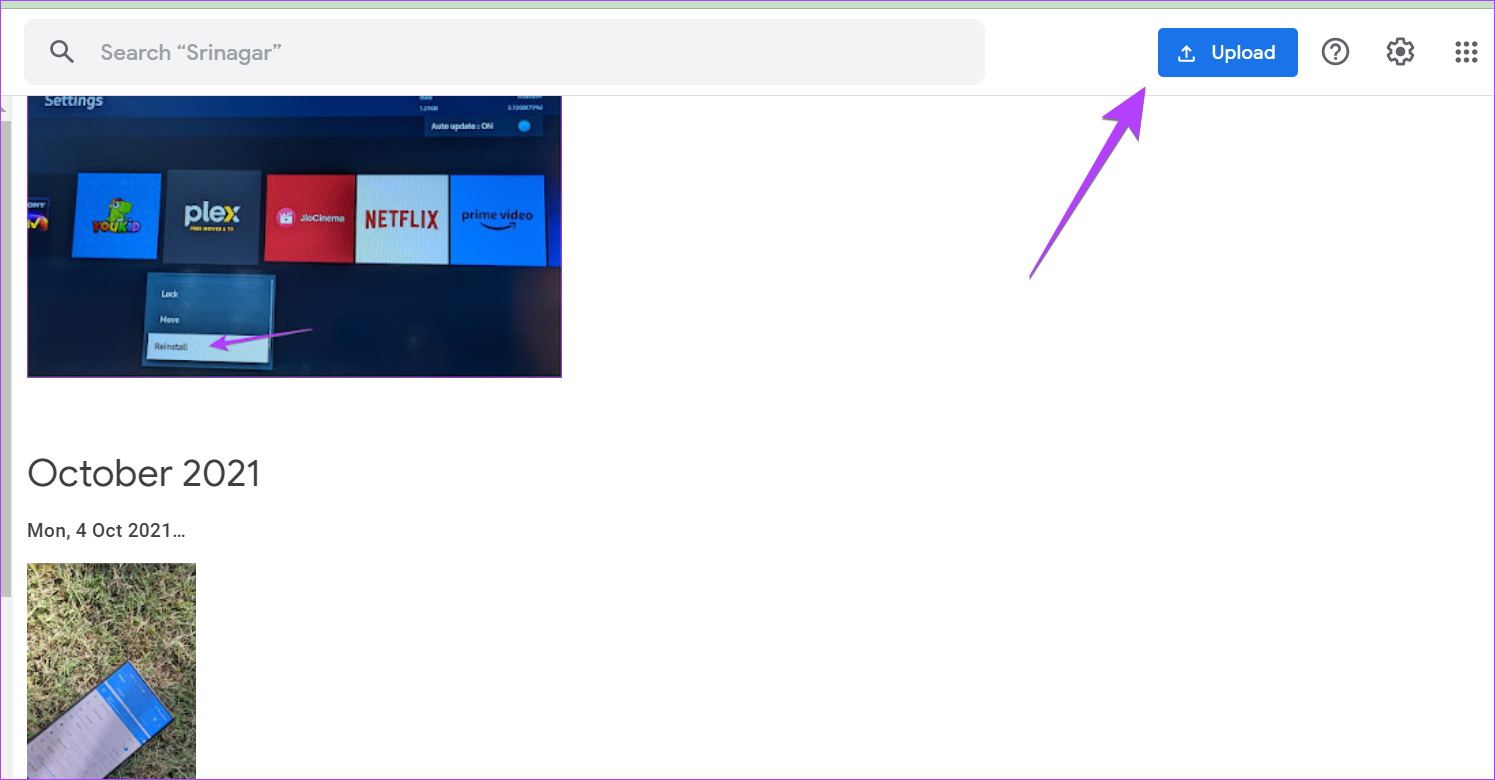

Step 4: Select the source from which you want to add images. If you want to add it from a folder on your PC, select Computer.
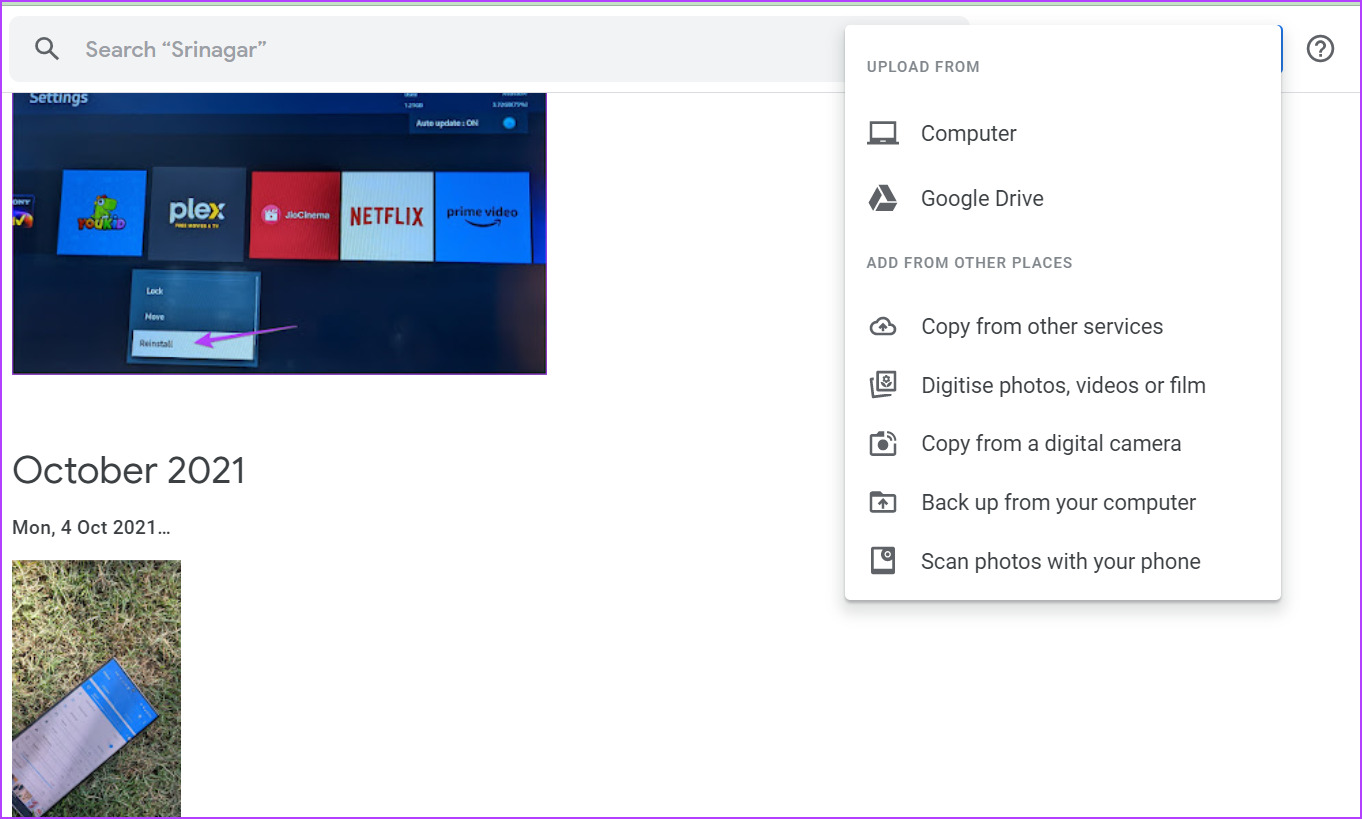

Step 5: Choose the folder and select the photos you want to upload.
If you’re having a problem, here’s how to fix Google Photos not uploading photos from PC.
Pro Tip: You can drag and drop photos directly from your computer to Google Photos. You can even drag them to a specific album.
Bonus: How to Check the Backup Status of an Image
Wondering if your photo has been uploaded to Google Photos or not? Luckily, it’s pretty easy to find out the same thing in two ways.
Method 1: Use photo details
Step 1: Launch the Google Photos app on your phone.
2nd step: Tap the photo for which you want to know its save status.
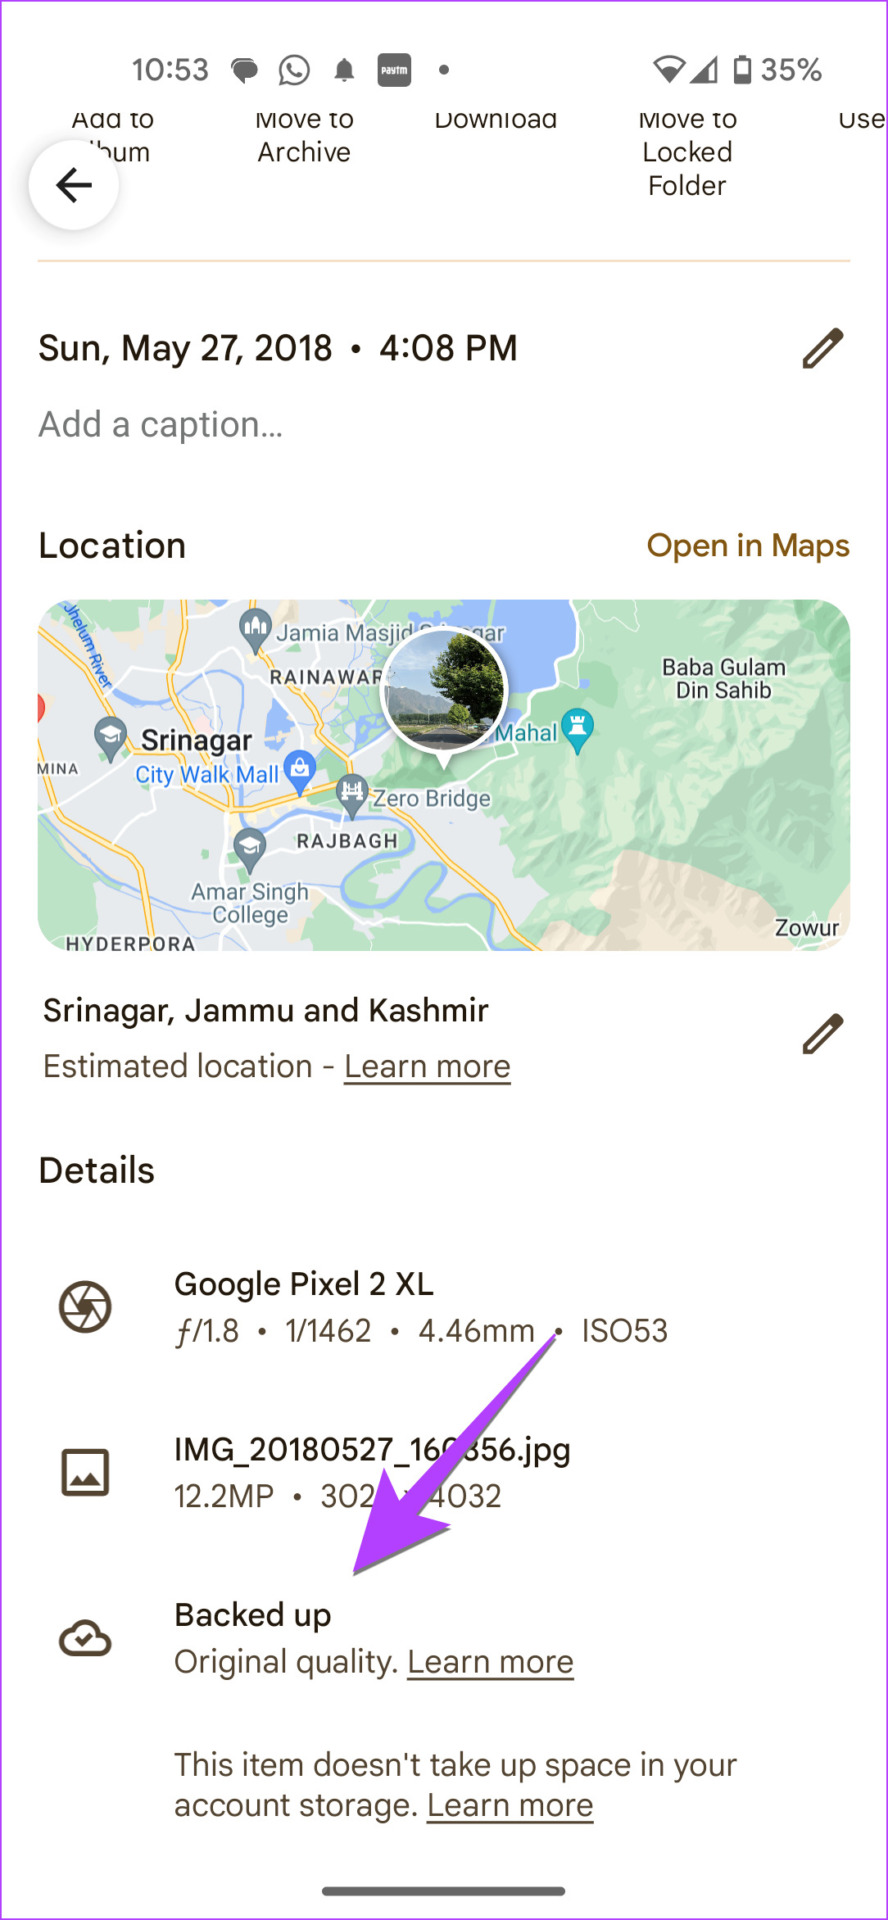
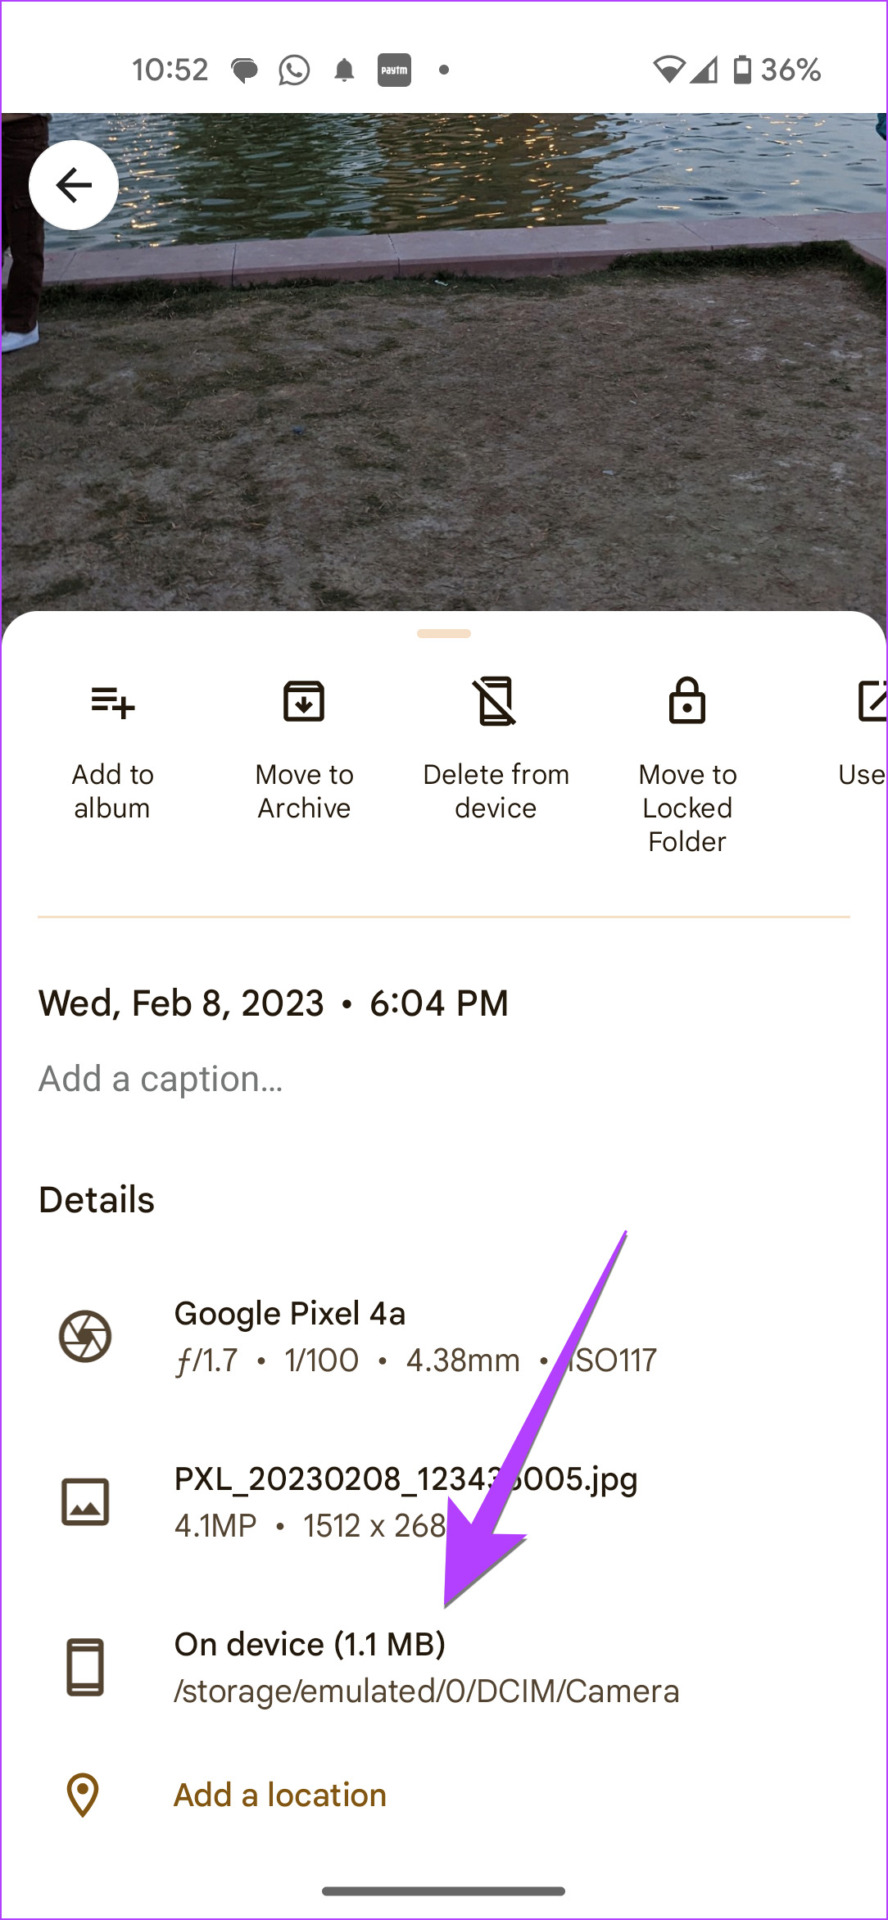
Step 3: Swipe up on the photo or tap the three-dot icon at the top to open the info screen.

Step 4: Scroll down to the Details section where you will see the backup status:
- You will see saved text for a photo that was uploaded to Google Photos.
- If a photo has not been uploaded, you will see the text On Device.


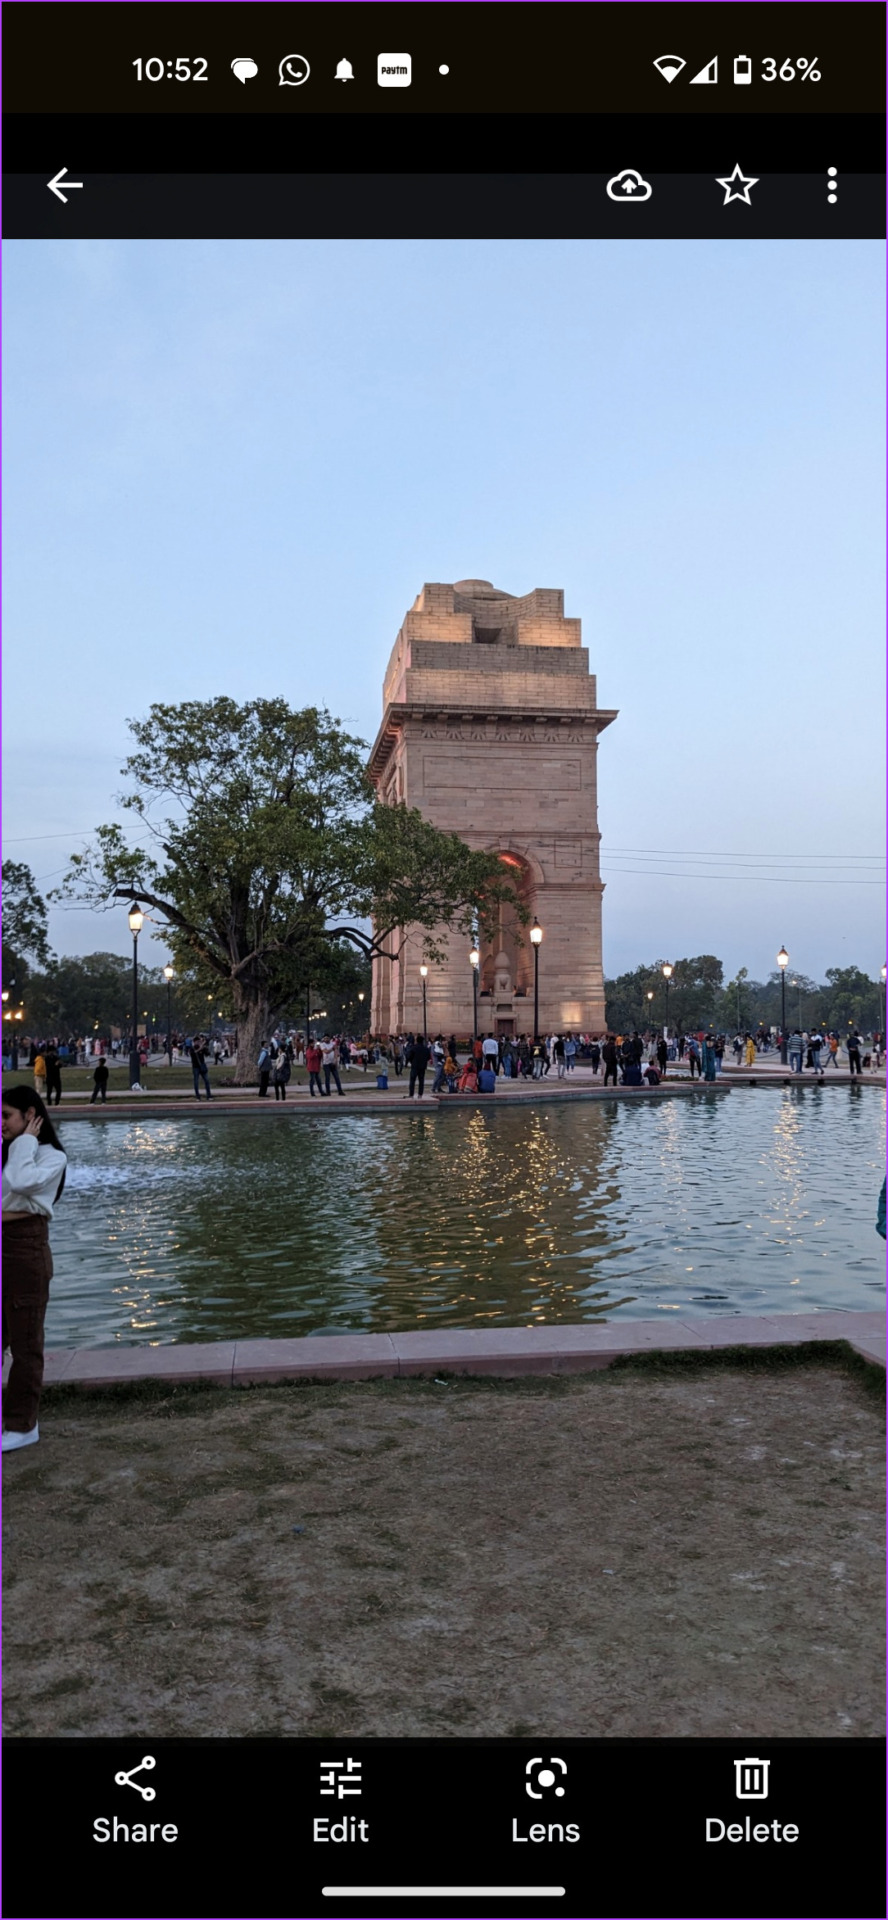
Method 2: Use the save icon
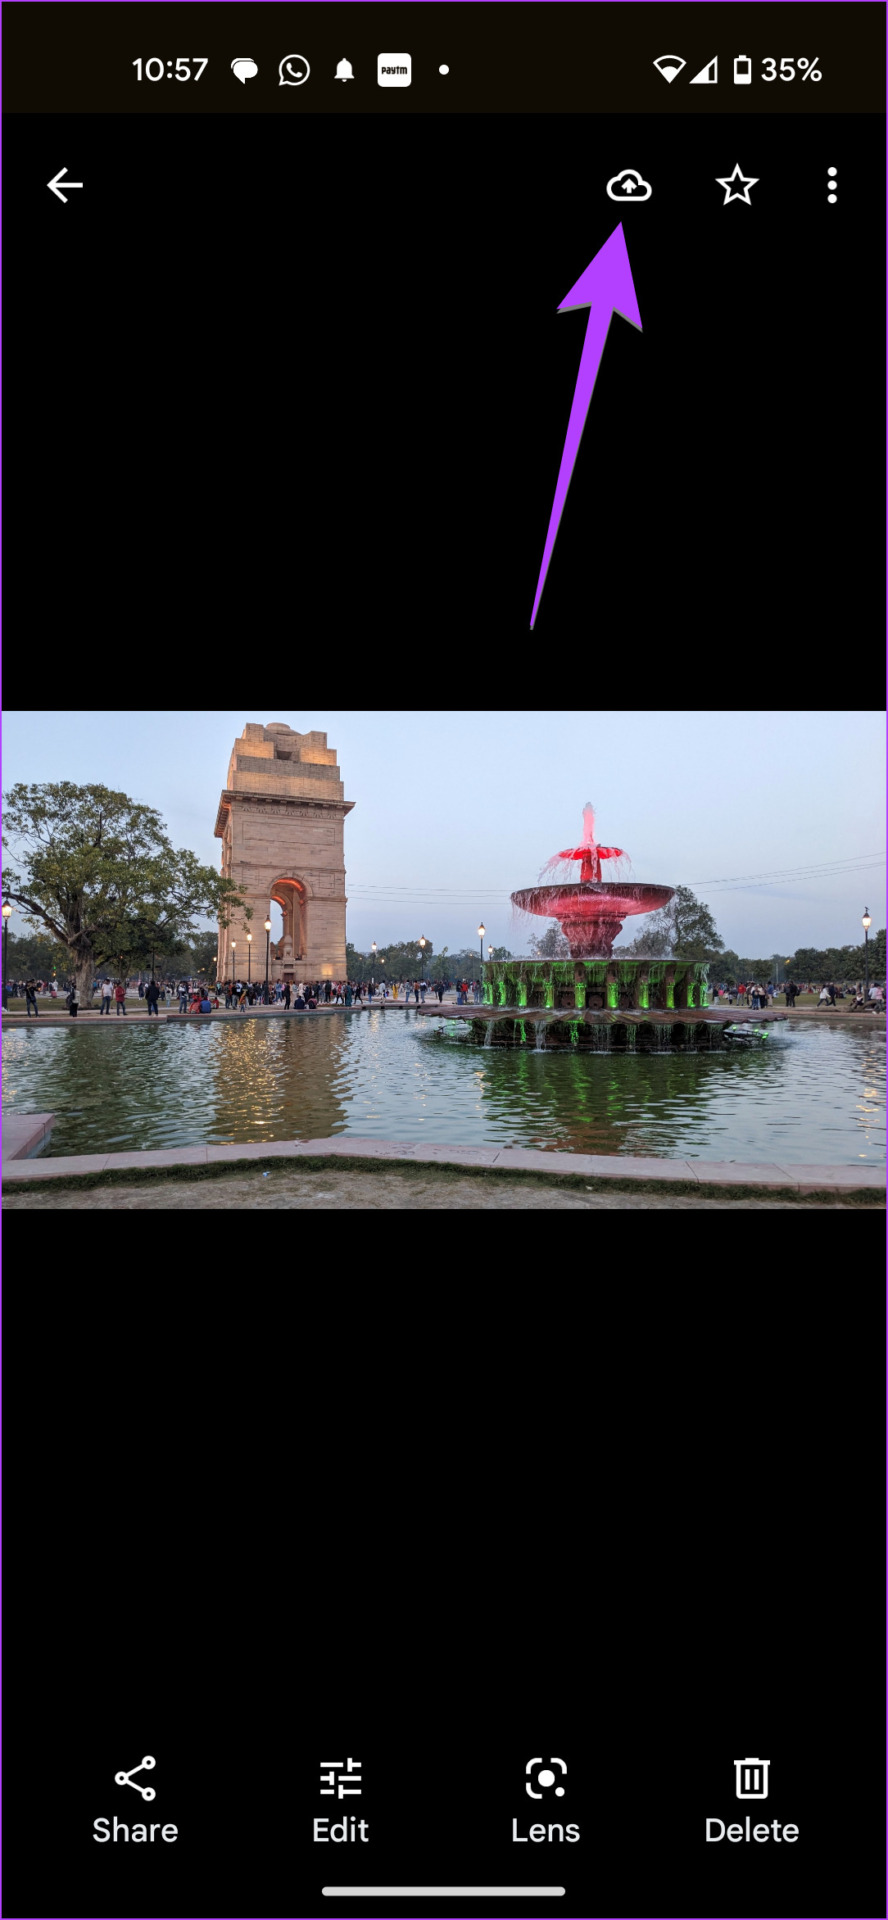
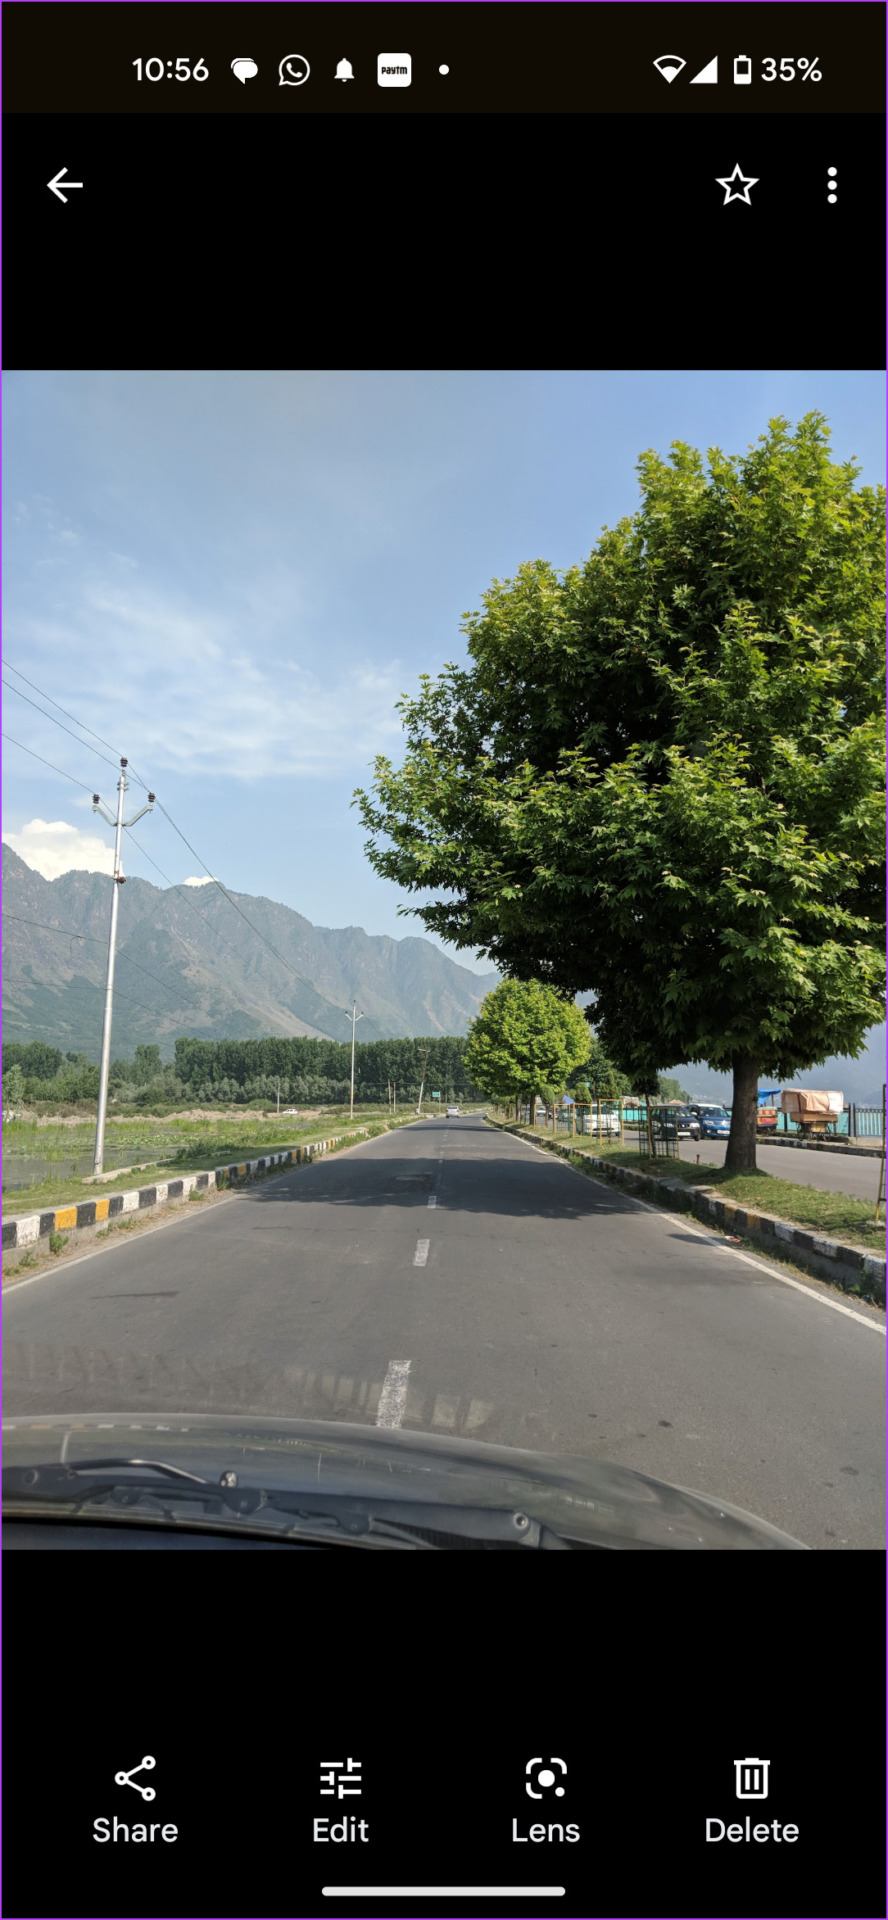
In this method, you have to look for the save icon which will appear for photos not uploaded to Google Photos. And this icon will be missing from photos saved in Google Photos.


FAQ on Uploading Photos to Google Photos
You can check how you uploaded the photo using the Google Photos website. Visit photos.google.com and open the photo. Click the (i) icon at the top to open the Info screen. Here you will see the source of the photo, as downloaded from the web browser.
No, your photos will not be deleted from your phone.
Deleting photos from Google Photos is a slightly complicated process. You must use the Google Photos website to delete images. Open the photo and click the Delete icon. Know how to delete photos in Google Photos from your iPhone.
Hide uploaded photos
After saving photos to Google Photos, learn how to archive photos to hide them. You can even use the locked folder in Google Photos to hide pictures.
