System Restore is a handy feature that allows you to safely restore your Windows computer to an earlier state. It’s one of those godsend features that come to your aid when all other troubleshooting methods fail. But what if the System restore function not working as expected and starting to generate errors?
It can be annoying if System Restore does not work when needed. To help you, we have collected the best methods to fix the system restore not working Windows 11 issue. So, let’s check them out.
1. Use a different restore point
Windows may encounter errors during the system restore process if the selected restore point is corrupted or no longer available. If another restore point is available, try it and see if it works. Here’s how to manually select a restore point in Windows.
Step 1: Click the search icon on the taskbar, type create a restore point in the text box, then press Enter.

2nd step: On the System Protection tab, click the System Restore button.

Step 3: Click Next to continue.

Step 4: Check the “Show more restore points” box.

Step 5: Select another restore point from the list and click Next.

Step 6: Check all the details and click Finish.

2. Check Windows Services
System Restore may not work on your PC if some of the services associated with the feature are not running. Here’s what you need to do to get them back up and running.
Step 1: Press Windows + R keys to launch the Run command, type services.mscand press Enter.

2nd step: In the Services window, scroll down to locate the “Microsoft Software Shadow Copy Provider” service. Double-click it to open its properties.

Step 3: Click the drop-down menu next to Startup type to select Automatic. Then press Apply followed by OK.

Similarly, change the startup type of the “Volume Shadow Copy” service to Automatic. Restart your PC after that and then try using System Restore again.

3. Run Check Disk Utility
Windows may have difficulty accessing restore point data if there is a problem with your hard drive. If so, running the Check Disk utility in Windows may help. It will scan your drive for bad sectors and corrupt data and repair any issues.
To run the Check Disk tool in Windows, follow these steps:
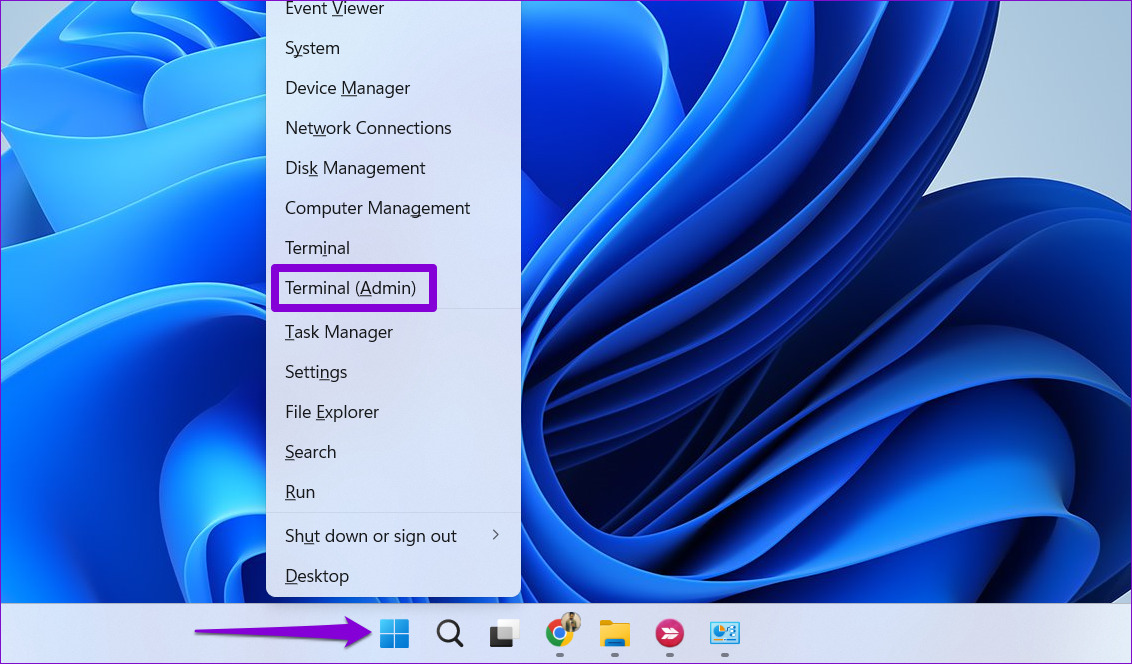
Step 1: Right-click the Windows icon in the taskbar to open the Power User menu and select Terminal (Admin) from the list.
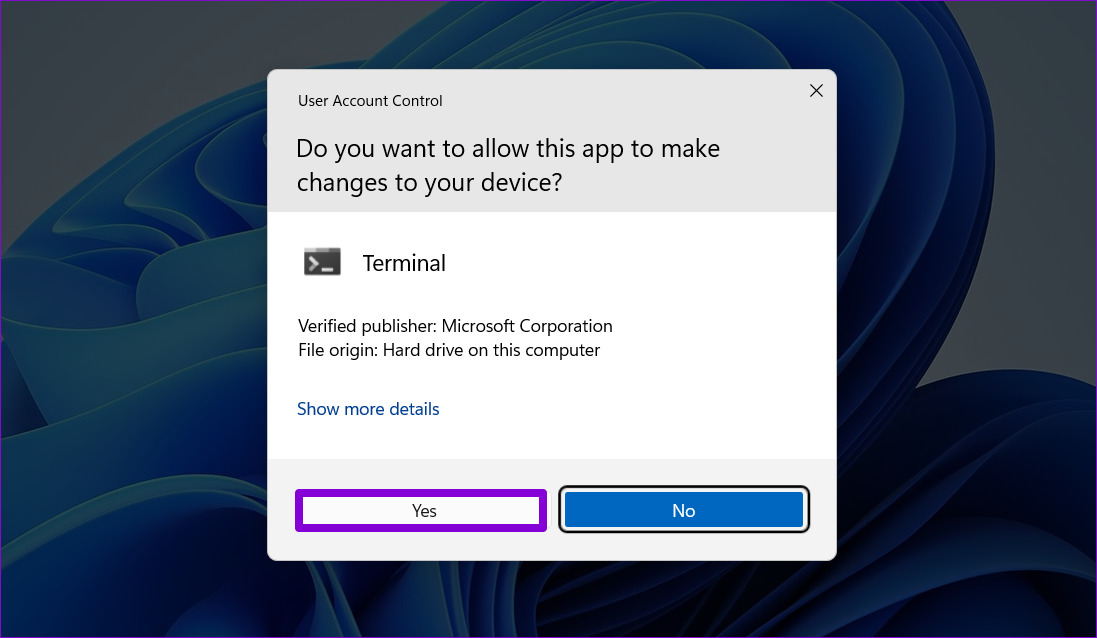
2nd step: Select Yes when the User Account Control (UAC) prompt appears.
Step 3: In the console, enter the following command to start the check disk scan.
chkdsk c: /r /scan /perf

Wait for the scan to complete, then restart your PC. After that, try using System Restore again.
4. Run SFC and DISM scans
If the Check Disk utility finds no problem, or if the problem persists, you can try scanning your PC’s system files. You can run SFC (System File Checker) and DISM (Deployment Image Servicing and Management) scans on Windows.
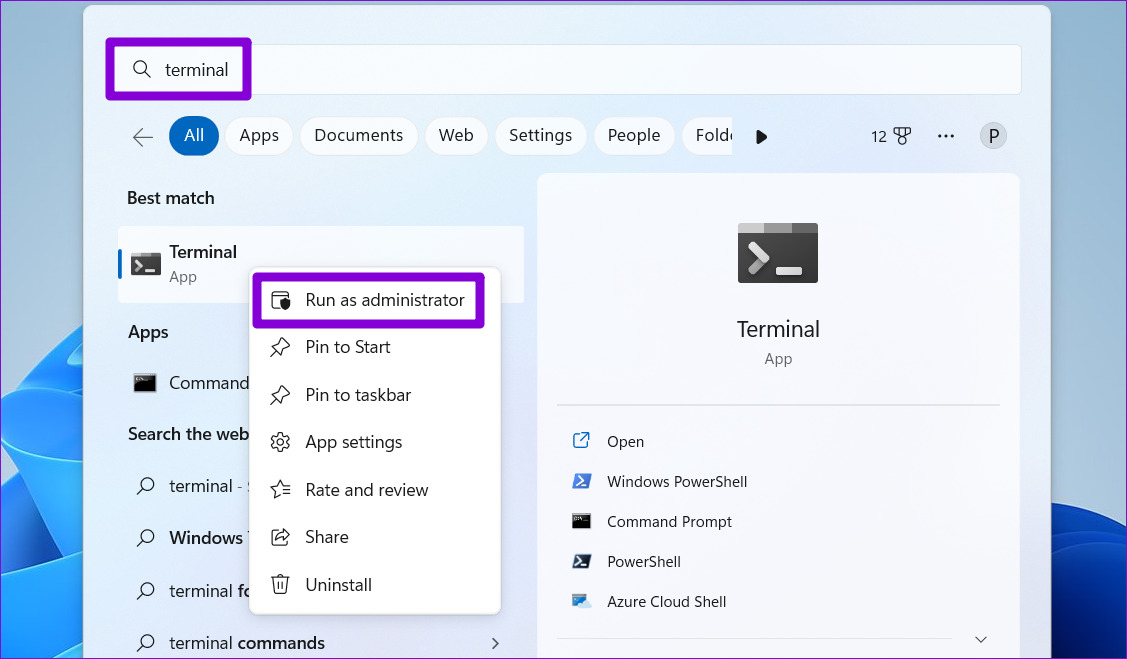
Step 1: Press Windows key + S to open the search menu and type Terminal in the search field. Right-click on the first result and select Run as administrator.
2nd step: When the User Account Control (UAC) prompt appears, select Yes to continue.

Step 3: Type the following command in the console and press Enter to run the SFC scan:
SFC /scannow

Step 4: Type the following commands one by one and press Enter after each command to run the DISM scan:
DISM /Online /Cleanup-Image /CheckHealth
DISM /Online /Cleanup-Image /ScanHealth
DISM /Online /Cleanup-Image /RestoreHealth

This may take some time, so be patient. After the scan is complete, restart your PC and check if the issue still occurs.
5. Temporarily Disable Third-Party Antivirus Program
It is possible that the third-party anti-virus program on your PC is blocking the restore process. If so, you can temporarily disable the antivirus program and perform a system restore. Make sure to re-enable your antivirus program after restoring your system to an earlier state.
6. Perform System Restore in Safe Mode
If none of the above solutions work, you can boot your Windows PC in Safe Mode and perform a System Restore. Since Windows only runs essential drivers and services in Safe Mode, this should help you avoid interference from third-party apps and programs.
To start Windows in Safe Mode, follow these steps:
Step 1: Press Windows + R keys to open the Run dialog box.
2nd step: Type msconfig in the text field and click OK.

Step 3: Switch to the Boot tab and check the box that reads Safe boot.

Step 4: Click Apply and then OK.

Step 5: Select the Restart option to start your PC in Safe Mode.
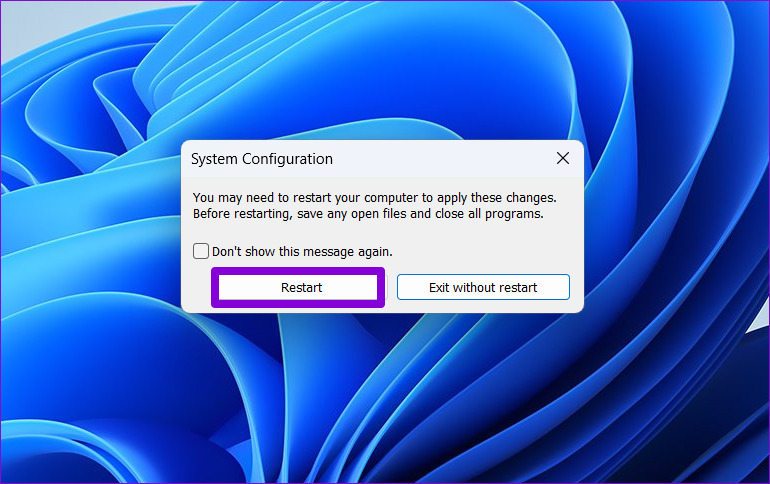
Once your PC has booted into Safe Mode, try performing a System Restore.
Restore your peace of mind
System Restore is an important Windows feature that allows you to undo any bad changes made to your system. Therefore, it can be inconvenient if it does not work properly. We hope that one of the fixes mentioned above helped you and you can restore your PC to its previous state.
