
iOS 14.2 is the current version of the iPhone software. It comes with a series of new features and bug fixes. However, in addition to that, it adds a serious bug that prevents certain notifications in Messages from triggering. In addition, it also issues a read receipt to the sender. If you can’t live with this problem, you can upgrade from iOS 14.2 to 14.1 and get your Messages notifications back.
The trade-off is that you’ll come back to another important bug that randomly mutes the ringtone and alerts on your device, an issue that erupted right after the public release of iOS 14.0. Also, you will need a backup you made in iOS 14.1 for the restore. If you did not back up your device before updating to iOS 14.2, it is too late to do so now, as backups made on higher iOS versions cannot be restored upon downgrade.
Update: Apple has stopped signing iOS 14.1 which prevents users from downgrading from iOS 14.2!
7 steps to downgrade to iOS 14.1
If you’ve used iOS 14.1 before, you know what to expect. And if you find it better than the current iOS 14.2, here’s what you can do to downgrade:
1. Download the iOS 14.1 ISPW file
You will need this file to reinstall iOS 14.1 on your device. You need a Mac or Windows computer to download this restore file. Choose the one that matches your iPhone model from the list available below:
- iPhone 12 Pro Max
- iPhone 12 Pro
- iPhone 12 mini
- iPhone 12
- iPhone SE (2nd generation)
- iPhone 11 Pro Max
- iPhone 11 Pro
- iPhone 11
- iPhone XR
- iPhone XS Max
- iPhone XS
- iPhone X
- iPhone 8 Plus
- iPhone 8
- iPhone 7 Plus
- iPhone 7
- iPhone 6S More
- iPhone 6S
- iPhone SE
- iPod touch (7th generation)
2. Turn off Find My iPhone

For the downgrade process to work, you must turn off Find My iPhone in the Settings app.
Press your Apple ID available at the top of the settings home page. Go for Find my and deactivate Find my iphone.
3. Connect the iPhone to the computer
Then you need to connect your iPhone to the computer that you used to download the IPSW file. Use the Lightning to USB cable.
Point: Unlock your iPhone to allow it to establish a working connection with the macOS or Windows machine.
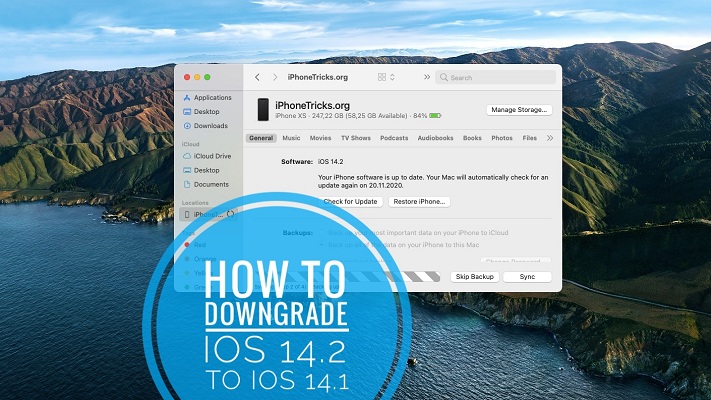
4. Open Finder (or iTunes)
If your Mac is running macOS 10.15 Catalina or later, you’ll need to open Finder, if your iPhone isn’t detected automatically. Click on your iPhone’s name, which should be available in the left sidebar under Locations.
Point: If you are using macOS 10.14 Mojave or earlier, or if you are using a Windows PC, you must use iTunes! After opening iTunes, click on your iPhone icon available at the top of the window. You can also find your iPhone in the Devices section, available in the sidebar.
5. Trust the computer
If you are connecting your iPhone to your computer for the first time, then you have to trust the machine.
How? ‘Or’ What: In Searcher, after selecting your iPhone, click on the Trust button. In iTune, you have to click on Continue to achieve the same result.
6. Install iOS 14.1
Important: Before you begin, make sure your MacBook or Windows laptop is plugged in to prevent it from going into sleep mode during the process. This is if you are using a laptop and not a desktop computer.

-
A. With Finder
- Make sure you are on the General tongue.
- Press and hold the Option (old) key and click Restore iphone.
- In the pop-up file browser window, find the IPSW file that you downloaded in step 1. Click on it and select Open. A pop-up will appear, informing you that iOS 14.1 will be installed on your iPhone: “Your Mac will erase and restore your iPhone to iOS 14.1 and verify the restore with Apple.”
Point: This will overwrite iOS 14.2. Click on Restore. Check your iPhone, you may need to enter the passcode. Keep your iPhone connected to your computer until it restarts and you get the iOS 14.1 welcome screen.
B. With iTunes
Make sure you are viewing the Summary view.
Press and hold Option key (alt) on Mac or Shift key in Windows and click Restore iphone.
Follow the same steps mentioned in point A until iOS 14.1 is installed on your iPhone.
7. Restore iPhone from backup
Downgrading iPhone from iOS 14.2 to 14.1 erases all data. If you have an iCloud, Finder, or iTunes backup that you made in iOS 14.1 before updating to iOS 14.2, you can restore it by choosing:
– Restore from iCloud
– Restore from iTunes backup
Whichever restore option you choose, you should keep your iPhone connected to the computer. Click on the desired restore option and choose the most recent backup. Click on Restore.
Done: If you have encrypted your iOS 14.1 backup, you need to enter the password to continue. Please be patient until the restore process is complete and unplug your device. That’s it!
Have you managed to downgrade your iPhone from iOS 14.2 to iOS 14.1? Use the comments section and share your comments.
Related: The next version of the iOS 14.3 software is currently in beta testing. You can upgrade to the public beta by following the tips provided here.