
The current MOBOs (motherboards) will have AHCI enabled in UEFI or BIOS default. Some older motherboards may have FDI enabled by default instead. If you want to install Windows using AHCI instead of IDE, you must first enable AHCI in BIOS / UEFI. If you have already installed Windows 10 with IDE but want to use AHCI mode, this article will help you.
What is AHCI?
the Advanced Host Controller Interface (AHCI) is a technical standard defined by Intel that specifies the operation of Serial ATA host controllers (SATA) in a non-specific way to implementation in the chipsets of its motherboard.
The specification describes a system memory structure that allows hardware vendors to exchange data between the host system memory and the attached storage devices. AHCI offers software developers and hardware designers a standard method for detecting, configuring, and programming SATA / AHCI adapters. AHCI is separate from the standard 3 Gb / s SATA, although it does expose advanced SATA features (such as hot swapping and queuing of native commands) so that the systems hosts can use them.
What is the IDE?
A Integrated development environment (IDE) is a software application that offers programmers complete functionality for software development. An IDE normally includes at least one source code editor, build automation tools, and a debugger. Some IDEs, such as NetBeans and Eclipse, contain the compiler, the interpreter, or both; others, such as SharpDevelop and Lazarus, do not do it. IDEs are sometimes referred to as Program Development Environments (PDEs).
The border between an IDE and other parts of the broader software development environment is not well defined; Sometimes a version control system or various tools to simplify the construction of a graphical user interface (GUI) are integrated. Many modern IDEs also have a class browser, an object browser, and a class hierarchy diagram for use in object-oriented software development.
Difference between AHCI and IDE
AHCI and IDE are two modes in which a hard drive communicates with the rest of the computer system with the help of a SATA storage controller. SATA hard drives can operate in PATA / IDE mode that is compatible with earlier versions, in standard AHCI mode, or in vendor-specific RAID.
Essentially, the IDE is considered adequate for the average user and is the most compatible with other technologies, especially older devices. However, it lacks support for new technologies.
AHCI supports some important new features not mentioned by IDE, such as queuing native commands and hot-plugging hard drives. It also offers an improvement performance (speed) on IDE.
Enable AHCI in Windows 10 after installation
Note: You must be logged in as an administrator to enable AHCI after installing Windows.
Press Windows + R, in the Run dialog box, type regedit, press Enter to start Registry Editor.
In the left pane of Registry Editor, navigate to the location.
HKEY_LOCAL_MACHINE SYSTEM CurrentControlSet Services iaStorV
In the right pane, double-click the Start DWORD to modify it. In the box that appears, type 0 in the Value data field. Click OK.
Again, in the left pane of the Registry Editor, navigate to the location-
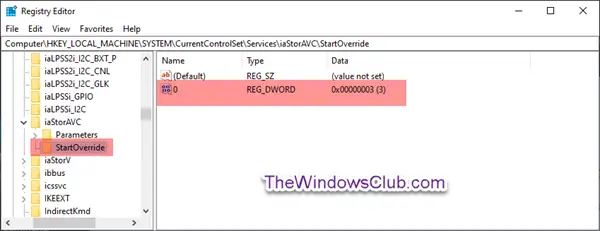
HKEY_LOCAL_MACHINE SYSTEM CurrentControlSet Services iaStorAVC StartOverride
In the right pane, double-click the 0 DWORD to modify it. In the box that appears, type 0 in the Value data field. Click OK.
Now, in the left pane of the registry editor, navigate to the location-
HKEY_LOCAL_MACHINE SYSTEM CurrentControlSet Services storahci
In the right pane, double-click the beginning DWORD to modify it. In the box that appears, type 0 in the Value data field. Click OK.

Still in the left pane of the Registry Editor, navigate to the location-
HKEY_LOCAL_MACHINE SYSTEM CurrentControlSet Services storahci StartOverride
Check if you have the StartOverride The.

If the StartOveride the folder is not present, exit the Registry Editor.
But if the folder is present as shown above in the screenshot, in the right pane, double-click the button 0 DWORD to modify it. In the box that appears, type 0 in the Value data field. Click OK.
Now start the computer with the settings of your BIOS or UEFI firmware.
In your BIOS or UEFI firmware settings, enable AHCI, and then save and exit to apply and restart the computer.
Note: The settings vary depending on the make and model number of the motherboard. Refer to your motherboard manual for details on changing SATA settings.
At startup, Windows will automatically install the AHCI drivers.
When the driver installation is complete, you will be prompted to restart.
Restart the computer and you are all done.