Firefox in its current form supports creating multiple profiles, but it’s not as simple compared to Microsoft Edge or Google Chrome, and it’s disappointing. The functionality is very useful, and since Google is now making a big deal on this, we can only hope that Mozilla will see the light of day before long.
Why You May Need Multiple Firefox Profiles
Some users may wish to have multiple profiles for different reasons. For example, having only one profile for work and another for personal reasons on one computer makes a lot of sense. This is important because not all companies can afford to give their employees a work computer, which means they have to use their own.
For those who do web development work, having different profiles is beneficial. With this, there is no need to test websites and apps on a single profile, just run everything in a newly created profile and that’s it. The only downside is the way we activate this feature.
How to create Firefox profiles
Using the Firefox User Profile Manager, you can create one or more Firefox profiles on your Windows 10 PC in a few easy steps.
- Launch Firefox browser
- Type about: profiles in the address bar and hit enter
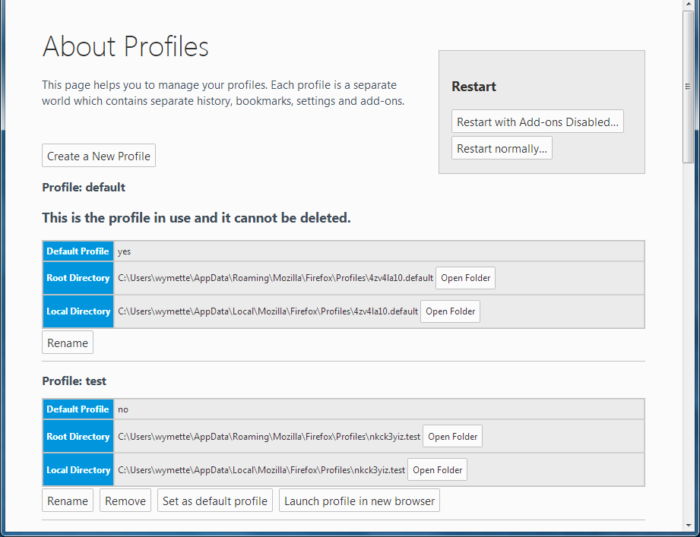
- the About profiles the page will open
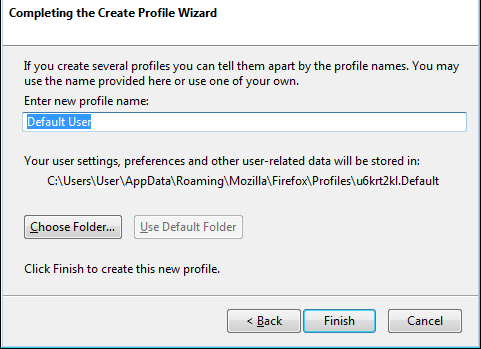
- hurry Create a new profile launch the wizard
- Enter the required details
- Click Finish and restart the browser.
The first thing you will need to do is type about: profiles in the URL bar and press Enter keyboard key.
You should now see the About profiles page with a short description at the top.

Now to create a new profile, please click on the button that says Create a new profile.

Follow the instructions and be sure to give it a name to better separate it from the others on the list. When you’re done, click finish.
Of the same About profiles page, find the one you just created and click Launch the profile in a new browser.
After that, a new Firefox browser window should appear, separate from the current window.
Ok so using about: profiles is the easiest way, but there are other ways you could consider.

- Press “Wind + R” on your keyboard.
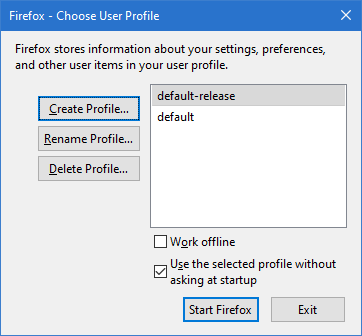
- Type firefox –new-instance –ProfileManager and hit enter.
- You can also type firefox.exe -p and hit enter.
Rename and delete Firefox profile
When it comes to renaming a profile and deleting it, the task is simple. Just go back to the Profile Manager section, then from the profile you want to rename, just click on the Rename button. In terms of deleting the profile, press Remove and that’s all.
Set the default Firefox profile
After creating a profile, it automatically becomes the default profile after opening it. However, if you have more than one and want to manually make it a default, click the button that says Set as default profile.
I hope this helps you!

